In this article, we will go through a not-so-common topic in regards to WordPress functionalities and specifically WordPress Salts. Ultimately, they are used to keep your website safe and secure. We will cover the theory behind them, how to use them, and change them if needed.

WordPress Salts: What are they used for?
It is mainly used as an encryption tool to further secure every password that is generated for your website and stored on your WordPress website. Additionally, they help out with securing the WordPress Admin Login itself by authenticating each user that tries to log in to your website, including your credentials.
WordPress Salts help secure different authentication information such as user and password, and different cookies that store specifics like browser version, IP Address, device, and much more.
That includes other automatic instances where you have the option to stay logged in for some time like a saved session. For that to happen, WordPress saves cookies that have the needed authentication information that confirms it’s you and there is no need to type in your username and password every time you visit the site.
Where can I find my WordPress Salts?
They usually are automatically created when your site has a WordPress installation. Their location is in the core WordPress file wp-config.php.
To locate it, you would need to first log in to your WPX Account from here.
Now that you’re in the Hosting Panel, select the File Manager option in the left-hand menu. It will open the file manager in a new tab:

From there you can navigate to the public_html folder of the specific site you want to check the WordPress Salts on:
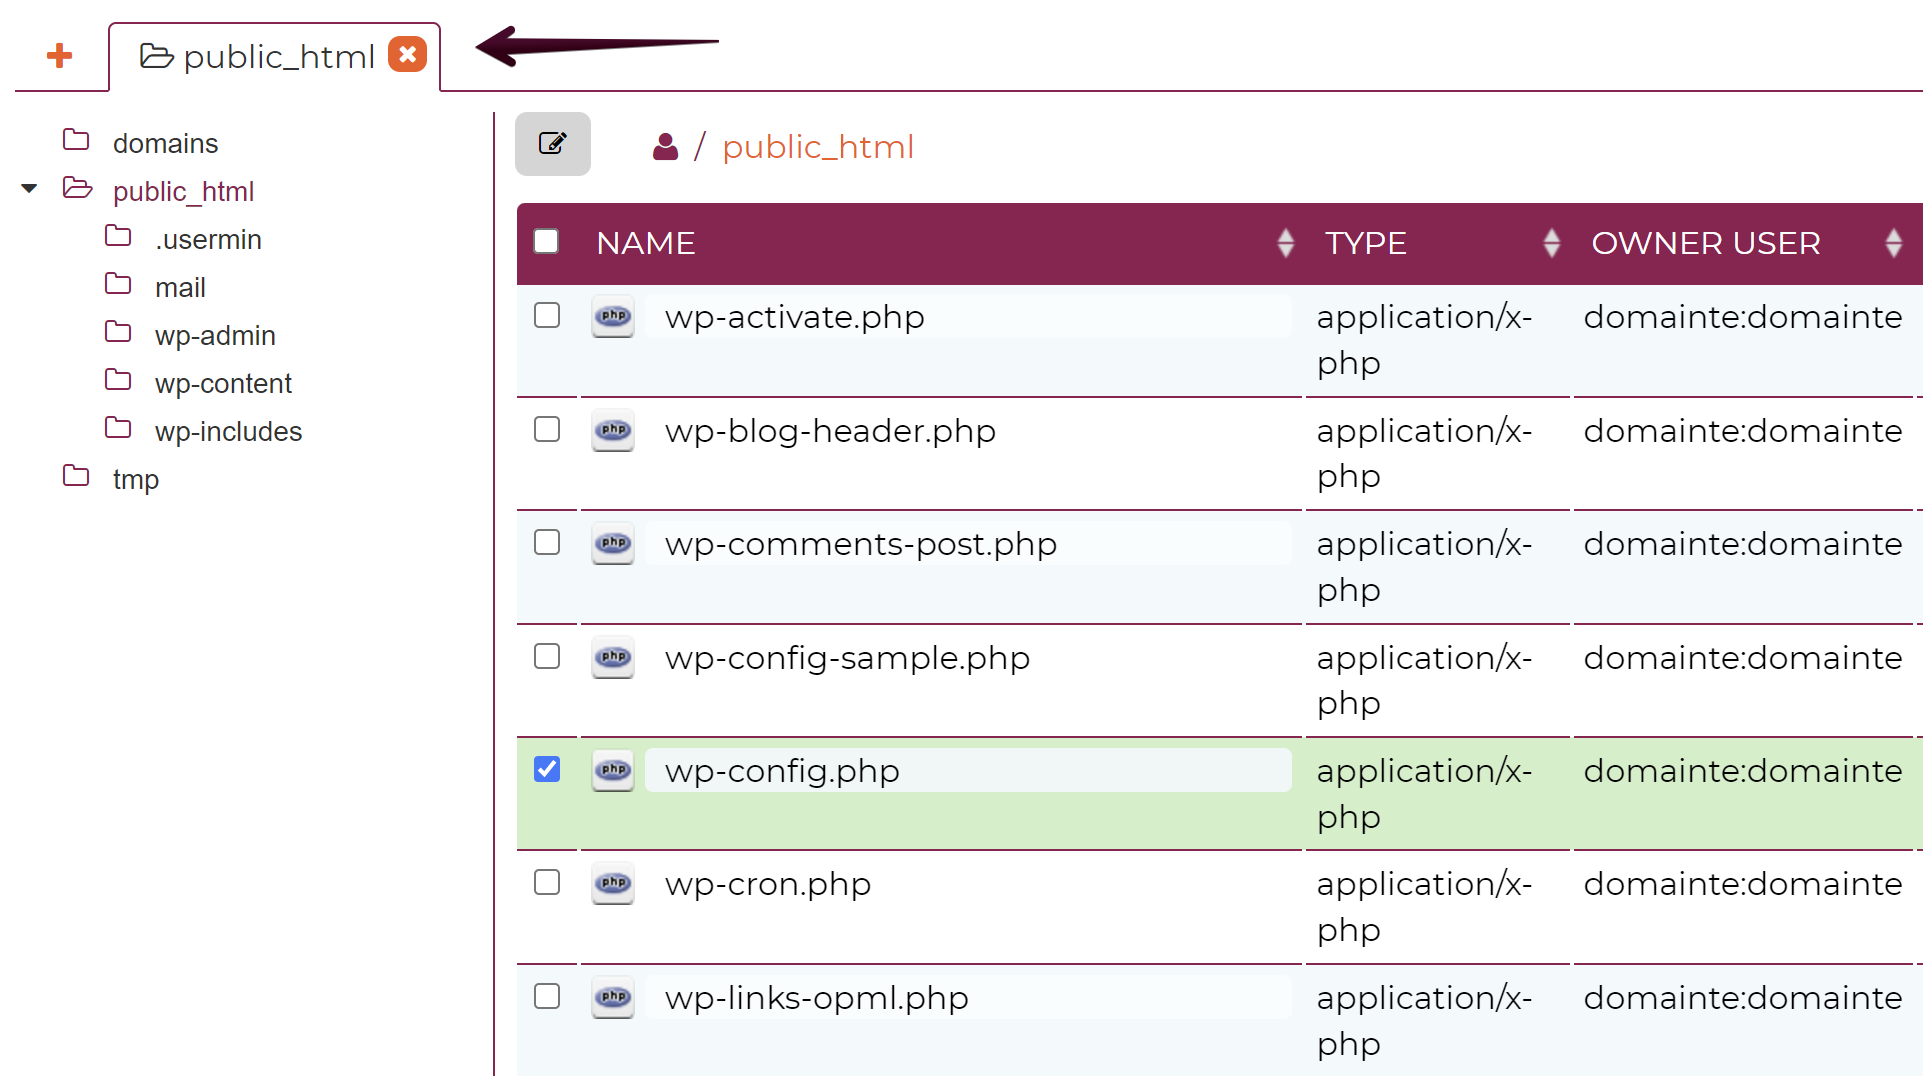
When you scroll down and find the specific file named wp-config.php, then you can double-click on it and it will open it in Editor mode.
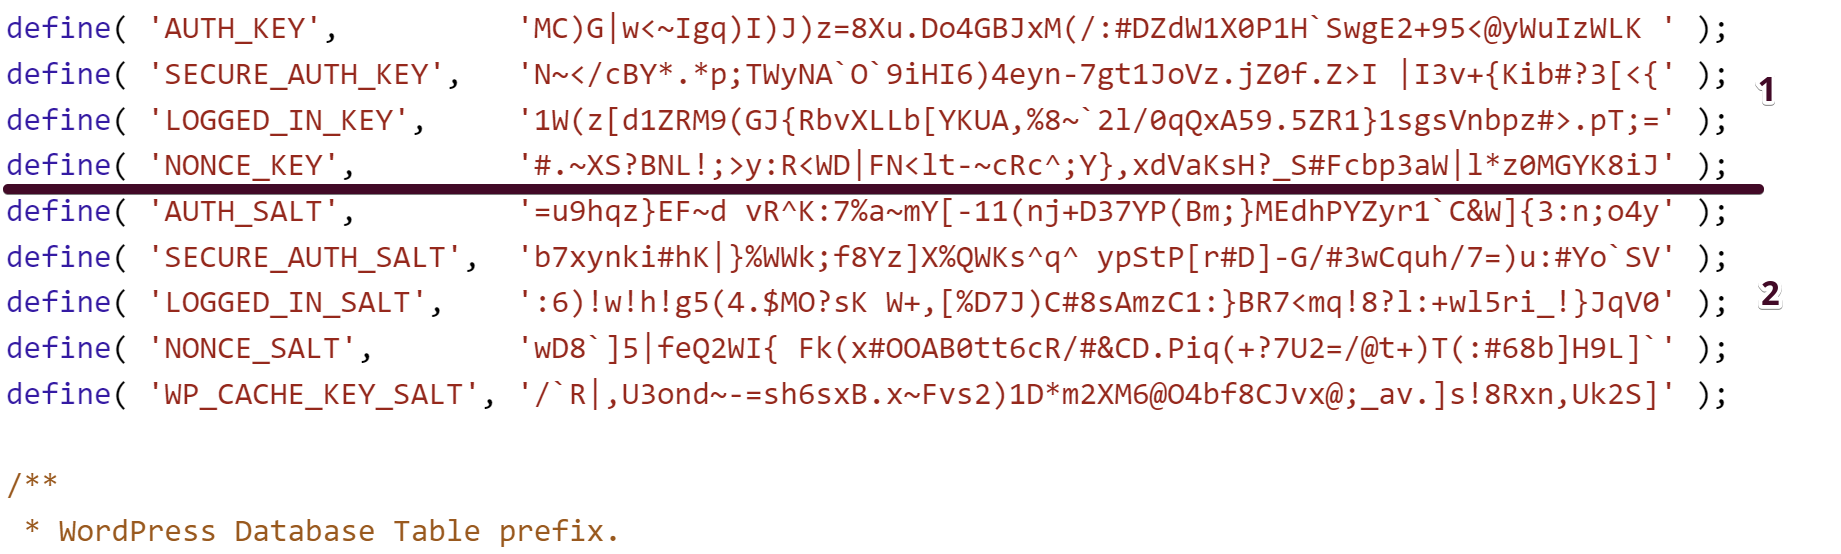
As mentioned earlier, they are encrypted and not just plain text divided into two parts. The first one is your actual Security Keys and Login Information (1), and the second part is your actual WordPress Salts Keys (2) which contain and store the information for your browser to remember your login sessions:
Things to know about WordPress Salts
In simpler words, if you use any password, strong or weak, it will be left in the open to copy and breach, if not encrypted properly and stored for convenience and automatic login sessions through your device and browser.
That is where the WordPress Salts come in handy and deliver the needed security and customer experience for your WordPress website.
WordPress uses one part as Security Keys to encrypt the password and login information for each of your websites specifically, then uses WordPress Salts Keys to synchronize them and further save browser cookies to store the info safe and sound and seamlessly log you in the WP Dashboard.
Can the WordPress Salts be edited?
You can edit the WordPress Salts manually or through the help of a plugin to automate the process. Before diving into how that can be done, keep in mind that WordPress automatically creates them upon installation and there is no purpose or need to touch them, unless you fear that you have your passwords exposed or used on a public network that is not safe.
The first option is to do it manually through the File Manager. Once you have logged in and opened wp-config.php file again like in the previous steps, then you can go ahead and load up the official WordPress.org Salts generator.
By simply loading the page, you will get different variations of a total of eight keys, divided by four Security ones and four WordPress Salts ones.
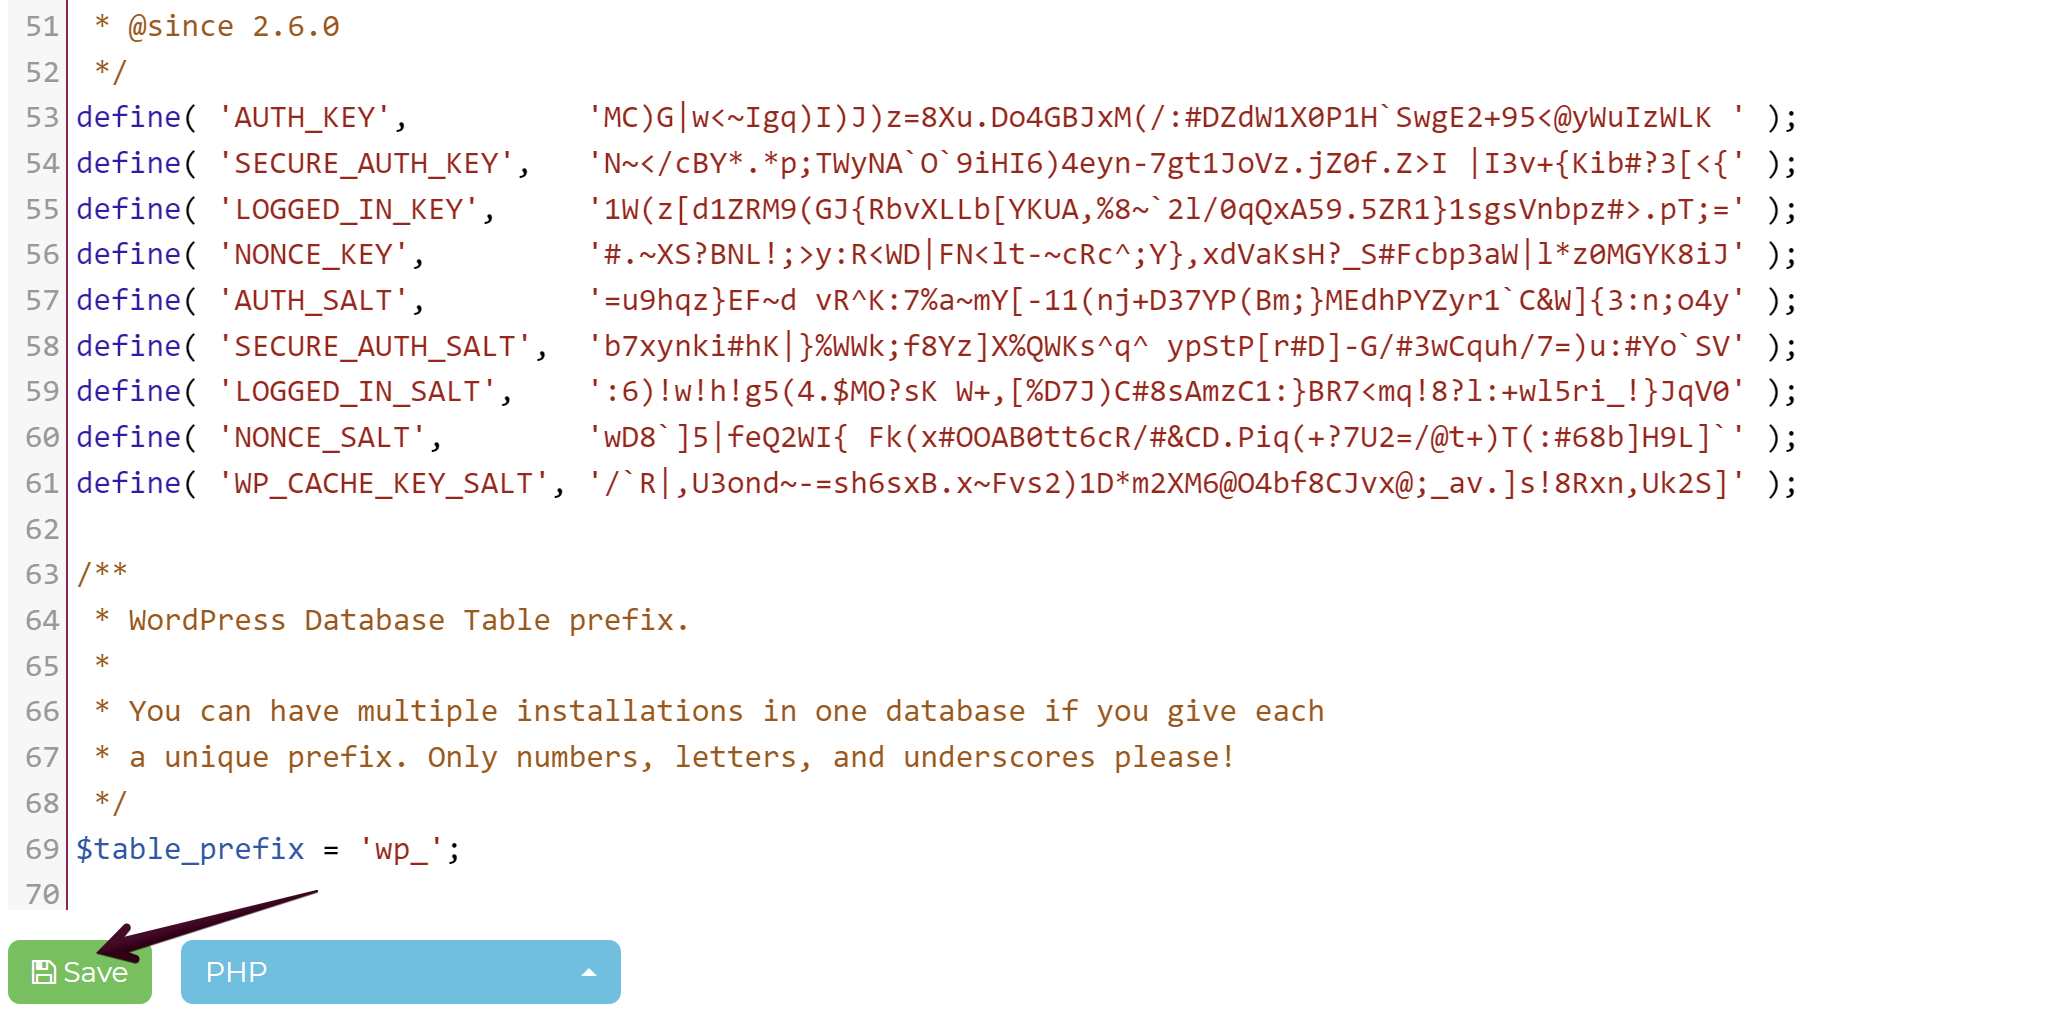
Once you have generated them, you can carefully delete the ones that are in the file and replace them with the newly generated ones. Once that is done, you can save the changes on the file:
By doing so, you have successfully replaced your WordPress Salts with different encryption.
Either way, if you feel unsure about how to handle it, we recommend contacting us via chat or ticket to make sure everything is done correctly.
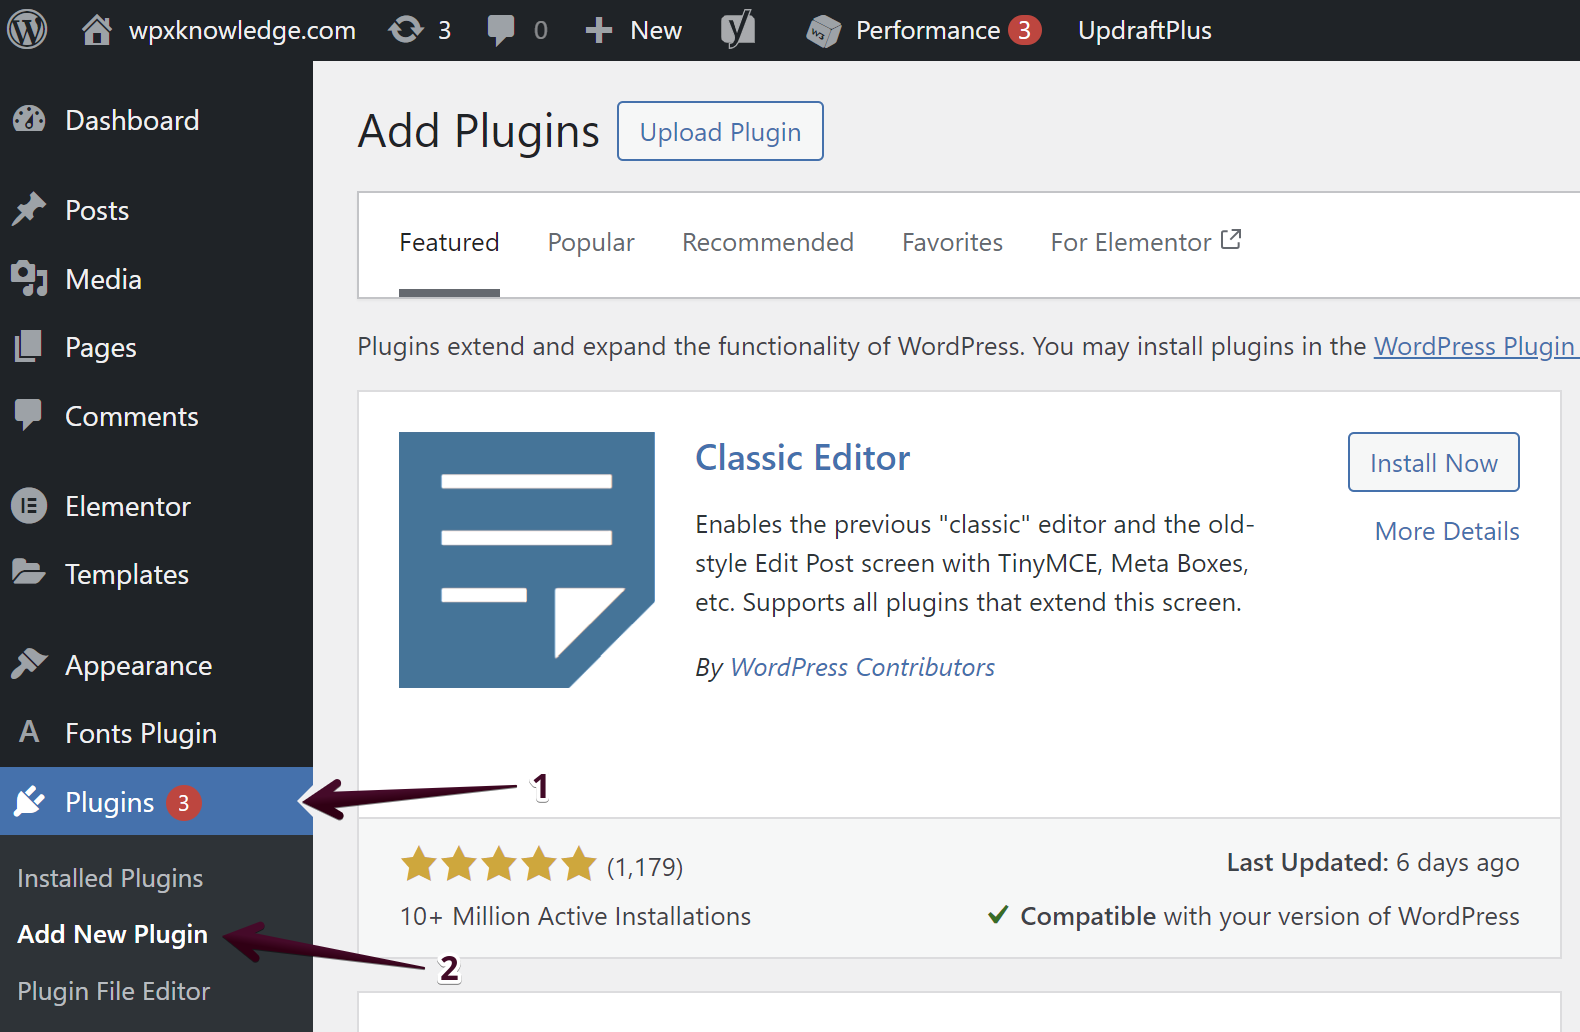
The second option is to use a plugin that you can install on your WordPress website. To do that, you would need to log in to your Dashboard.
From there, navigate to Plugins (1) section and select Add New Plugin (2):
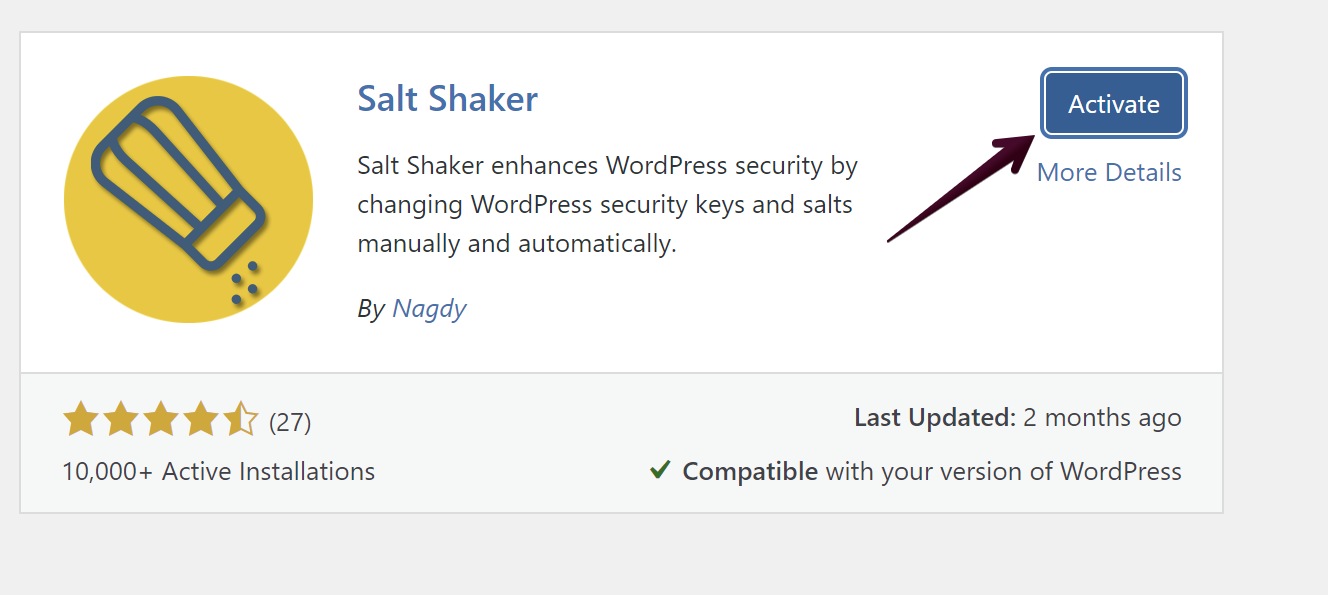
From there you would need to use the Search Bar and type in: Salt Shaker (1) and once it shows, choose Install Now (2) option:

Afterward, the only thing left is to Activate it to finish the setup:
To use the plugin and change your WordPress Salts, you would need to navigate to Tools (1) and Salt Shaker (2):

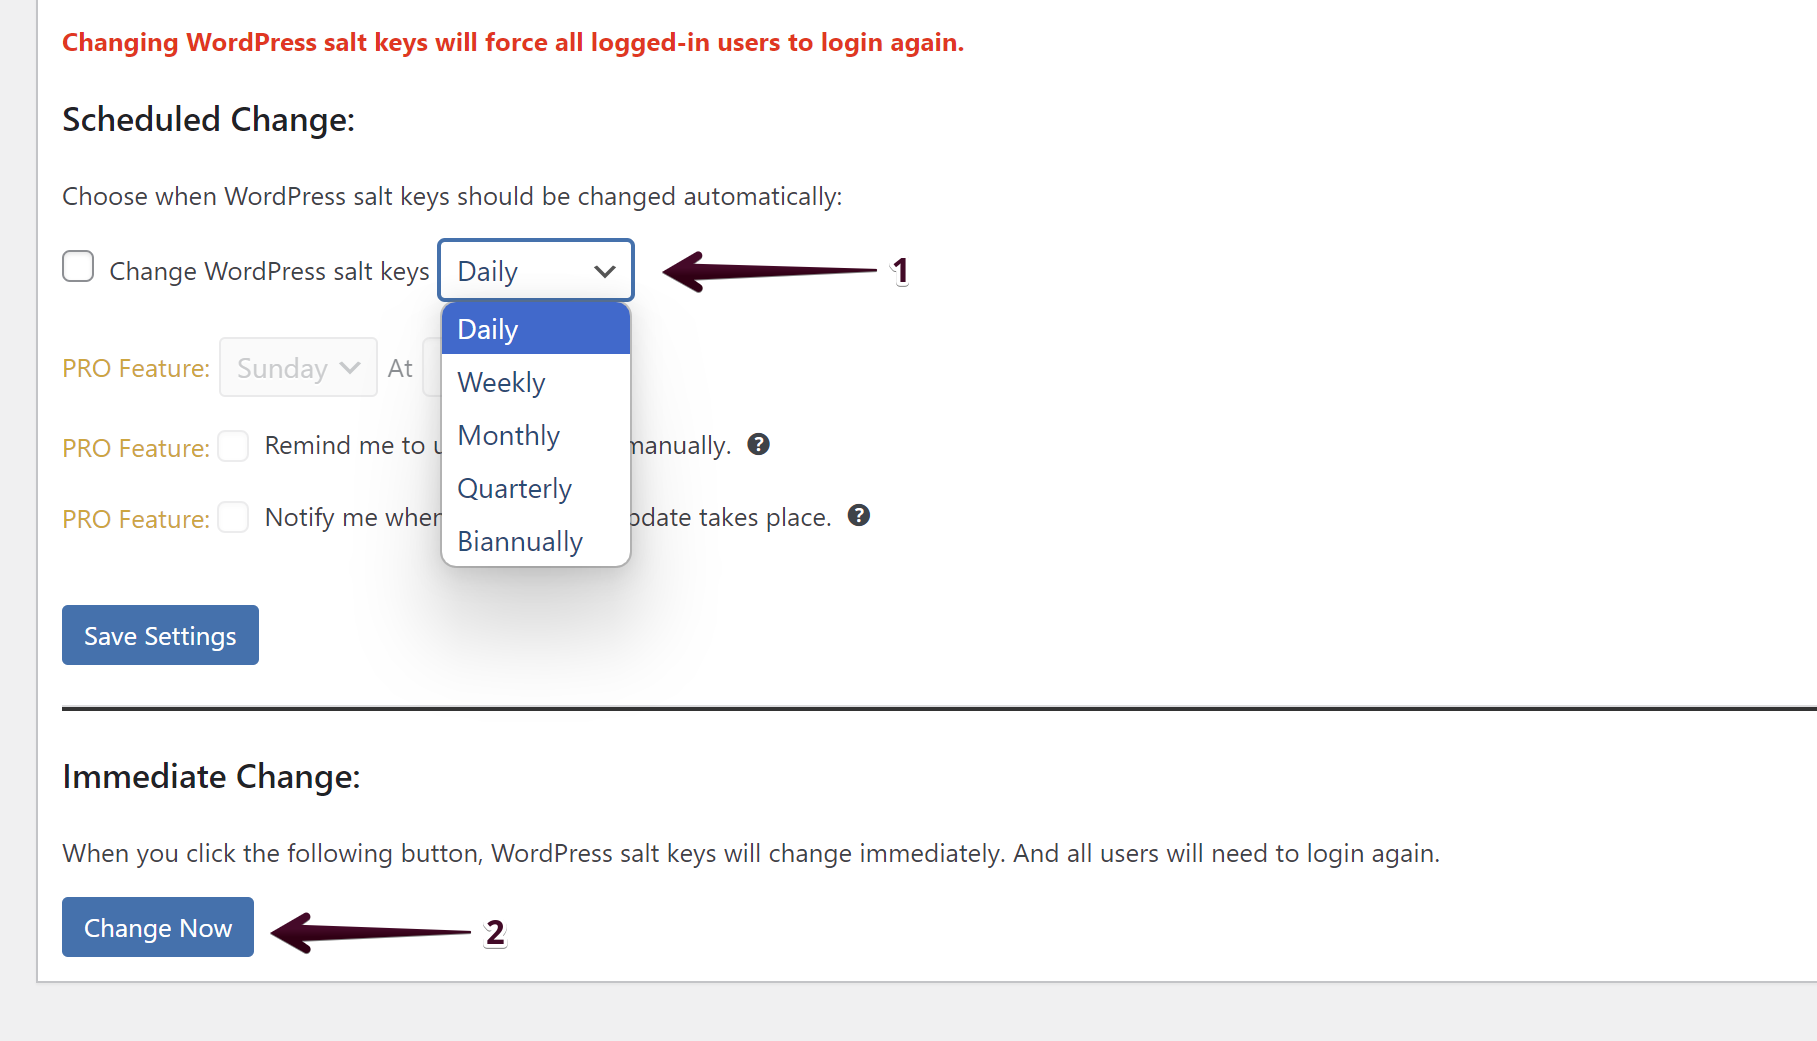
From the menu, the plugin showcases the existing WordPress Salts that you have on your website and in the configuration file.
You have two options to change the keys. One is connected to scheduling the changes Daily, Weekly automatically from the settings (1). The second option is to manually change them in an instant using the quick action button Change Now (2):
If you get stuck with anything discussed on this page, please get in touch with the WPX Support Team via live chat (use the bottom right-hand widget) and they will respond and help within 30 seconds or less.