In this article, we will show you how to add A records to your Cloudflare account, easy and super fast, just in a few steps.
For example, our WPX Cloud (XDN) uses 4 A records to work. We will use those to show you how to add A records to your active Cloudflare DNS zone.
Step 1. Log in to your WPX account
You can log in to your WPX account here.
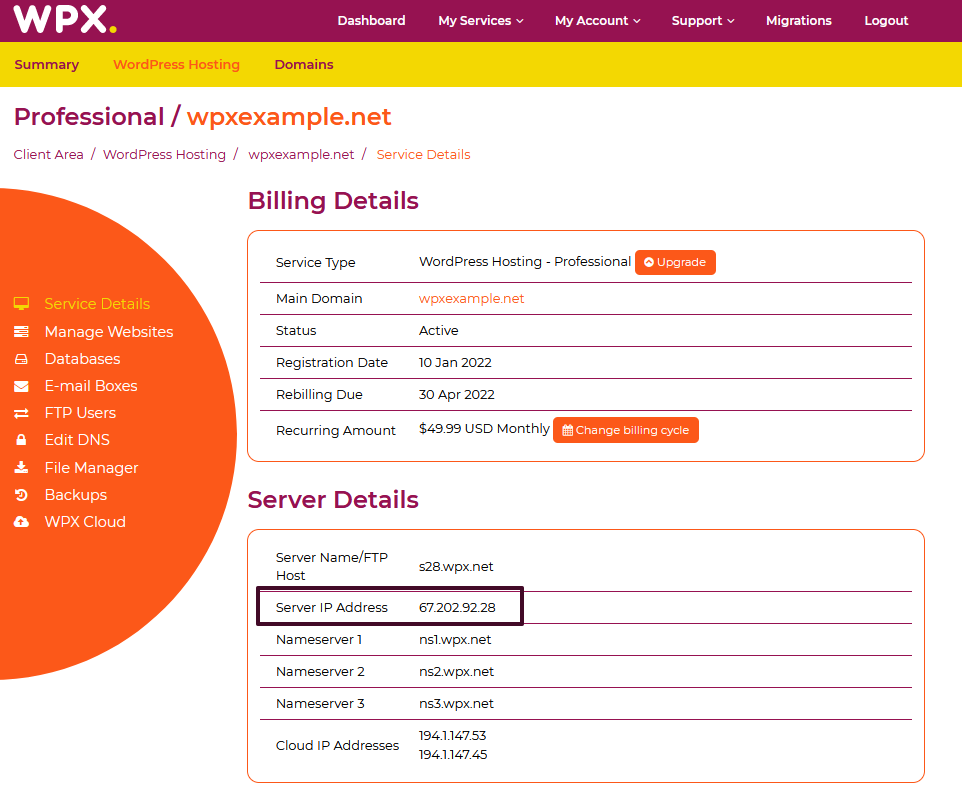
Step 2. Find the XDN IP addresses
Now that you are logged in, navigate to the Service Details menu to get the IP addresses. You can do this from your Dashboard, by going to My Services (1) → WordPress Hosting (2) → Manage service → Service Details (3);

Step 3. Log in to Cloudflare
Next, log in to Cloudflare and from the Home page select the domain, for which you want to change the DNS A records.
Once you select your domain name, choose the DNS section from the left side menu.

Step 4. Manage your DNS Records in Cloudflare
On the next screen, you will see Cloudflare’s DNS editor from where you can add or edit the A records.
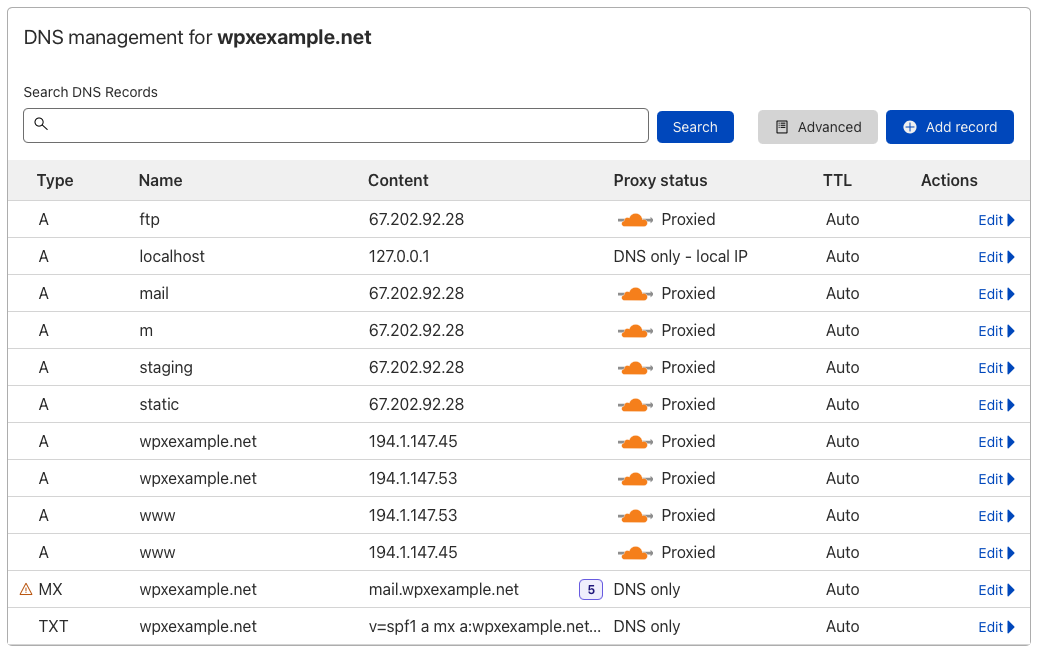
Add DNS records
To create a new record, simply click on Add record, there you will be able to specify the record type as well as other required fields: ( A, CNAME, TXT, MX, etc.)

Edit DNS records
To edit an existing record, click on the Edit button.

If you don’t want to use our WPX Cloud while using Cloudflare, you need to add two A records.
One for your website (same as domain) and one for the www version of the site. In the section IPv4 address (required), you need to use the Server IP Address. You can find that in your Service details menu, under Server details.
If you have any other questions on the topic, don’t hesitate to contact the WPX Support Team via live chat (use the bottom right-hand widget) and they will respond and help within 30 seconds or less.