In this article, we will cover one of the WPX Webmail features that will allow you to change the initial display name of your email address.
Step 1. Log in to your WPX account
You can log in to your WPX account here.
Step 2. Navigate to your hosting plan
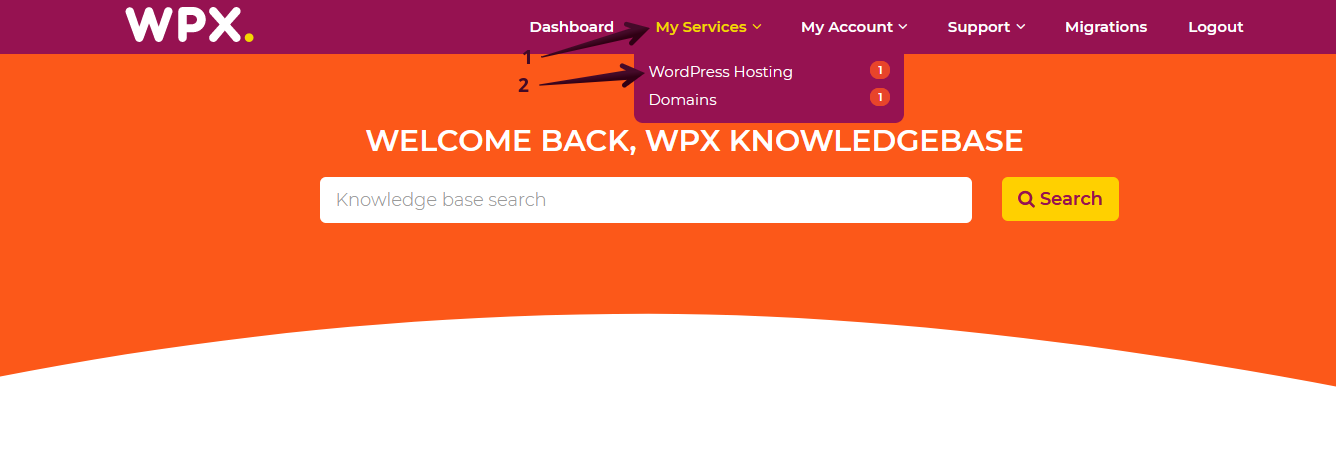
You can either find your hosting service through the navigation menu or within your dashboard. Once you log in to your WPX account select My Services (1) → WordPress Hosting (2).
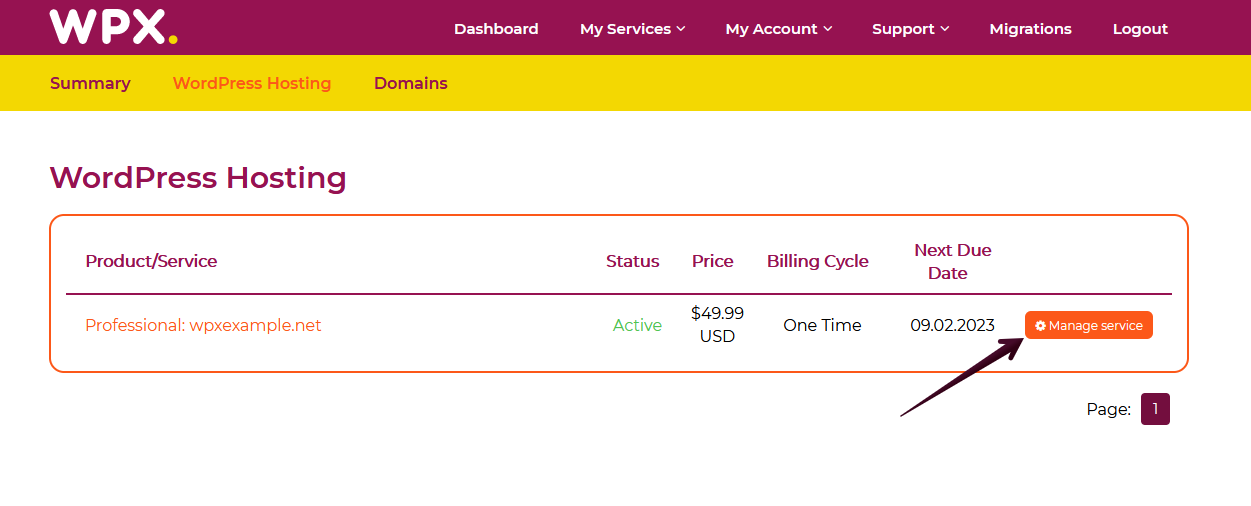
Then you will see all of your hosting services with us. When you find the plan that you want to manage, you need to select the orange button Manage service.
Step 3. Go to the E-mail boxes menu
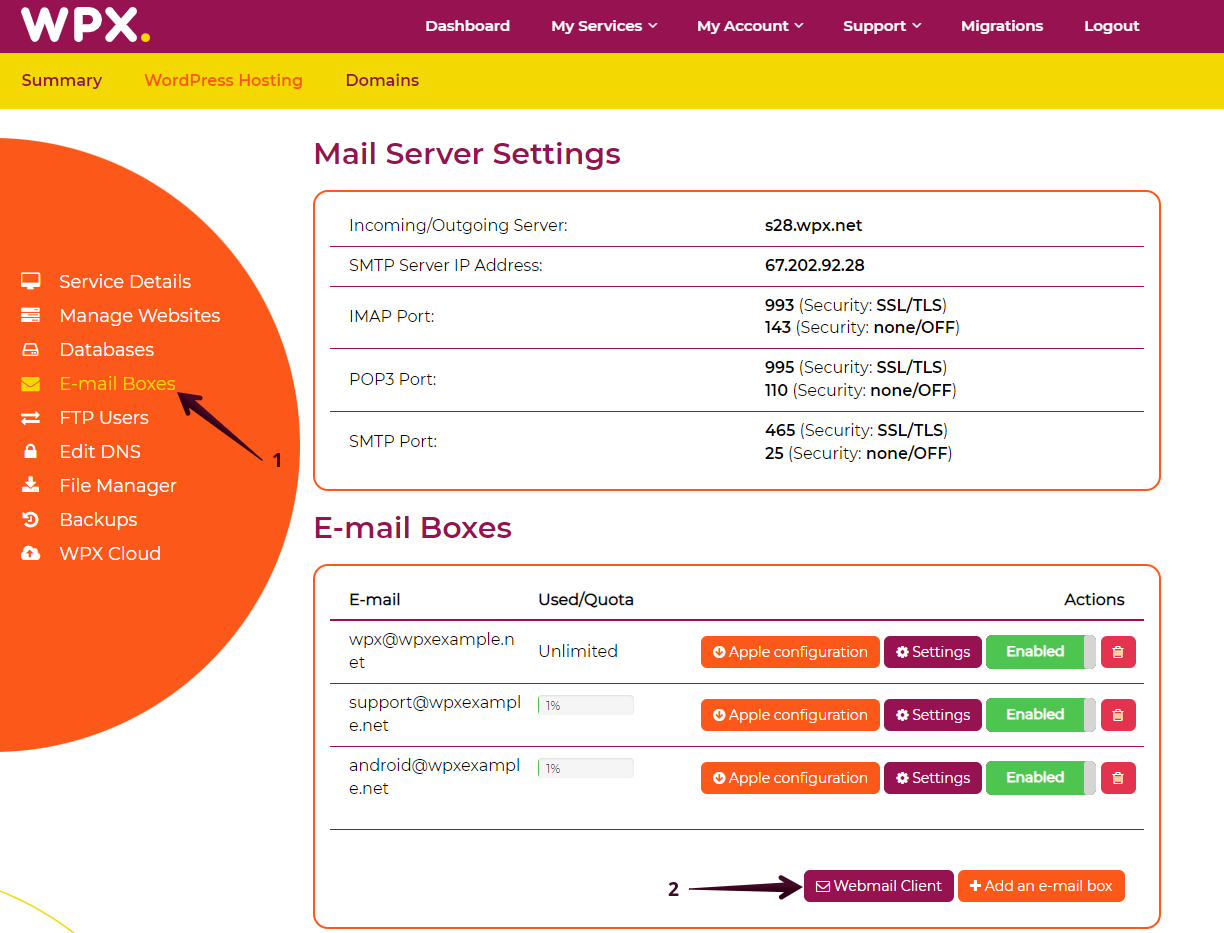
Now that you’re in the Hosting Panel, select the E-mail boxes (1) menu. To open your Webmail, click on the Webmail client (2) button.
You will be redirected to your Webmail login page. Please enter the username and password you choose when creating the email box.

Step 4. Navigate through Settings in Webmail.
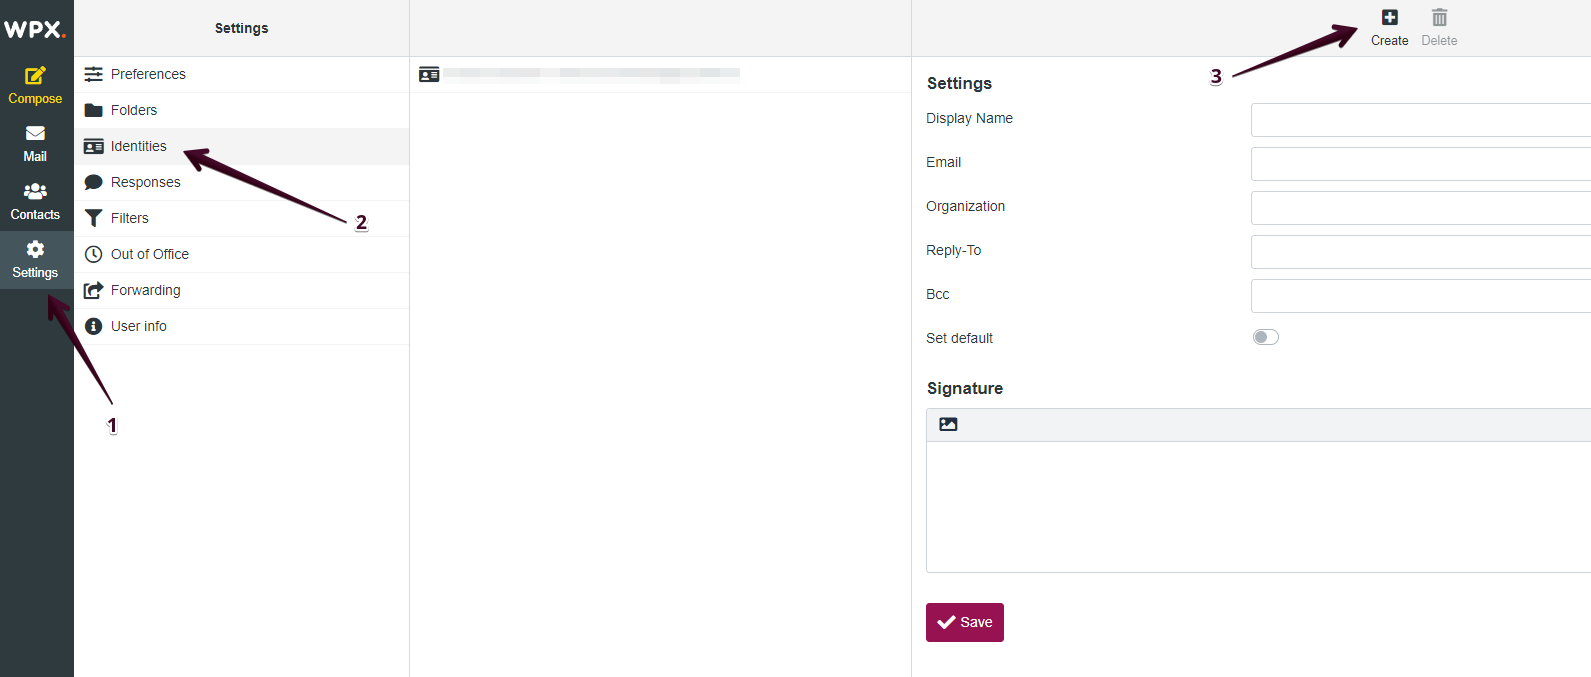
Once you’ve logged in to your WPX Webmail, you can proceed with navigating to Settings (1), select Identities (2) where you can click on the Create (3) button:
Then you can finish the setup by inputting the Display Name (1) you want to appear instead of the actual Email address (2) you have when sending emails. Make sure to Save (3) the changes afterward:

As you can see in this example, the actual email address is wpxknowledge@wpx.net, however, we want it to be displayed with a different name like wpxeducation@wpx.net.
Step 5. Check the new Display Name with a test email
Once you’ve done all the hard work with the settings, you can test to see if everything is working correctly.
To do so, you need to navigate to your Compose (1) and select the Display name you want within the From section (2) drop-down menu:

After you select the desired Display Name, simply write a test email and send it to another email address to confirm that everything is working and is displayed correctly.
If you get stuck with anything discussed on this page, please get in touch with WPX Support Team via live chat (use the bottom right-hand widget) and they will respond and help within 30 seconds or less.