In this article, you will learn how to create an archive using File Manager.
Step 1. Log in to your WPX account
You can log in to your WPX account here.
Step 2. Navigate to your hosting plan
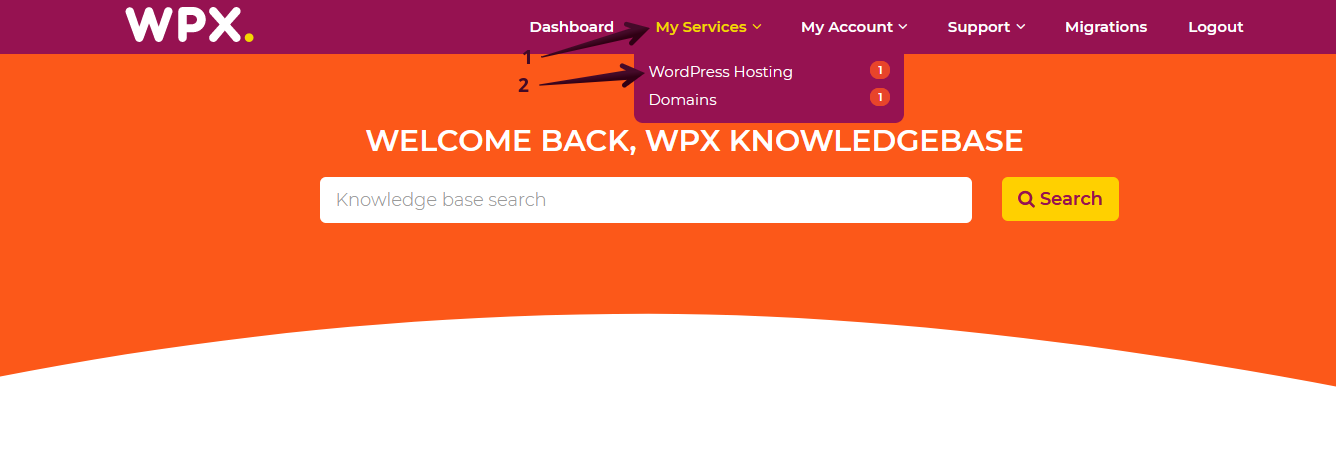
You can either find your hosting service through the navigation menu or within your dashboard. Once you log in to your WPX account select My Services (1) → WordPress Hosting (2).
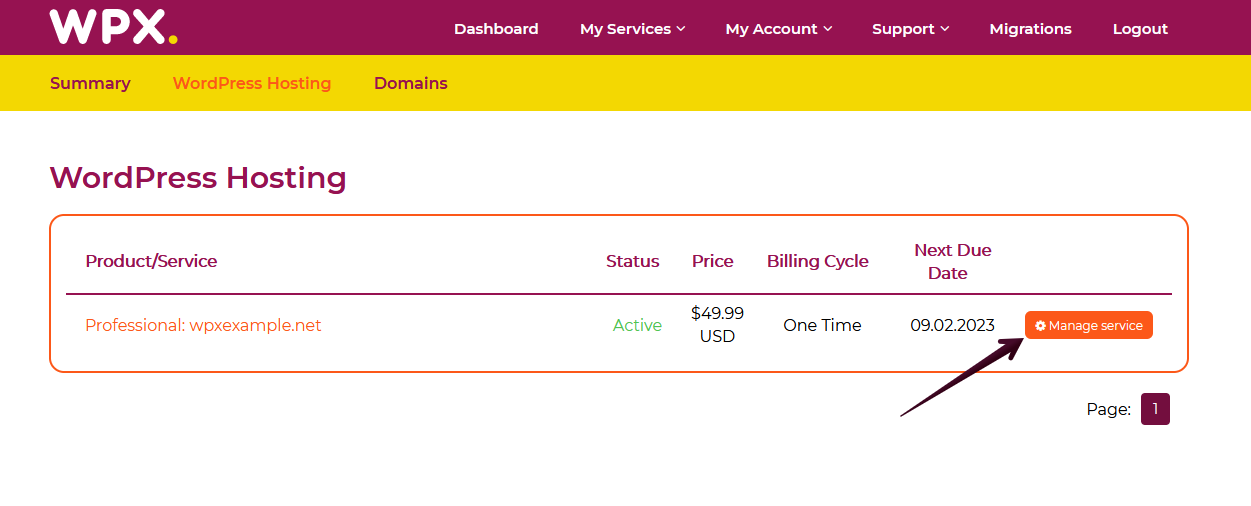
Then you will see all of your hosting services with us. When you find the plan that you want to manage, you need to select the orange button Manage service.
Step 3. Open File Manager
Now that you’re in the Hosting Panel, select the File Manager option in the left-hand menu. It will open the file manager in a new tab.

You can also open the file manager using the server hostname with port 30000. For example, https://s28.wpx.net:30000 (keep in mind that this option would only work if you’re logged in to your WPX hosting account).
Once in the section File Manager, you will be redirected to another screen with a warning notice and the actual button to the application Open File Manager.

Step 4. Overview and File Manager organization
Once you are in the File Manager, the Overview will be visible with all the different options on the top bar icons:

Firstly, you need to understand how the File Manager sorts your websites into folders.
There are two types of directories:
- One is for your Main website which is located in the discrete public_html directory;
- The rest are Sub-sites. The files of those sites are stored in the /domains directory. Each of them contains an individual public_html (root) directory used for storing your site’s files.
In the following screenshot, you can see how these folders are organized:

Step 5. Create an archive (compressed file)
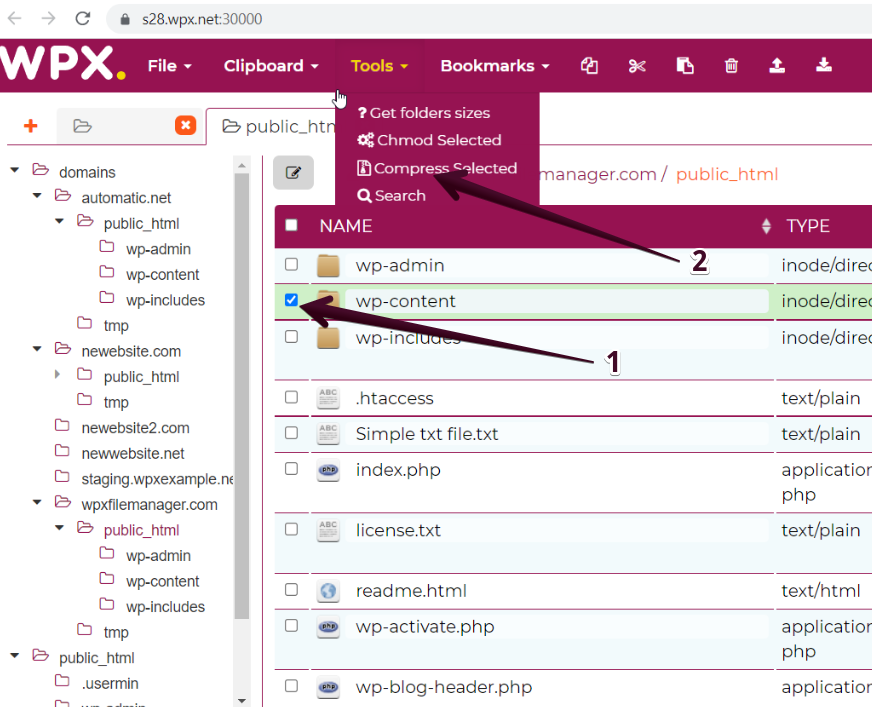
You need first to navigate to the site and folder where the file that you want to be compressed is located. In our case, this will be the domains/wpxfilemanager.com/public_html folder:

Now you have to select the file (1) that you want to archive and then select Tools → Compress selected (2) from the drop-down menu:
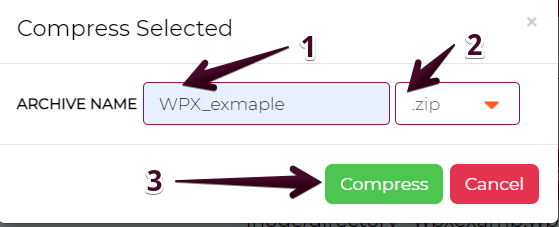
You will then see a window where you can fill in the name of the archive (1), and what type (2) you want to be (tar.gz or zip). Once you select that just hit the Compress (3) button:
After that, you’ll see a notification (1) in the down right corner of your monitor that the compression was completed successfully and you’ll be able to see the archived file (2) in the file list:

If you get stuck with anything discussed on this page, please contact the WPX Support Team via live chat (use the bottom right-hand widget); they will respond and help within 30 seconds or less.