This article will help you install a Commercial SSL certificate (paid) using your WPX hosting panel.
What do I need to install a Commercial SSL certificate?
- CRT – the actual certificate or the main file that needs to be implemented with the key for a successful installation;
- Private Key – the private key that “locks” the certificate and is needed for encryption;
- CA Bundle – the certificate’s chain itself is required to improve compatibility with different web browsers.
Step 1. Log in to your WPX account
You can log in to your WPX account here.
Step 2. Navigate to your hosting plan
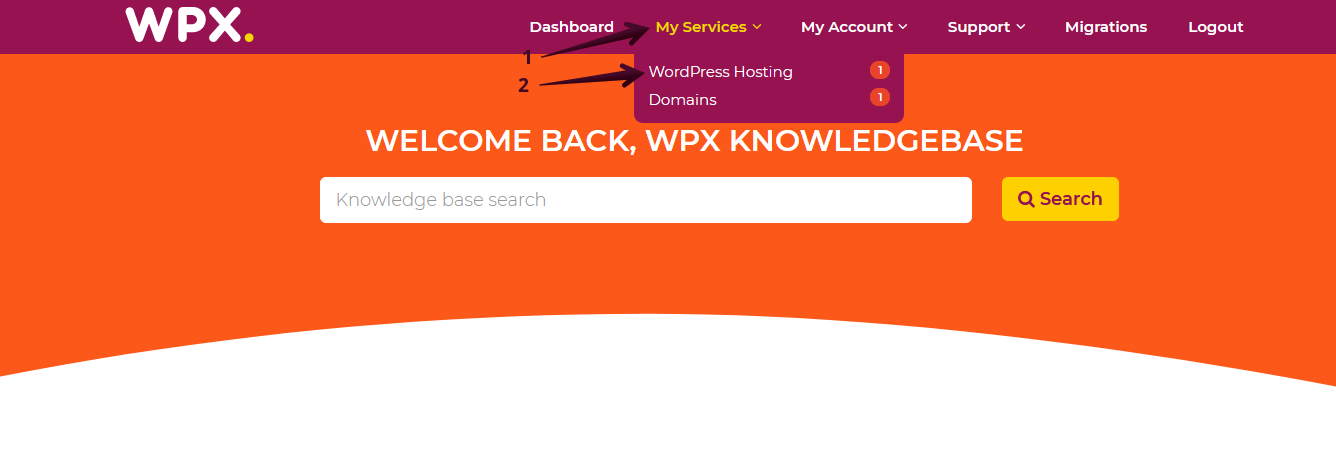
You can either find your hosting service through the navigation menu or within your dashboard. Once you log in to your WPX account select My Services (1) → WordPress Hosting (2).

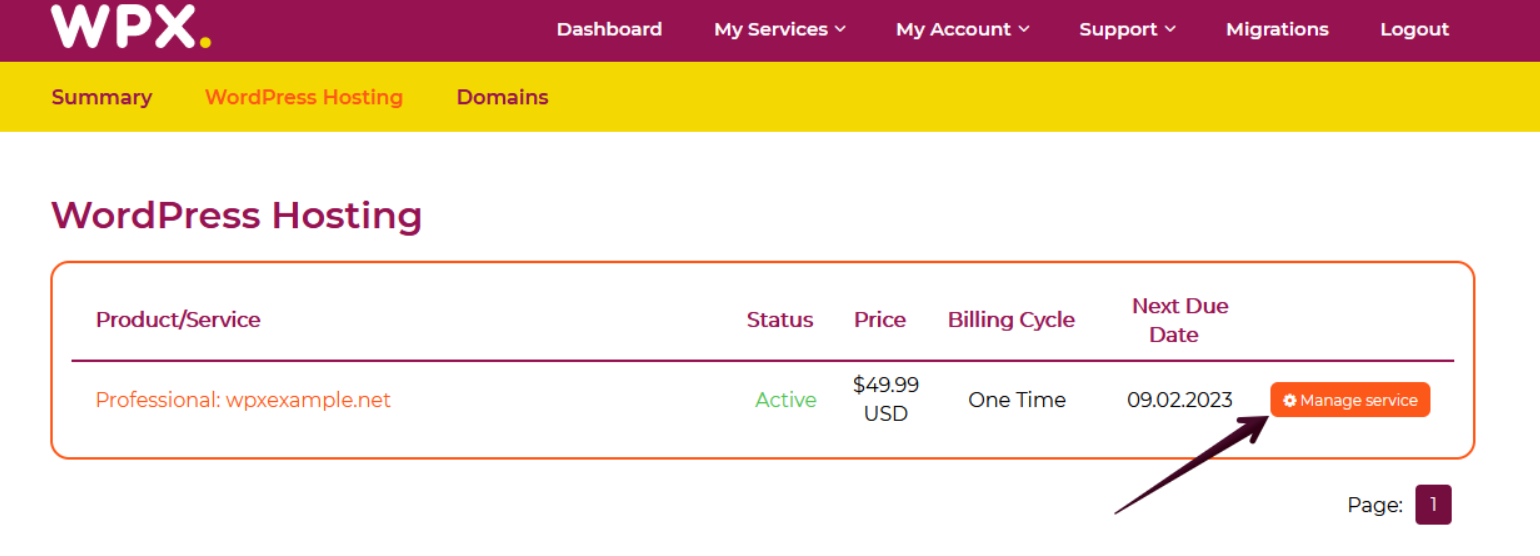
Then you will see all of your hosting services with us. When you find the plan that you want to manage, you need to select the orange button Manage service.

Step 3. Install Commercial Certificate
Once you enter your main Service Details page, select the Manage Websites menu to list your websites and their SSL settings.

Then select the dropdown button SSL (1) next to the site that you wish to install a custom certificate on and choose to Install Commercial Certificate (2):

Afterward, a pop-up will appear on your screen with fields where you need to input the certificate itself and select Install.

- Certificate (1)
- The private key (2)
- CA Bundle (3)
Copy and paste the certificate here, it should include both lines and the encrypted code in the middle.
—–BEGIN CERTIFICATE—– (1), the encrypted code (2) in the middle, and —–END CERTIFICATE—– (3). 
Copy and paste the private key for the certificate here, it should include both lines and the encrypted code in the middle.
If you have generated the CSR from our hosting panel, the private key is stored on our servers and you may leave the field empty.
—–BEGIN PRIVATE KEY—– (1), the encrypted code (2) in the middle, and —–END PRIVATE KEY—– (3). 
Тhe last part of the certificate begins with —–BEGIN CERTIFICATE—– and ends with —–END CERTIFICATE—–
You need to copy the entire text including the lines and paste it into the third field.
When you are ready click on the install button to proceed. When the installation is completed, you will receive a green notification on your screen in the top right corner.

Step 4. Configure HTTPS and Cloudflare (optional).
You would probably encounter an issue with Mixed Content which means that you’ll need to install Really Simple SSL and activate the plugin, the rest is done automatically by the plugin itself for you.
The plugin will force the content of your website to load via HTTPS.
If you are using Cloudflare, please check the following article.
If you get stuck with anything discussed on this page, please get in touch with the WPX Support Team via live chat (use the bottom right-hand widget) and they will respond and help within 30 seconds or less.