This article will explain how our WPX XDN works with other CDN providers such as Cloudflare.
Does WPX XDN work in combination with other CDN providers?
Yes, it does. Our WPX XDN can be configured to work with any external third-party CDN provider that does not require A records to work.
Our XDN works by pointing the website with 4 A records to the XDN IP addresses, which are located in your hosting plan.
For example, Cloudflare only requires your NS records to be pointed to their service. Therefore, you simply need to access your Cloudflare account to point to the website via A records, so it can work with our WPX XDN as well.
How do I set up WPX XDN to work with Cloudflare?
To set up your WPX XDN to work with Cloudflare, you need to point your website in its active DNS zone (which is with Cloudflare) to our XDN IP addresses, using A records. In the guide below, you can find all the steps to achieve that.
Step 1. Login to your WPX account
You can log in to your WPX account here.
Then log in to your Cloudflare account here.
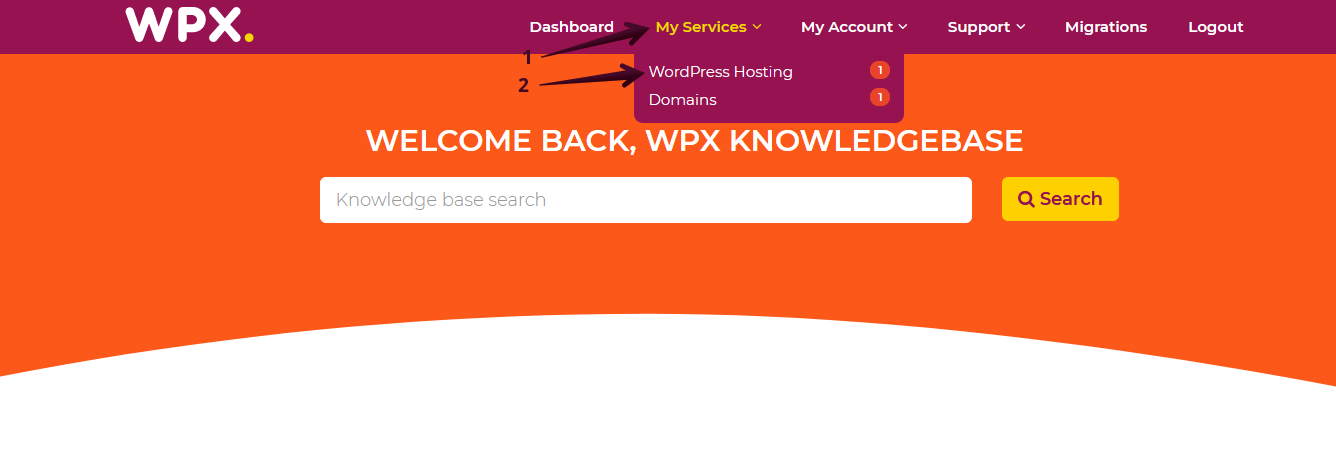
Once you have logged in to both your WPX and Cloudflare accounts, you can navigate to the Service Details section in your WPX account. You need to select My Services (1) → WordPress Hosting (2) and then find the hosting plan that you want to manage.

Then you will see all of your hosting plans with us. When you find the one you want to manage, click on the orange button Manage service.

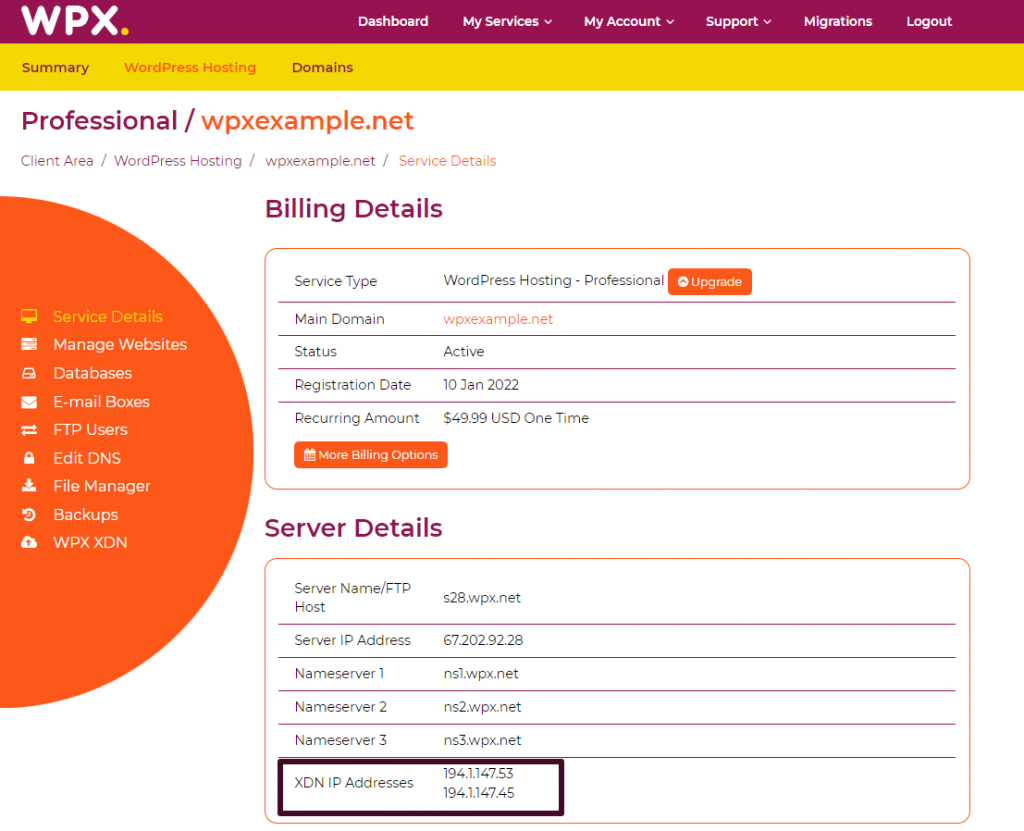
You land on the Service Details page, where you can see the XDN IP Addresses for your hosting plan, which you need to use to point the website in your Cloudflare account.

You need to save them in a file or simply copy them when you are ready to create the new A records in your Cloudflare account.
The second option is to click on WPX XDN Menu (1) and then you’ll see all 4 XDN IP addresses (2):

Step 2. Navigate to the DNS area in your Cloudflare account
Once you know the correct WPX XDN A records from your Service Details section, you go to your Cloudflare Dashboard:

You will see a list of the websites that you use Cloudflare with and you need to choose the one that needs WPX XDN enabled.
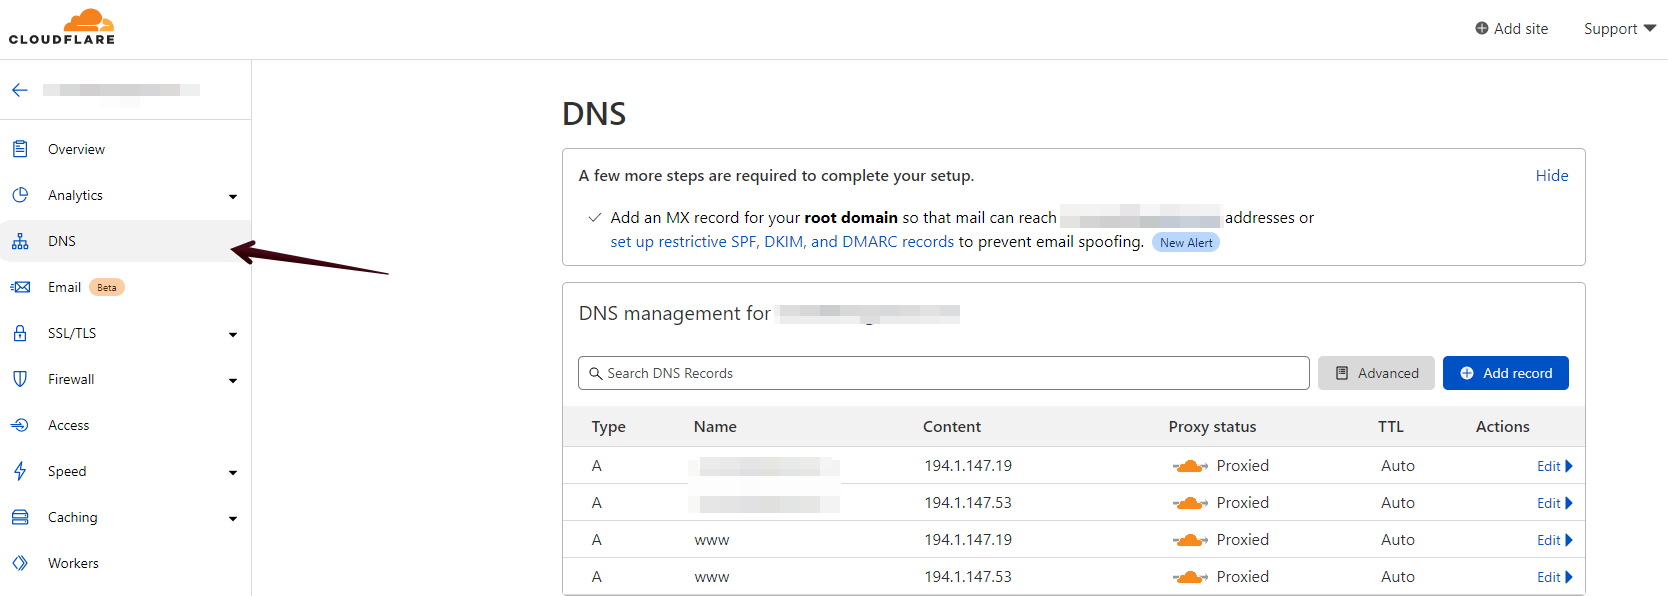
After you choose the correct website, you will get another Overview of the different settings where you need to select DNS:

Step 3. Add WPX XDN A records
From there you need to select Add record or edit the current ones you have with the correct IP address:

Bear in mind that only the first two A records will be for the “root or @“.
The other two A records that are needed will be for the “www” version of the site.
This is how they will look after you have added all 4(four) A records to your Cloudflare DNS zone:

How do I set up WPX XDN to work with Cloudflare and Ezoic?
To integrate WPX XDN you first need to ensure you already have an active Cloudflare account and the nameservers are pointed to Cloudflare.
Afterward, you need to create an account with Ezoic and navigate to Settings:

Afterward, you can continue by scrolling down the page with all the different options until Cloudflare and select the option Activate via own Account:

You will be prompted to provide your Account Details in Cloudflare so that Ezoic can access your DNS zone and point the website to their respective records. Once you have finished inputting the Username and Password, select Save:

Once the process is finished, you will see that the same option for integrating the Cloudflare Account is active and will provide you with an option to remove the connection.

The final part would be to add the needed A records in the Ezoic DNS zone which will be in the section DNS Settings (1) and choose the option Add DNS Record (2):

The process for adding the records for WPX XDN will be the same as in Cloudflare.
If you get stuck with anything discussed on this page, please get in touch with the WPX Support Team via live chat (use the bottom right-hand widget) and they will respond and help within 30 seconds or less.