This article will cover a step-by-step guide on how to use the Search bar in your built-in WPX Webmail.
Step 1. Log in to your WPX account
You can log in to your WPX account here.
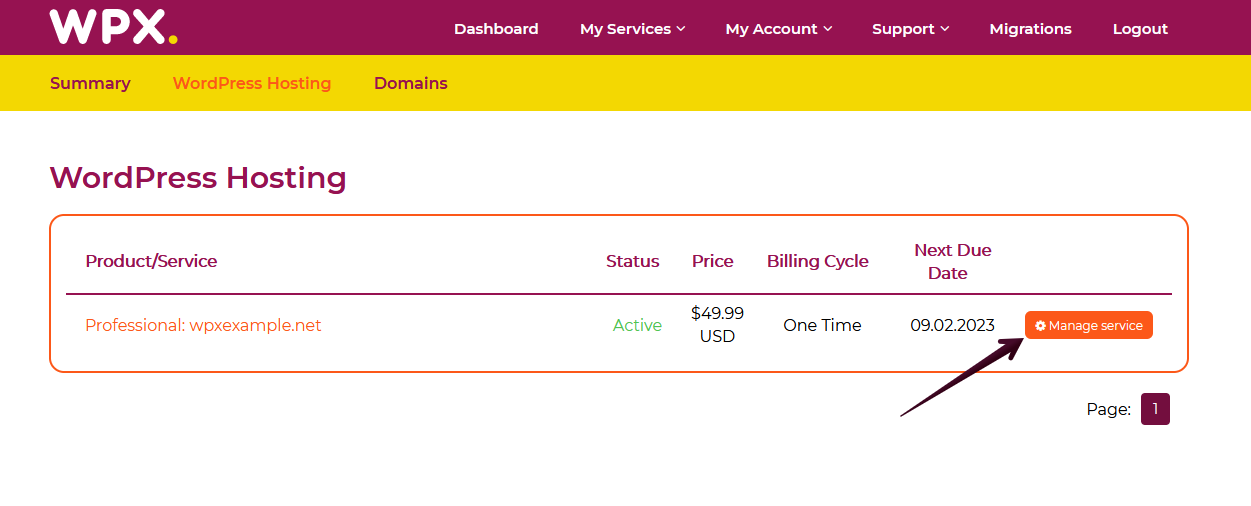
Step 2. Navigate to your hosting plan
You can either find your hosting service through the navigation menu or within your dashboard. Once you log in to your WPX account select My Services (1) → WordPress Hosting (2).

Then you will see all of your hosting services with us. When you find the plan that you want to manage, you need to select the orange button Manage service.
Step 3. Go to the E-mail boxes menu
Now that you’re in the Hosting Panel, select the E-mail boxes (1) menu. To open your Webmail, click on the Webmail client (2) button.
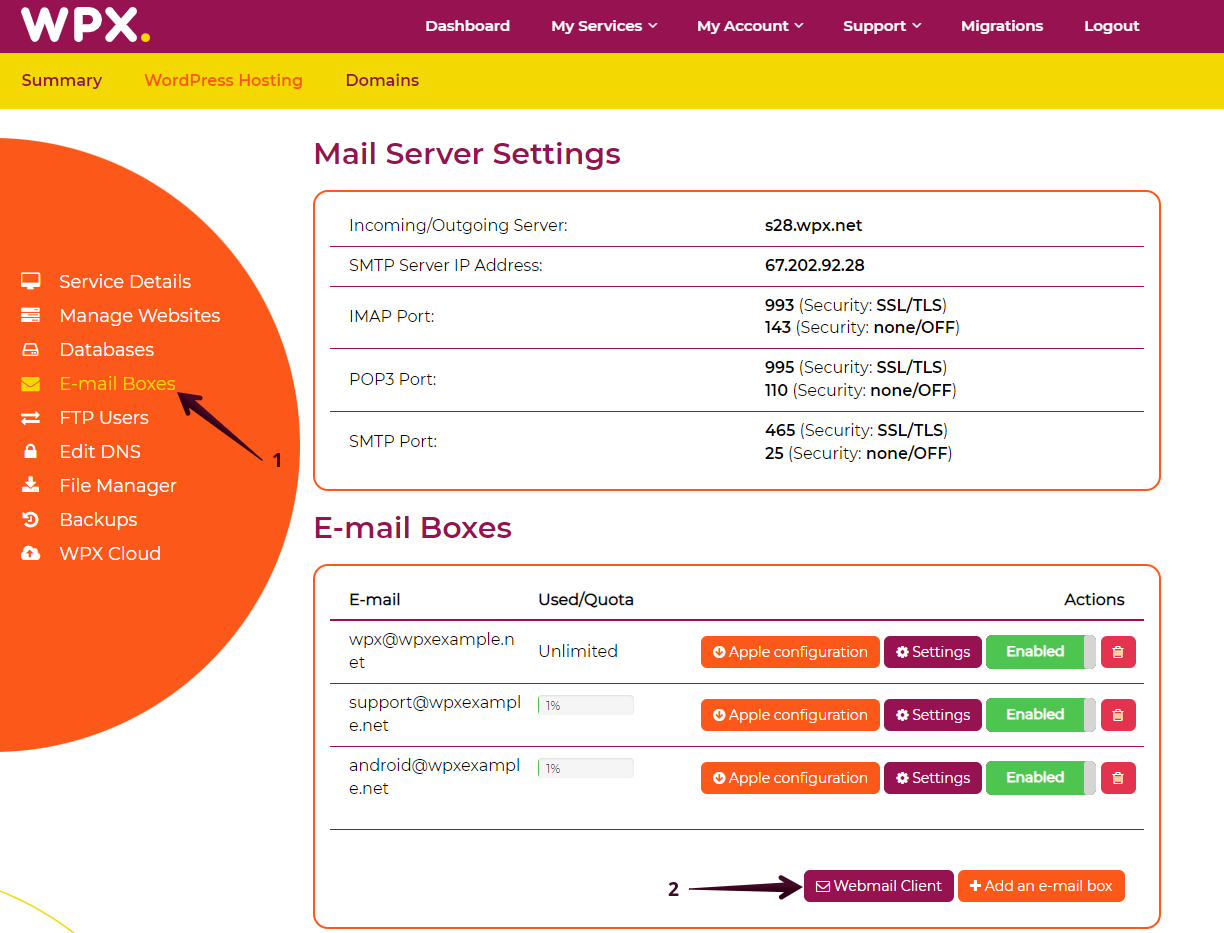
You will be redirected to your Webmail login page. Please enter the username and password you choose when creating the email box.

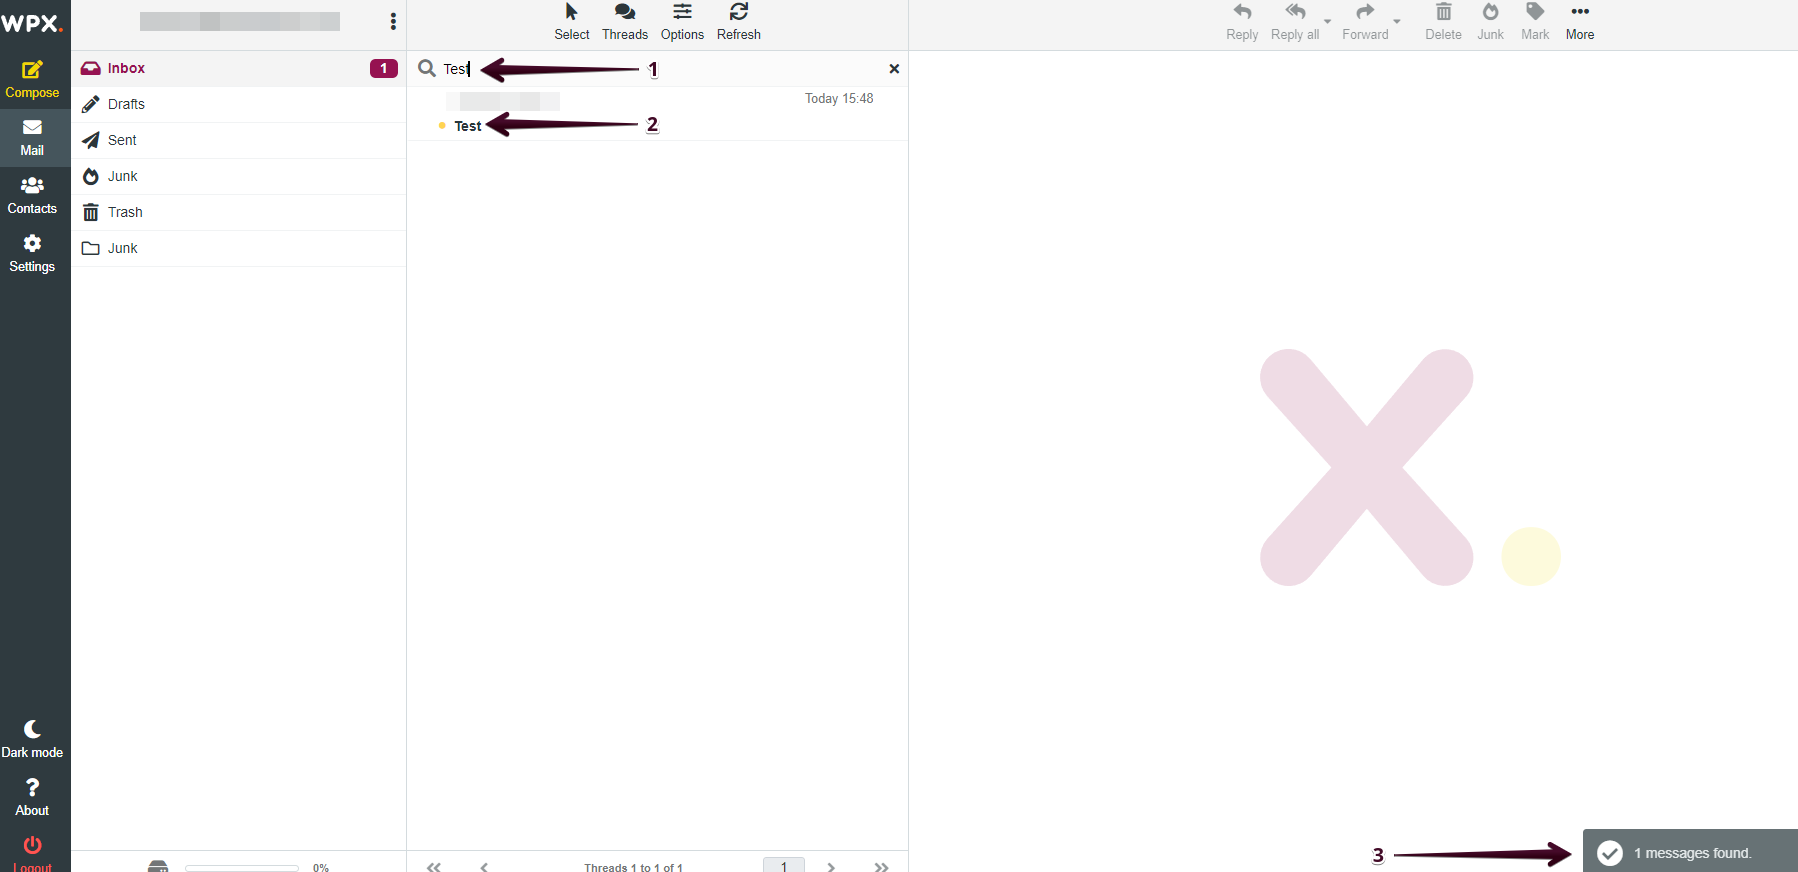
Search for a specific Email title
Once you’ve logged in to your WPX Webmail, you can proceed with searching for a specific email title.
You can simply use the Search Bar without a specific command line. You need to type in the Title (1) of the email you are looking for and it will List (2) all the emails that match the description with a notification of the exact Number (3):
Search for specific Email content
There is another way in which you can use the Search Bar in your built-in WPX Webmail and that would include searching for specific content in your emails.
To do that, you need to use the Search Bar and add a certain command line body: content to find the specific text in your emails and it will List (2) all the emails that match the keyword “content” with a notification of the exact Number (3):

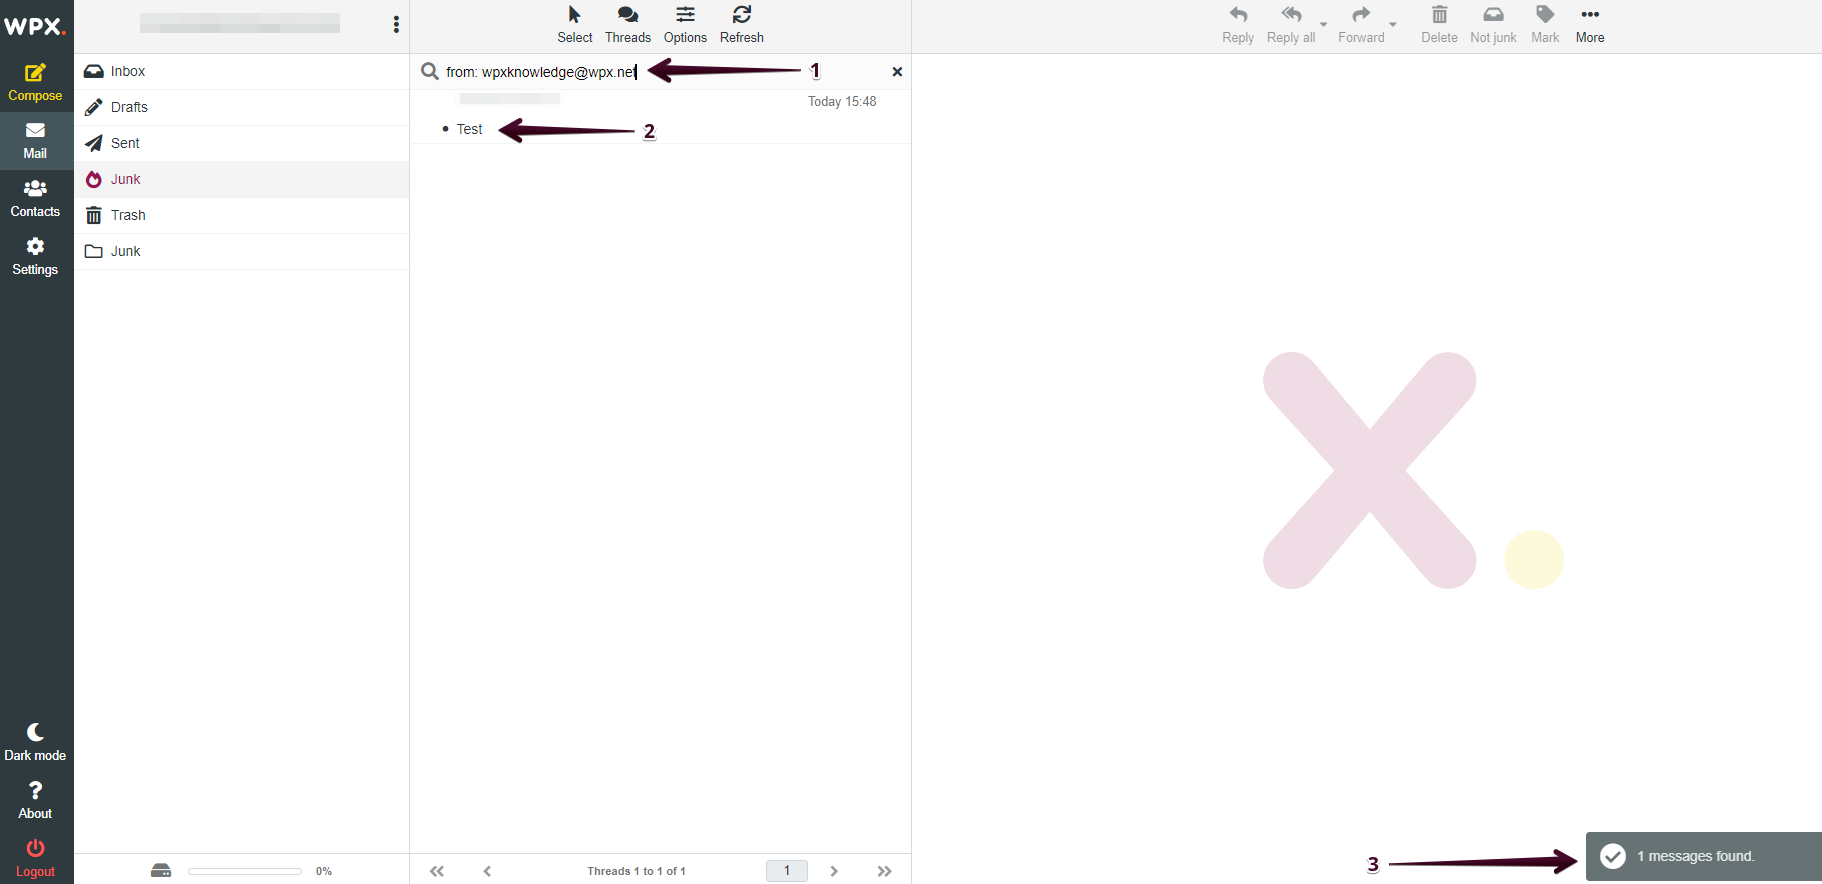
Search for a specific Email sender.
You can also use the Search bar to go through emails that are sent from a specific email sender.
To do that, you simply need to add a command line from: email address (1) to find the specific email sender and List (2) all the emails that are sent from him with a notification of the exact Number (3):
Search for a specific Email recipient.
You can also use the Search bar to list all the emails you have sent to a specific email address.
To do that, you simply need to use the following command line to: email address (1) to find the specific email recipient and List (2) all the emails that you have sent to him with a notification of their exact Number (3):

If you get stuck with anything discussed on this page, please get in touch with WPX Support Team via live chat (use the bottom right-hand widget) and they will respond and help within 30 seconds or less.