This article is only for the users that do not have hosting services with WPX but have to manage their domain’s DNS zone and add new DNS records.
Step 1. Log in to your WPX account
You can log in to your WPX account here.
Step 2. Navigate to the Domains menu
You can either use the My Services (1) → Domains (2) menu option or scroll down and see the list of your domains. You’ll see the Manage domain (3) button, which will take you to the page required for the next steps.

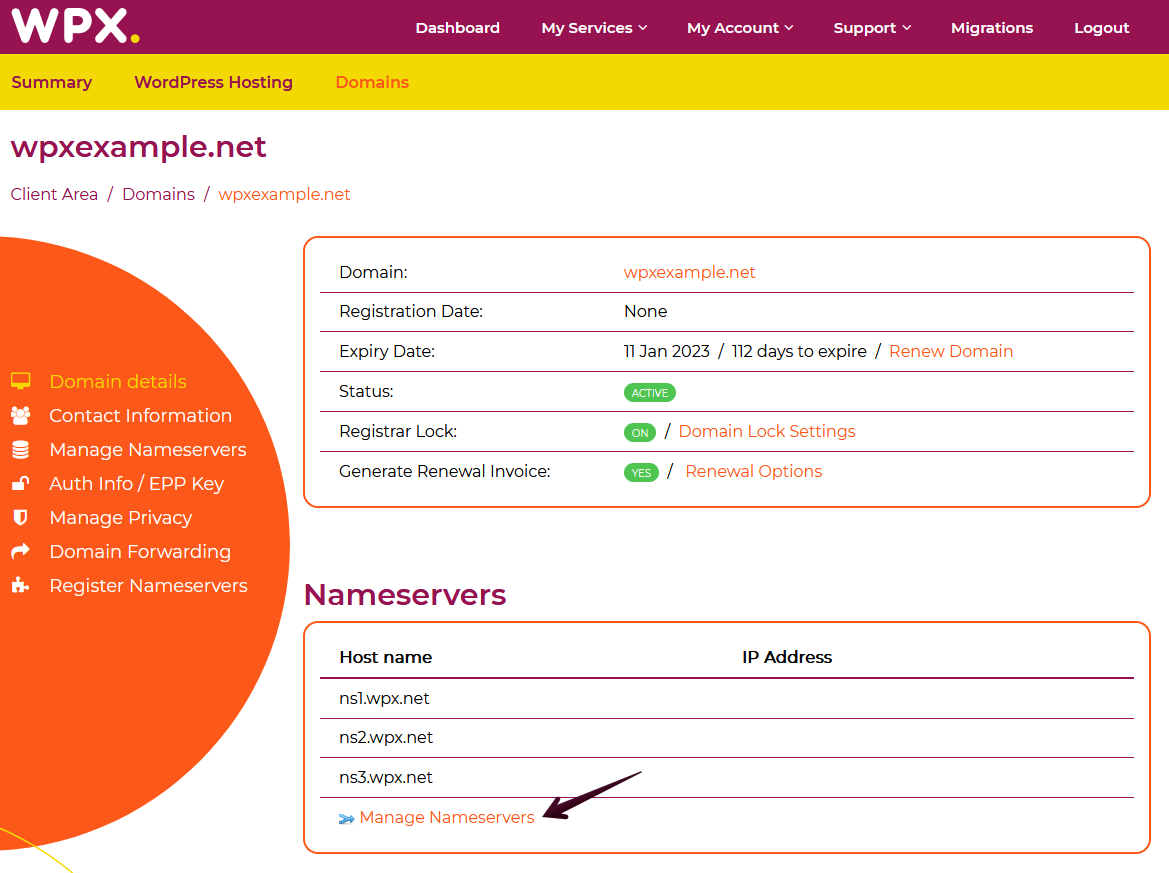
You’ll land on the following page which shows many details about the domain you’ve selected to manage. The Manage Nameservers button will help you both in changing your NameServers or accessing the advanced DNS management to add new DNS records (such as TXT, CNAME, A records, etc.)

Step 3. Manage your DNS records
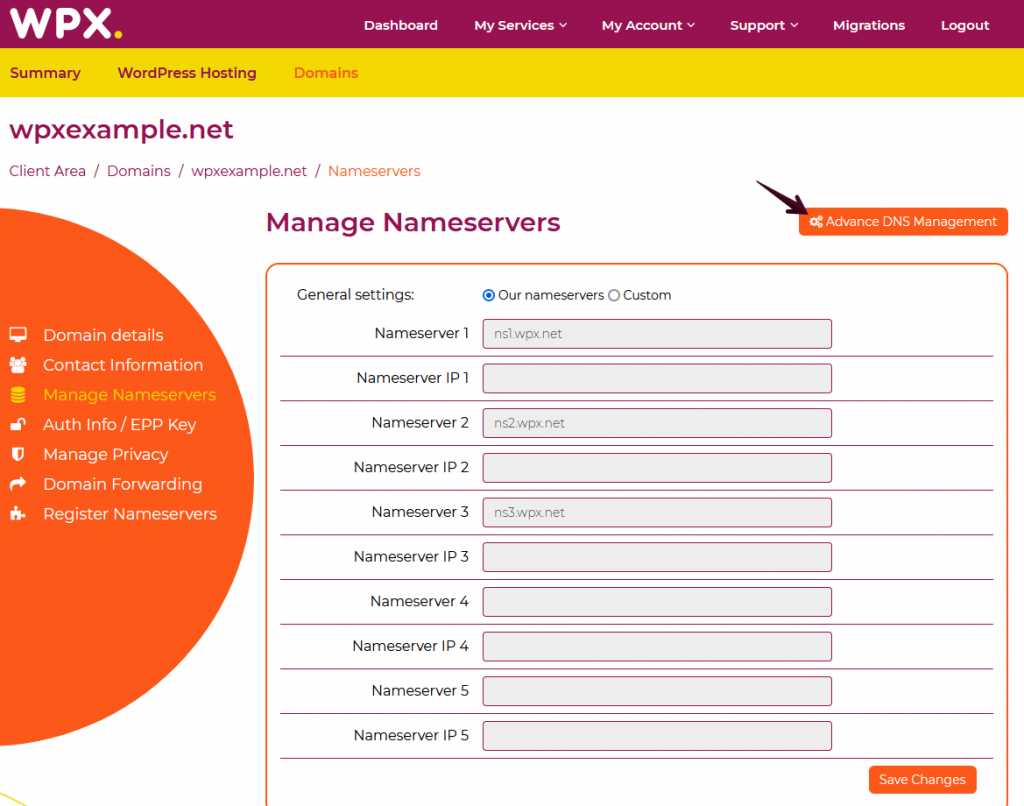
The next page you’ll see after clicking on the Manage Nameservers button is the one below, proceed with the Advanced DNS Management.

You’ll see the following warning. Make sure to ignore it if your domain isn’t pointed anywhere using NameServers (to a specific hosting service such as WPX). If that’s not the case and your domain is pointed using NameServers, please make sure to select the Take me back button.

How to add DNS records?
To add a new record, fill in the required information and record type (1) and click on the Save Changes (2) button.
You can select from the following record types:
- A record
- AAAA record
- CNAME
- TXT
- NS

How to delete DNS records?
It’s as simple as adding a record. Make sure to delete everything in the Hostname (1) section for the record you’d like to remove and proceed with the Save Changes (2)button.

If you get stuck with anything discussed on this page, please get in touch with the WPX Support Team via live chat (use the bottom right-hand widget) and they will respond and help within 30 seconds or less.