Your WPX Control Panel is designed to be fast and responsive, to make the whole process of managing sites and domains easy for you.
When you log in to your WPX account, you will immediately see a general overview of your WPX account status, including any unpaid invoices that may need attention. This is essentially the Dashboard that contains your main details such as your WordPress Hosting Plan(s) specifics and any domains that you may have registered with us.
In this article, we will make an overview of the WPX hosting panel. Let’s start!
First, you need to log in to your WPX account here.
WPX Main menu
When you log in to the WPX Dashboard you will see the options for your WPX hosting account in the main menu (1). Also, you can search for more useful knowledgebase articles (2) once you log in.
The search bar will make suggestions based on what you type in.

Let’s take a look at the main menu.
- Dashboard
- My Services
- My Account
- Support
- Migrations
You can use this button to go back to your WPX dashboard. The dashboard sums up your services with WPX. 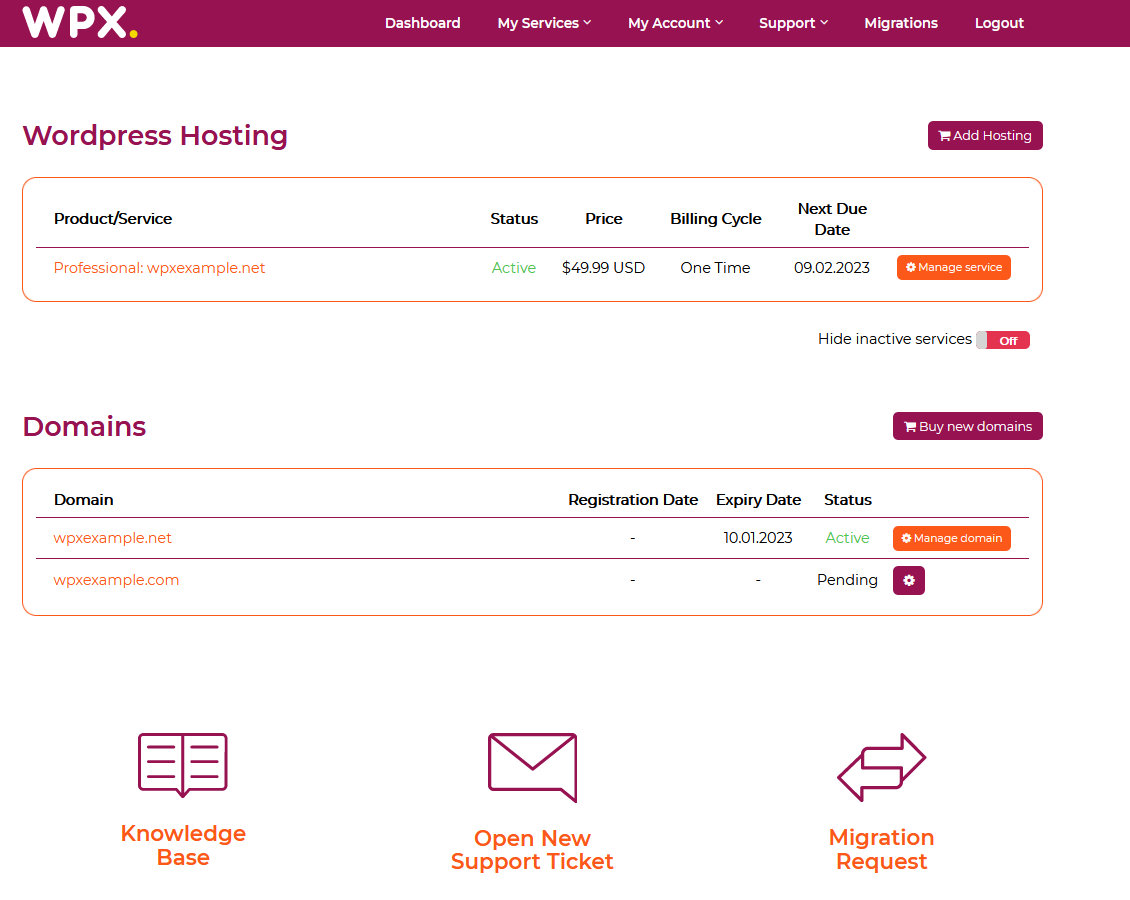
This menu contains your hosting packages and the domains that you have with WPX. In this article, we will focus more on the two submenus – WordPress Hosting and Domains. 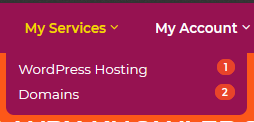
All details for your WPX account such as your Account details, additional contacts, invoices, and more. You can find more information about your account menu here. 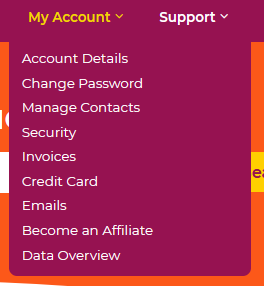
The Support menu has the options to open a new support ticket, check your support tickets, or navigate to the homepage of WPX knowledge base. 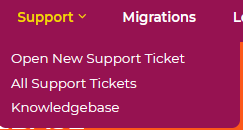
You can directly open a new migration request from this menu. More information on migrations and how to start one can be found in the Migrations section in our knowledge base.
Manage your WordPress Hosting with WPX
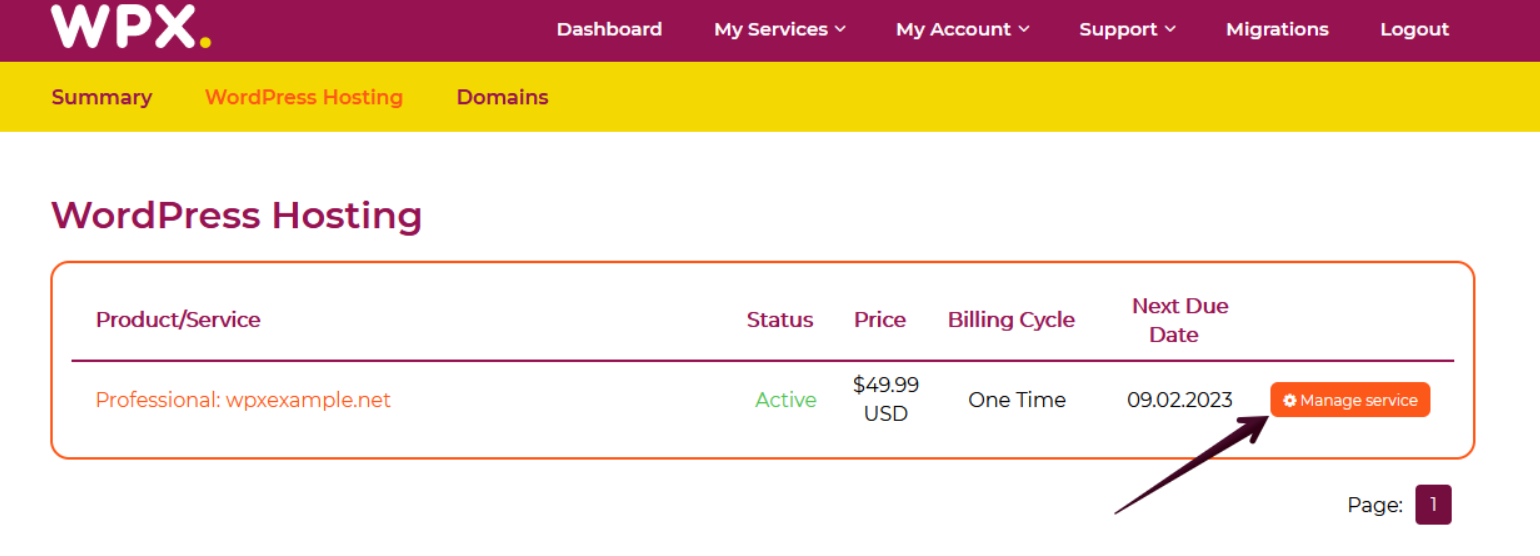
Let’s check what you can do from your WPX control panel when it comes to managing your websites. Once you log in to your WPX account select My Services (1) → WordPress Hosting (2).

Then you will see all of your hosting services with us. When you find the plan that you want to manage, you need to select the orange button Manage service.
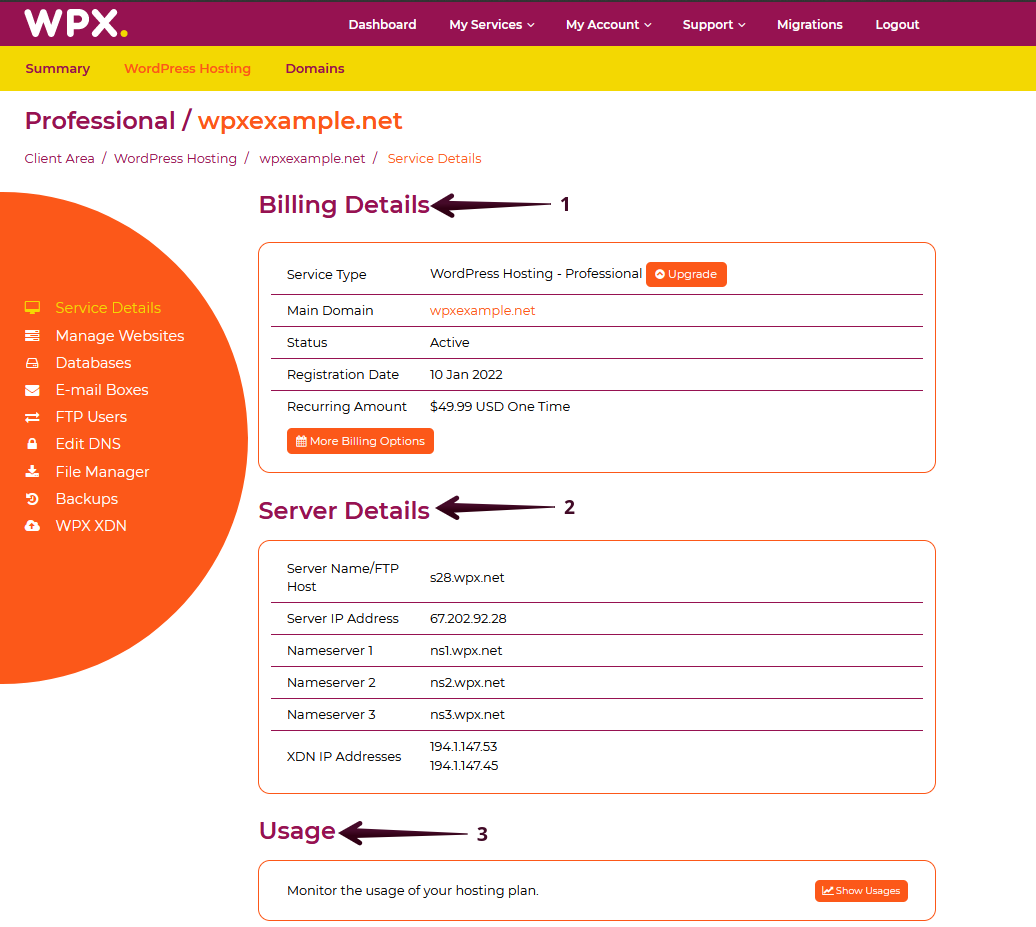
Service details menu
From the Service details, you can preview and manage some of the Billing details for that particular hosting plan. You can also check the Server details (2) that you are hosted on.
The Show Usages (3) button will provide you with the usage information for that plan. If you want to know more about your hosting plan usage, you can check our detailed article.
Manage websites menu
When you select the Manage Websites menu, you can view your websites and their settings. You have the option to control each website and its SSL Certificate. You can also submit an Optimization and Migration request from the buttons above your websites.

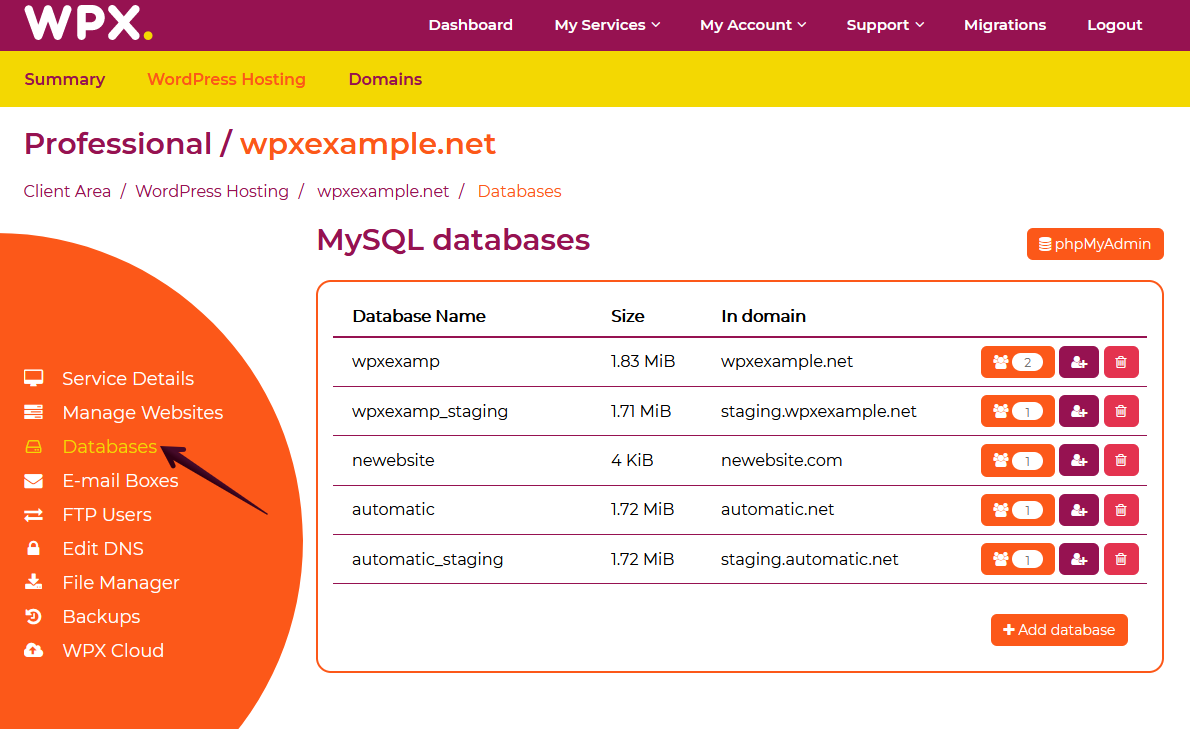
Databases menu
The Databases page allows you to manage your websites’ databases. You can access your PHPMyAdmin, add/delete databases, and database users.
E-mail Boxes menu
This is the place where you can control your email boxes – add/delete emails. You can also get a direct link to our Webmail to manage the email boxes that you have with WPX.

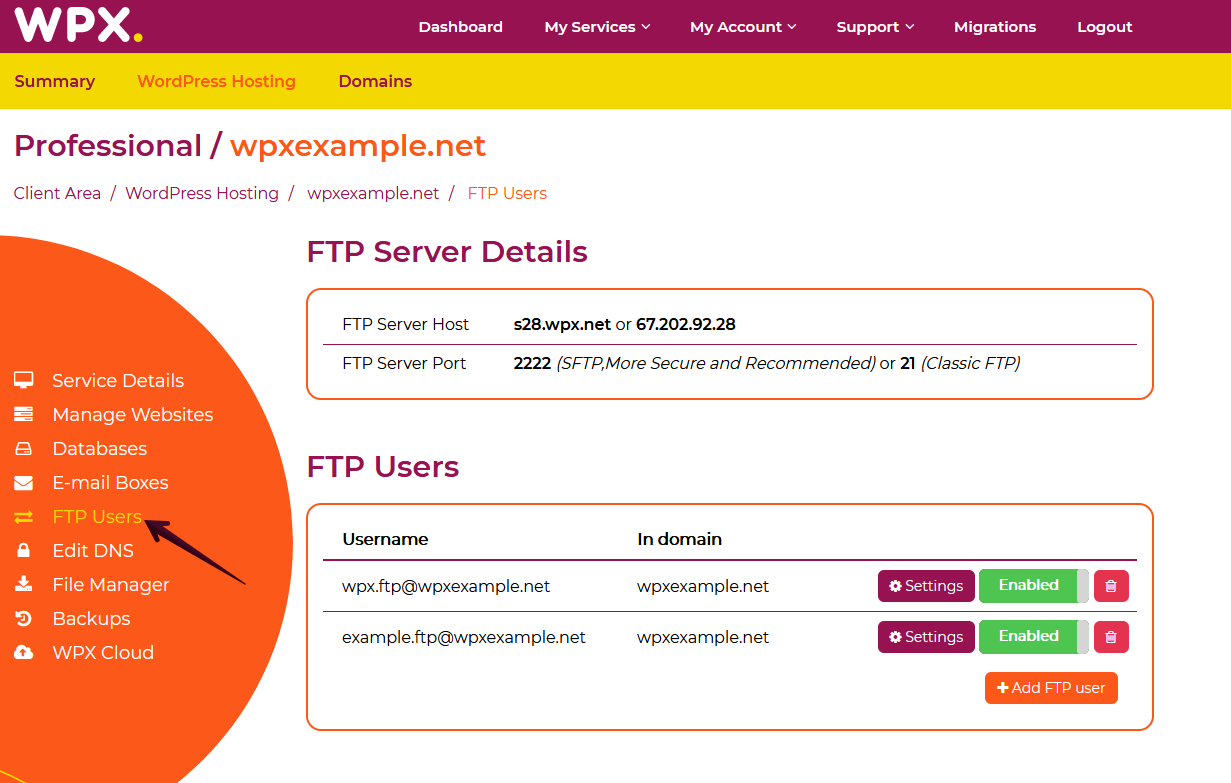
FTP Users menu
The FTP Users page allows you to manage your FTP users. You can add/delete FTP users, and change their passwords.
Edit DNS menu
The Edit DNS section is where you can manage your DNS records for each website. You can preview the current records that are added in WPX for your websites, add/delete records and enable 3d party email services with a few clicks.

File Manager menu.
The File Manager allows you to manage your websites’ files. You can use it without the need to log in with an FTP Client such as File Zilla and manage your files easily from your hosting panel

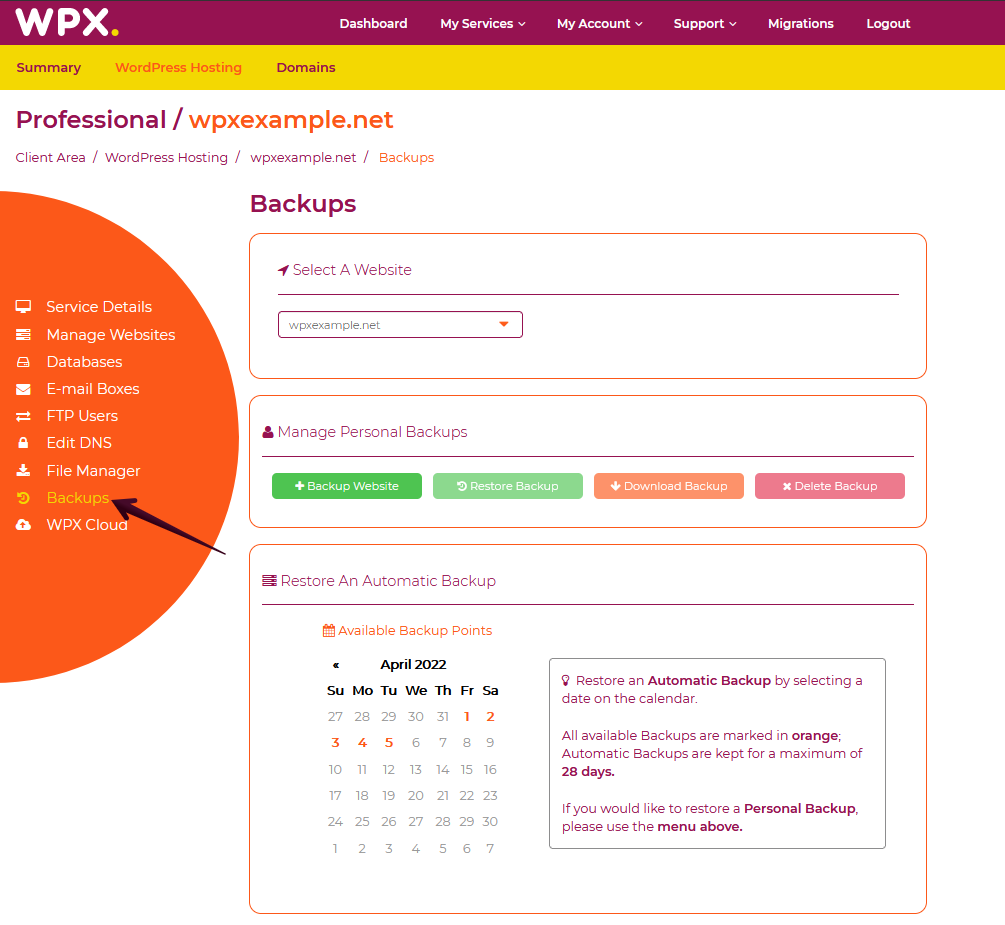
Backups menu.
The Backup menu allows you to restore your websites with a few clicks. You can also create backups and download them if you want to store them locally.
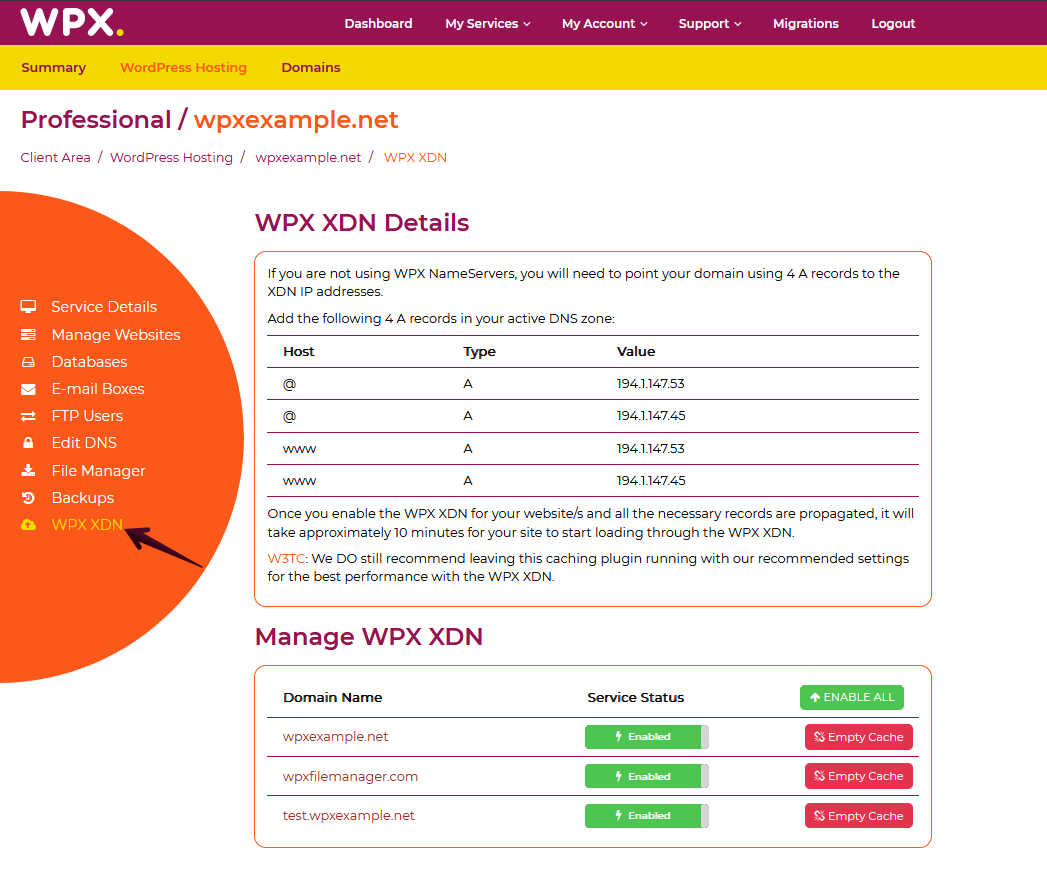
WPX XDN menu.
The WPX XDN menu is where you can disable/enable the WPX XDN (our custom-built CDN). You can also clear the WPX XDN cache for each website that has the XDN enabled.
Those are the main menus to help you manage your hosting plan with WPX. Now let’s check out the Domains section.
Manage your Domains with WPX
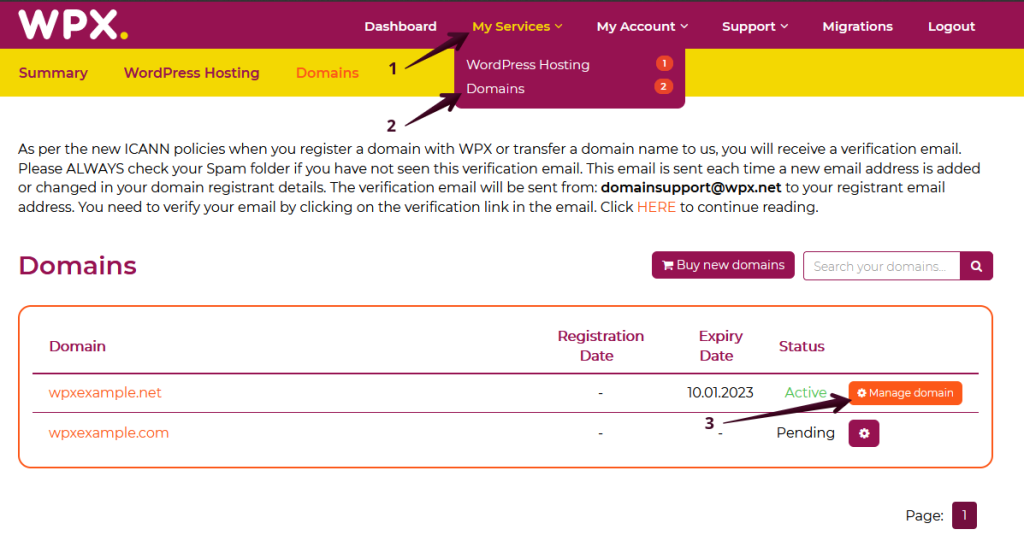
The domain management menus are placed similarly. You can check those by navigating to My Services (1) → Domains (2) → Manage domain (3).
Domain Details menu
The Domain details menu provides you with the information for the domain name that you have selected. You can check the domain status, settings, and the Nameservers that this domain name is currently using.

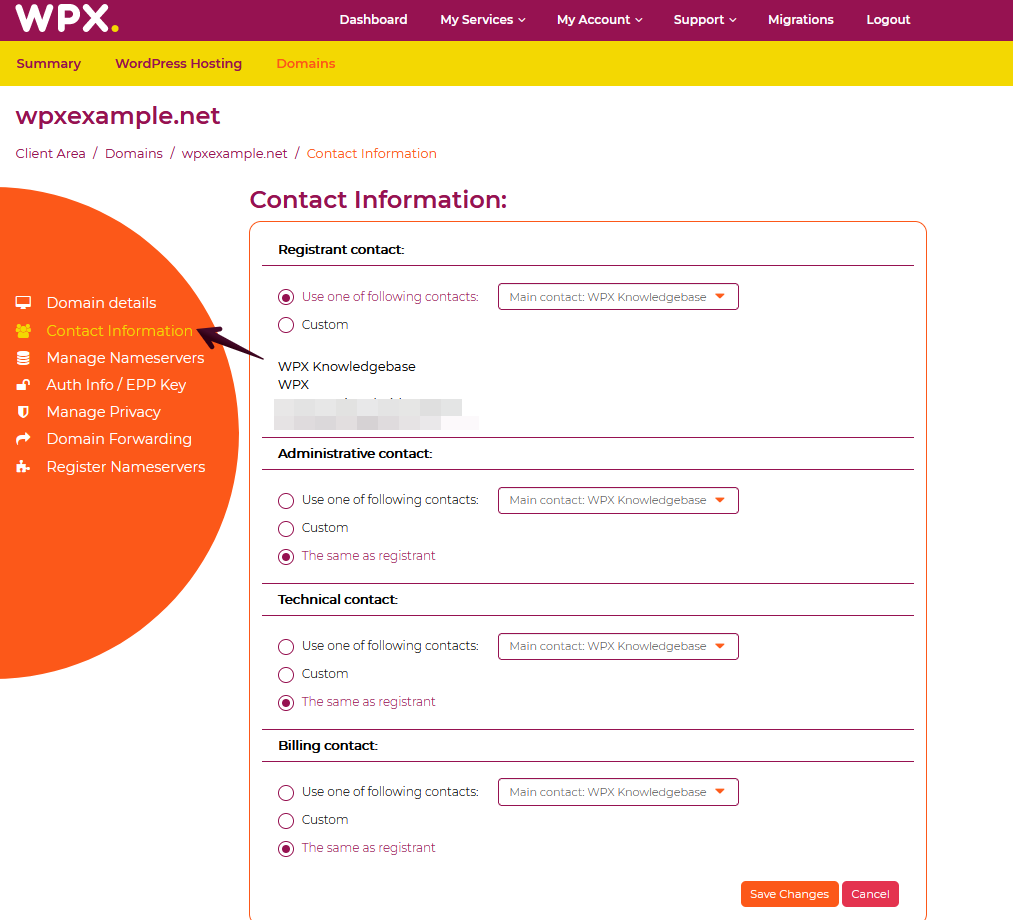
Contact information menu
You can update your contact information for that domain name. You can use different information for every type of contact or select to use the data from your WPX account.
Manage Nameservers menu
This is the menu where you can add custom nameservers or select to use the WPX ones. We have an advanced DNS management option too.

Auth Info / EPP Key menu
If you need to transfer the domain name away from WPX, you will need the EPP Key. You can request it from this menu and it will appear on your screen.

Manage Privacy menu
If you need to transfer the domain name away from WPX, you will need to turn off the WHOIS privacy. You can do that from the Manage Privacy menu. Otherwise, WHOIS privacy should be turned on to protect your details from appearing in WHOIS checks.

Domain Forwarding menu
You can add domain forwarding from this menu, meaning that your domain will be redirected to the URL that you select.

Register Nameservers menu
You can register custom nameservers to use for your domain.

If you have any other questions on the topic, don’t hesitate to contact the WPX Support Team via live chat (use the bottom right-hand widget) and they will respond and help within 30 seconds or less.