Step 1. Migrate your website to WPX
If your website is not hosted with WPX, you can request a migration of your website. After the migration of your content is complete you can point the domain to WPX. This is the correct order to avoid any downtime of your website. If you want to point your domain to a new project, you can skip this step.
Step 2. Update your DNS settings at your current domain registrar
Option: using NameServers
The WPX Name Servers that you should use to point your domain to us are:
NS1.WPX.NET
NS2.WPX.NET
NS3.WPX.NET
Option 2: using A records
Unlike the Name Servers way, changing the A records will not change the active DNS zone to WPX. This means that all of your custom DNS records (MX, CNAMEs, TXT, and so on) should be added to your domain registrar provider (the place you’ve purchased your domain from).
Here’s where to find your A records with us and first you’ll have to log in to your WPX account. You can log in to your WPX account here.
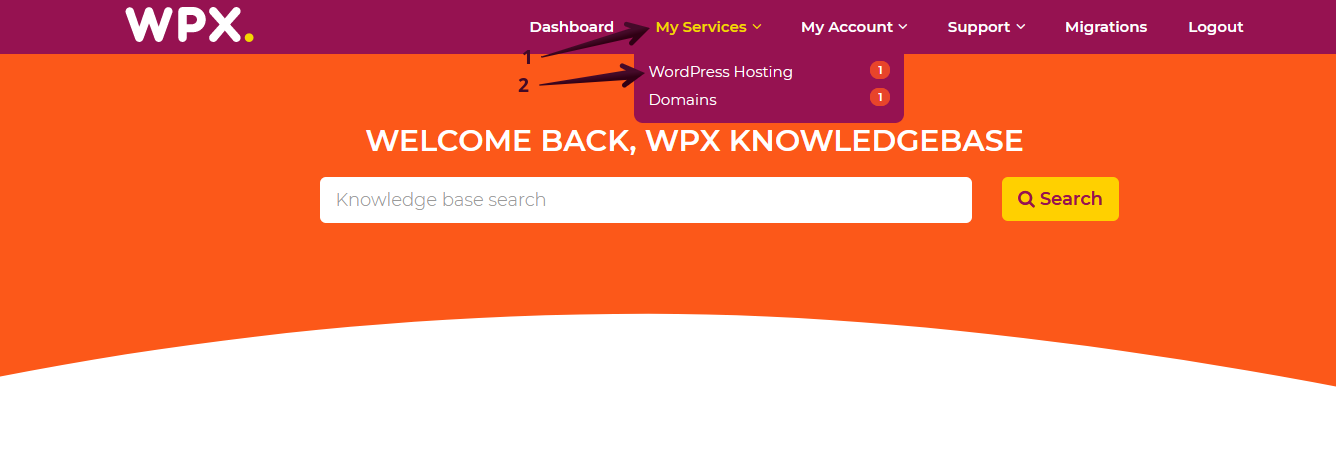
The next thing would be to navigate to your hosting plan. You can either find your hosting service through the navigation menu or within your dashboard. Once you log in to your WPX account select My Services (1) → WordPress Hosting (2).
Then you will see all of your hosting services with us. When you find the plan that you’d like to find the A records for, you need to select the orange button Manage service.
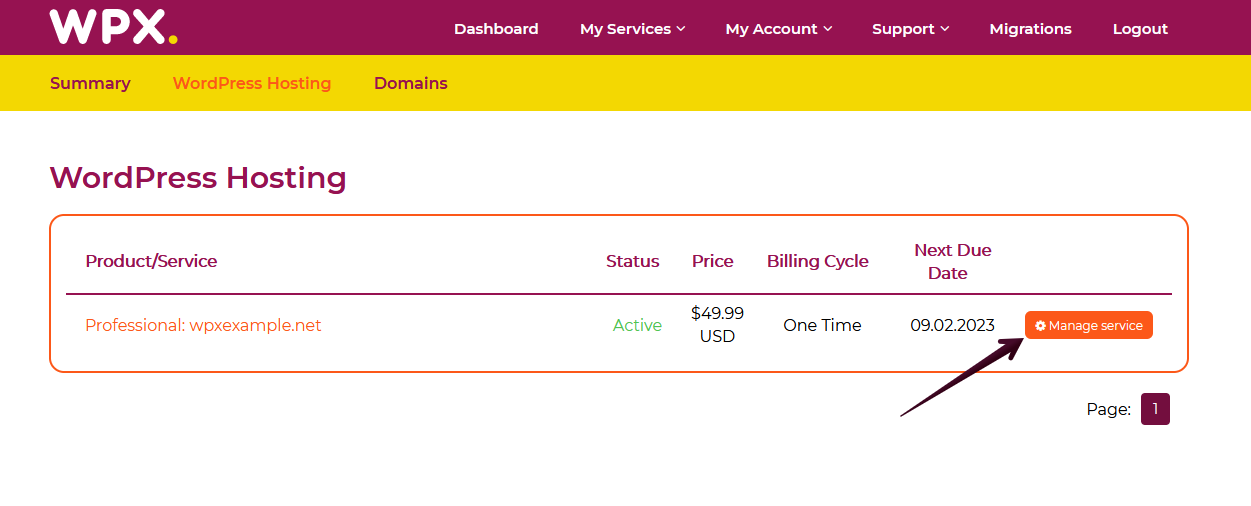
You’ll land on the following page which contains the A records that you have to use to point your domain to our service.
To determine which A records you should use, first you’ll need to decide whether or not you’d like to use our Cloud Service (WPX XDN).
If you don’t want to use our Cloud service, go for the Server IP Address (1) option (check the screenshot below). The records you should add to your domain registrar provider’s DNS zone are two and are as follows:
- Host: Same as domain or ‘@’.
Value/Target: 67.202.92.28 (most likely a different IP address depending on the server your sites are hosted at). - Host: www
Value/Target: 67.202.92.28 (most likely a different IP address depending on the server your sites are hosted at).
If you want to use our Cloud Service, go for the Cloud IP addresses (2) option (check the screenshot below). The records you should add to your domain registrar provider’s DNS zone are four and are as follows:
- Host: Same as domain or ‘@’.
Value/Target: 194.1.147.53 (most likely a different IP address depending on the server your sites are hosted at). - Host: Same as domain or ‘@’.
Value/Target: 194.1.147.45 (most likely a different IP address depending on the server your sites are hosted at). - Host: www
Value/Target: 194.1.147.53 (most likely a different IP address depending on the server your sites are hosted at). - Host: www
Value/Target: 194.1.147.45 (most likely a different IP address depending on the server your sites are hosted at).

To update your DNS settings, you need to go to your domain registrar’s management panel (this might be your previous hosting provider or else) and find the corresponding domain management forms to update the name servers / A records.
See how you can do that with Bluehost, GoDaddy, HostGator, DreamHost, Namecheap, and Google Domains.
Step 3. Wait for the propagation process to be completed
The DNS propagation usually takes 24 hours. In some rare cases, it can take up to 48 hours. During the propagation process, some of your visitors will access your website from your old hosting and some from WPX.
You can monitor the progress of DNS propagation here. You can read more about the propagation process in our article.
If you get stuck with anything discussed on this page, please contact WPX Support via live chat (use the bottom right-hand widget!) and they will usually respond and help within 30 seconds or less.