Our Migration Experts will migrate your websites within 24 hours of receiving your Migration request.
What do I need to do to migrate my site to WPX?
All you need to do is fill in the migration form for the websites (and emails) that you wish to migrate to WPX and leave it all in the hands of our experts.
You need to fill in a different migration form request for every website to avoid miscommunication and confusion during the migration process and afterward with the settings.
Once we have all the necessary information, we can migrate your sites to WPX.
What do we need to migrate your website(s) and email(s)?
To migrate your website(s) and email(s), our migration experts need:
Let’s move on to the migration form.
Step 1. Open a new migration form
To submit an Express Migration request or a normal one, you will need to access the Migration Form. Here is a direct link to the Migration form.
If you want to know how to locate the form from your account there are two options:
1. From the Migrations button located on our navigation bar here:
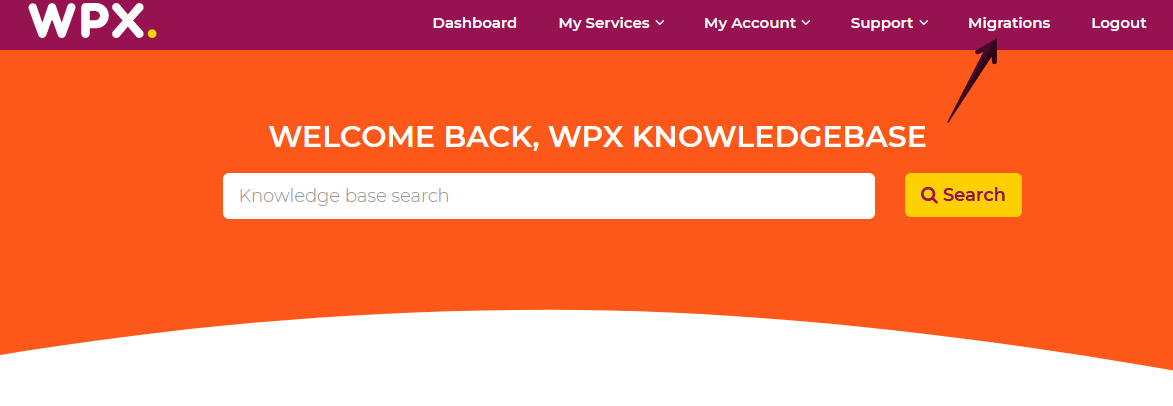
To open the migration form, click on the Migrations button in the top menu.
2. You can also access the migration form from inside your Control Panel here. Follow the screenshot below My Services (1) → WordPress Hosting (2),
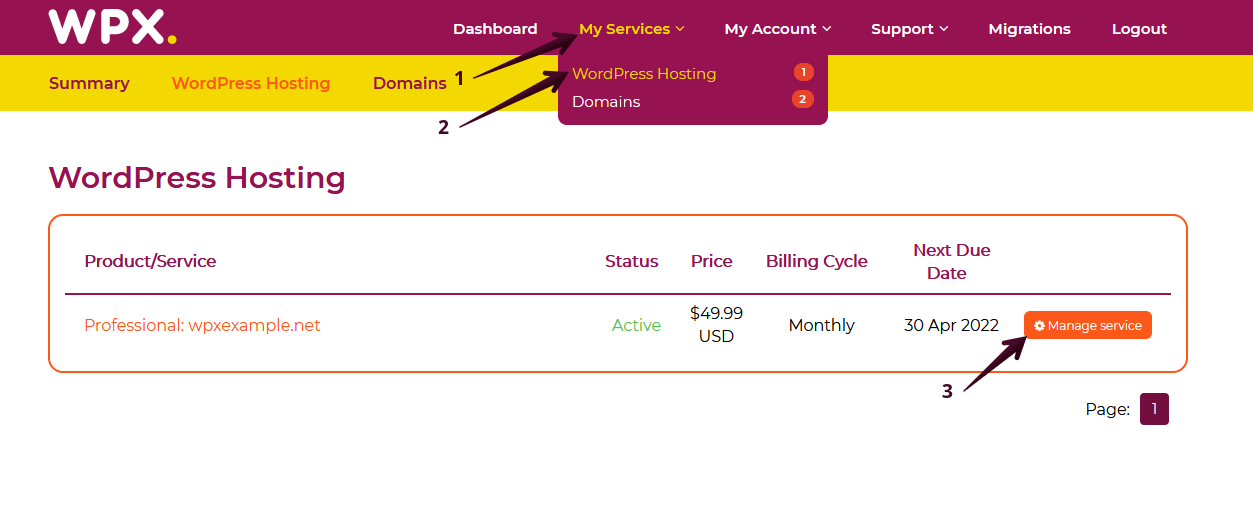
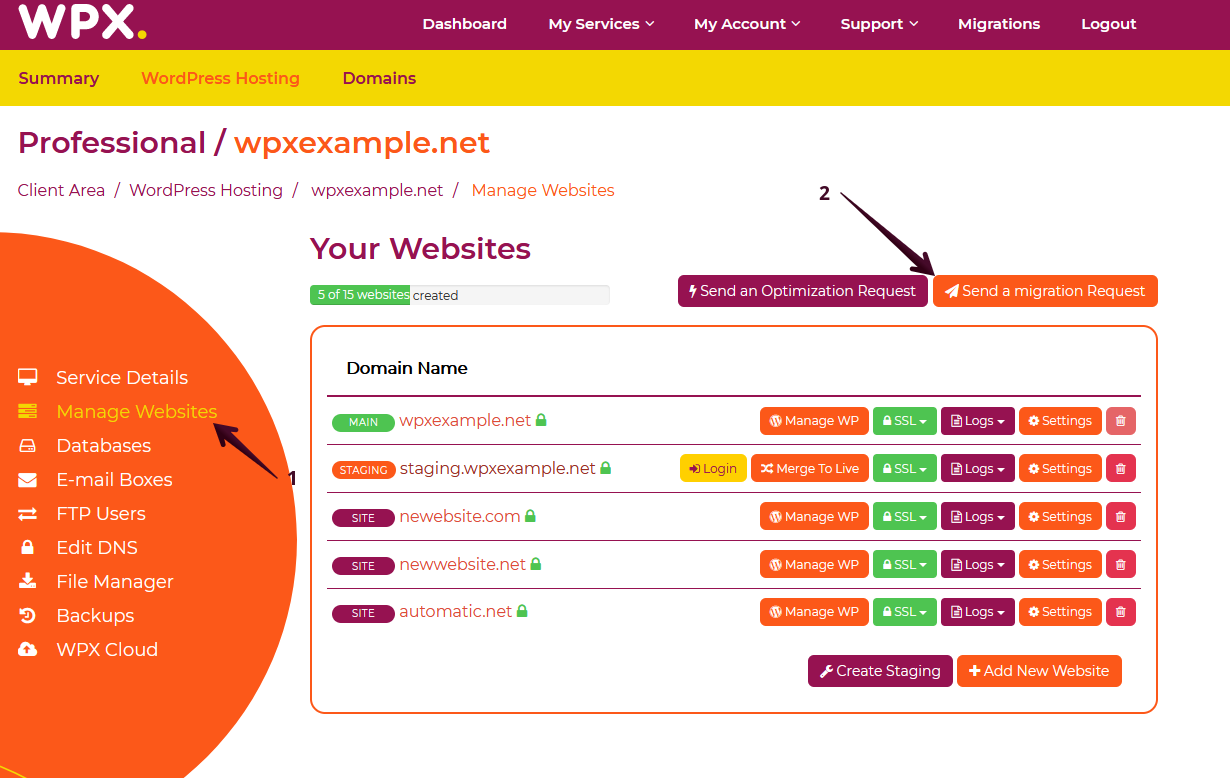
Now that you are in your hosting panel select Manage Websites (1) → Send a migration Request (2);
Once you open the Migration Form, you will be able to choose your migration type.
Step 2. Select a migration type
We are offering two types of migrations:
- Free Migration (completed within 24 hours);
- Express Migration (skipping the migration queue, completed as soon as possible);
Step 3. Provide us with access to your website
Once you’ve selected the desired migration type, you need to fill in the details that are needed for the migration to be completed.
Step 3.1. Website and wp-admin access
- First, you will need to choose which hosting service you want to migrate your website to;
- Еnter the domain you want to migrate with us, as seen below;
- Every WordPress website has a login page to its back end. We need access to your WP-admin dashboard.
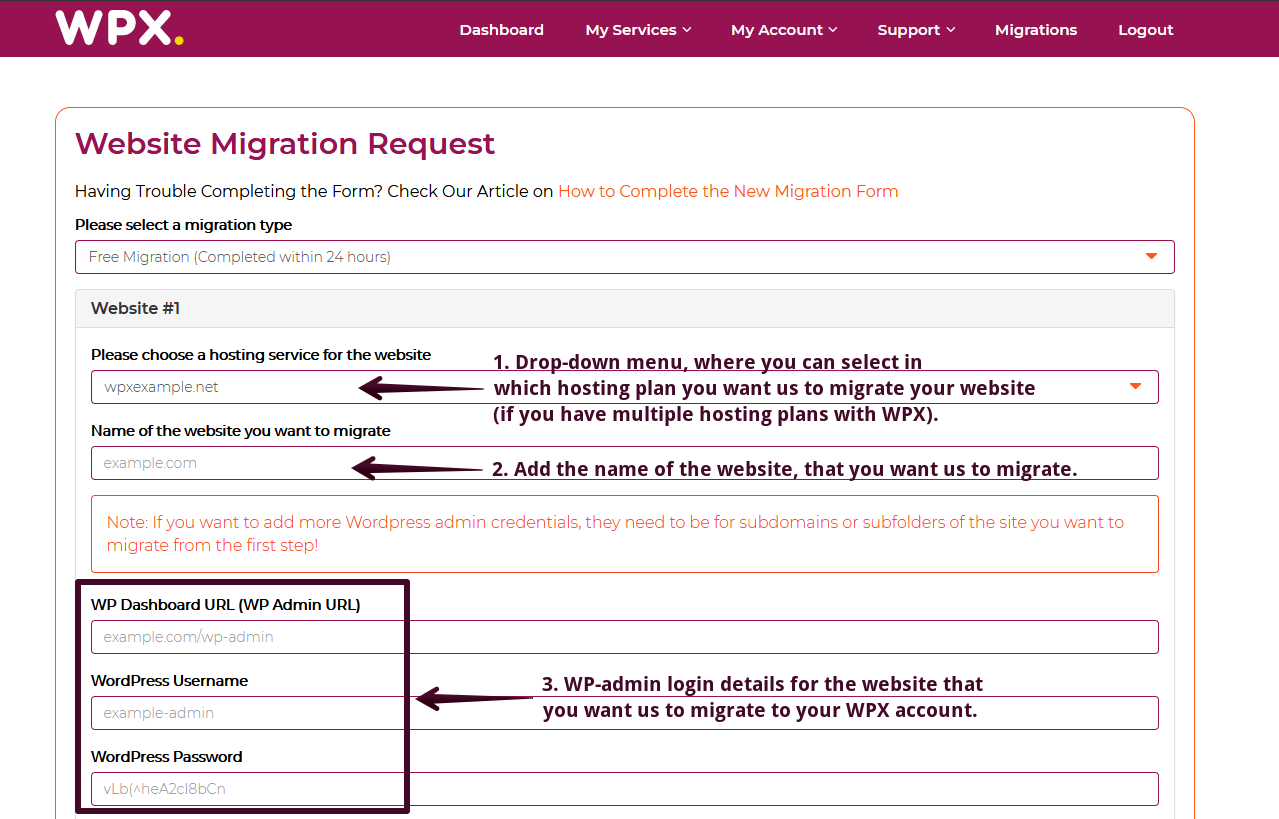
We need WP-admin access to be able to check the website and make sure that it is the same as on your previous hosting.
Step 3.2. Select migration process
Then you need to grant us access to your website’s files through one of the following options.
SiteGround
Give us secure access to your client area by adding us as a collaborator.
If you are not able to disable your 2-FA please make a new collaborator user for the WPX migration team. You can create a collaborator user using our support email support@wpx.net by following these instructions. This way, our Migration team will receive access to your SiteGround account and will be able to perform the migration.
GoDaddy
We have a separate article on that topic and we suggest checking it out by clicking here.
cPanel / Hosting account
If you don’t have a cPanel login URL, or if your hosting is not using Cpanel, you can provide us with direct access to your hosting account.
FTP/SFTP and phpMyAdmin
If you cannot provide us with access to your hosting, you can create an FTP account for us. Please also add PHPMyAdmin access, so we can easily move the database(s) of your website as well.
SSH
If you want, you can also provide us with SSH access to your current hosting and we will manage to move your website to WPX.
Backup (must contain files and database).
If you don’t have access to any of the above options, you can provide us with a full backup of your website (containing all files and database(s)). You can upload the backup either on a 3d party resource or directly to your WPX hosting plan.
Migration with a Plugin
Please keep in mind that if you choose the migration process with a plugin, we cannot guarantee 100% transfer and completion of the migration (with a WordPress plugin). Many hosting providers set up limits and restrictions for such plugins (and migrations often fail as a result). We recommend selecting a different type of migration process, preferably with access to your hosting

Step 4. Email migration
Now that you have filled in the information for your website, you need to tell us if you want your email boxes to be migrated to WPX or if you are using a 3d party mail service.
Let us know if you are using 3d party mail service for handling emails. We’ll set up the needed records for that mail service and avoid any possible downtime of your email.
If you don’t need any mailboxes migrated and are not using a mail service, you can select the option “I don’t need any mails transferred over”.
If you want us to migrate your mailboxes you will need to enter the following information;
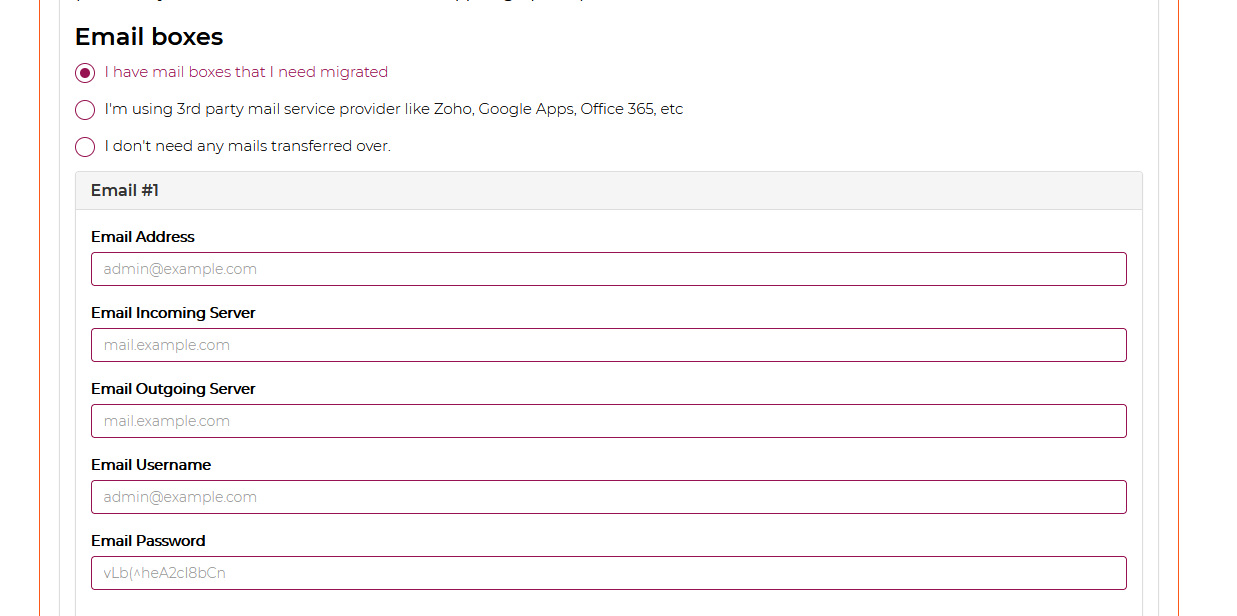
The Email Incoming and Email Outgoing Server fields usually contain the same information in most cases.
If you have more than one Email address that needs to be migrated, you can add more by clicking the Add More button.
Step 5. Additional information
The fields below are not required for the migration; if you don’t have this information or it isn’t relevant, you can leave these boxes empty.

Step 6. W3 Total Cache and Autoptimize
Finally, please choose if you want us to install our recommended cache plugin W3TC which works best with our servers and the WPX Cloud (for high-speed performance).
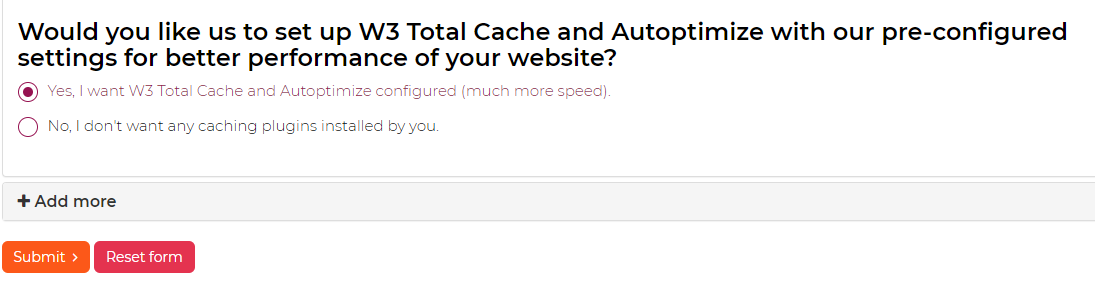
Step 7. Submit the migration request
When complete, you can submit the request with the button in the bottom right corner and we’ll start the migration process.
Please monitor your email box or your tickets in your WPX account as we may contact you for further information.
If you get stuck with any function discussed here, please contact WPX Support via live chat (use the bottom right-hand widget!) and we will usually respond and help within 30 seconds or less.