We do have a built-in File Manager which has been developed for our clients’ convenience, however, having an external solution is a necessity. Instead of sharing sensitive hosting account information, you can simply create an FTP account that can, later on, be accessed through an FTP client such as FileZilla.
Step 1. Log in to your WPX account.
You can log in to your WPX account here.
Step 2. Navigate to your hosting plan.
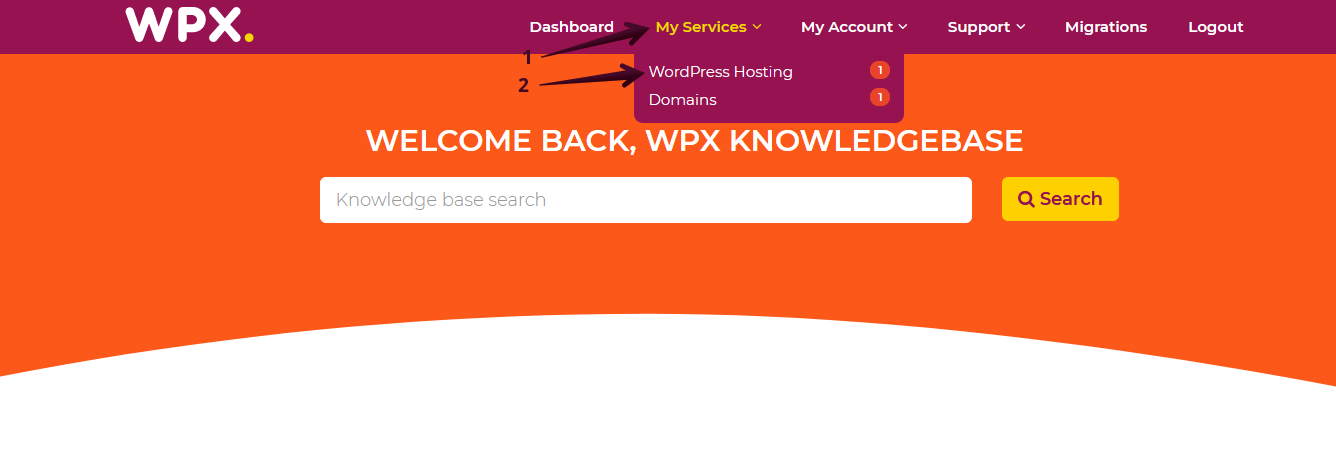
You can either find your hosting service through the navigation menu or within your dashboard. Once you log in to your WPX account select My Services (1) → WordPress Hosting (2).
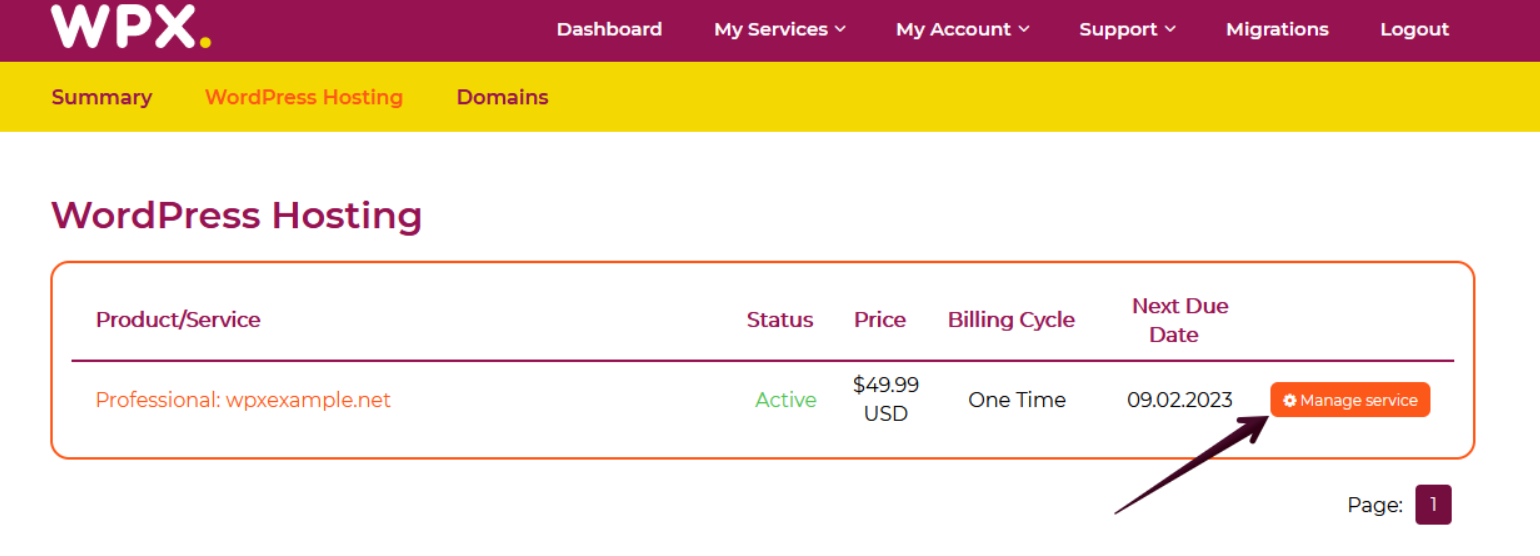
Then you will see all of your hosting services with us. When you find the plan that you want to manage, you need to select the orange button Manage service.
Step 3. FTP Users menu.
We’ll need the FTP user details to make a successful connection using FileZilla (please make sure to download and install FileZilla first).
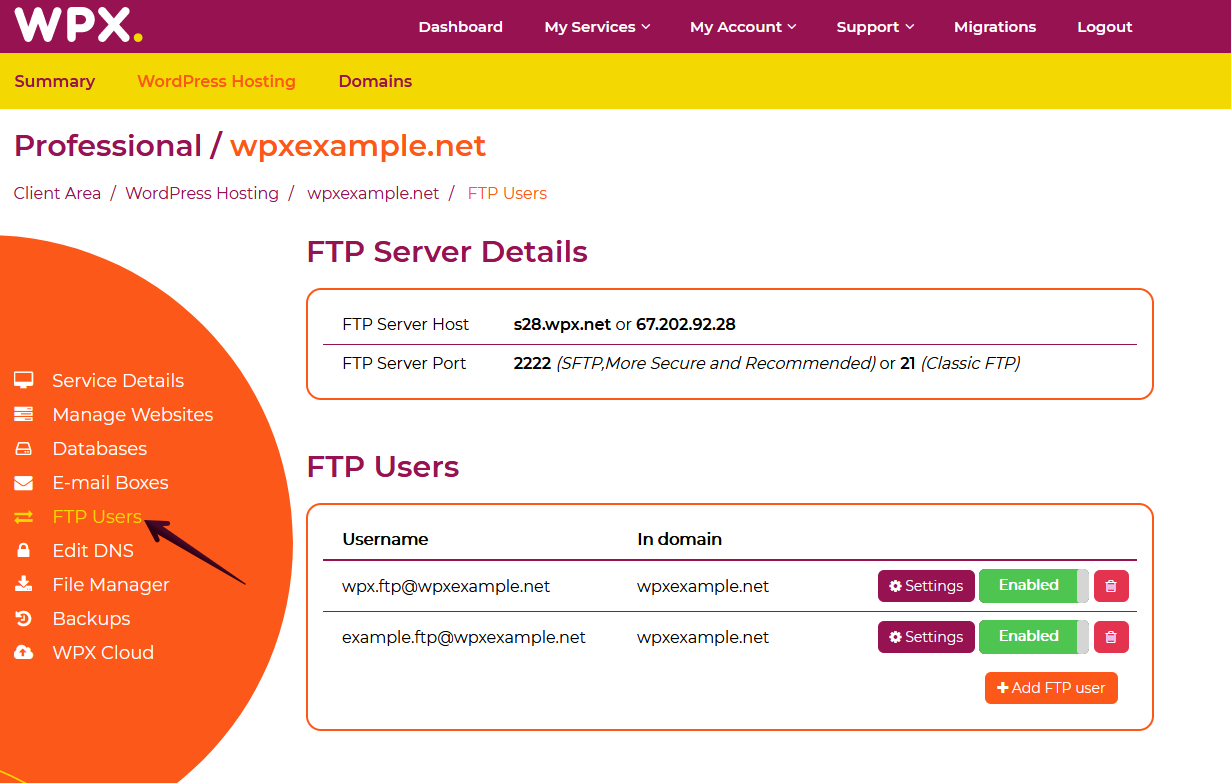
Don’t worry if you haven’t created an FTP user yet! We have an article covering that topic as well!
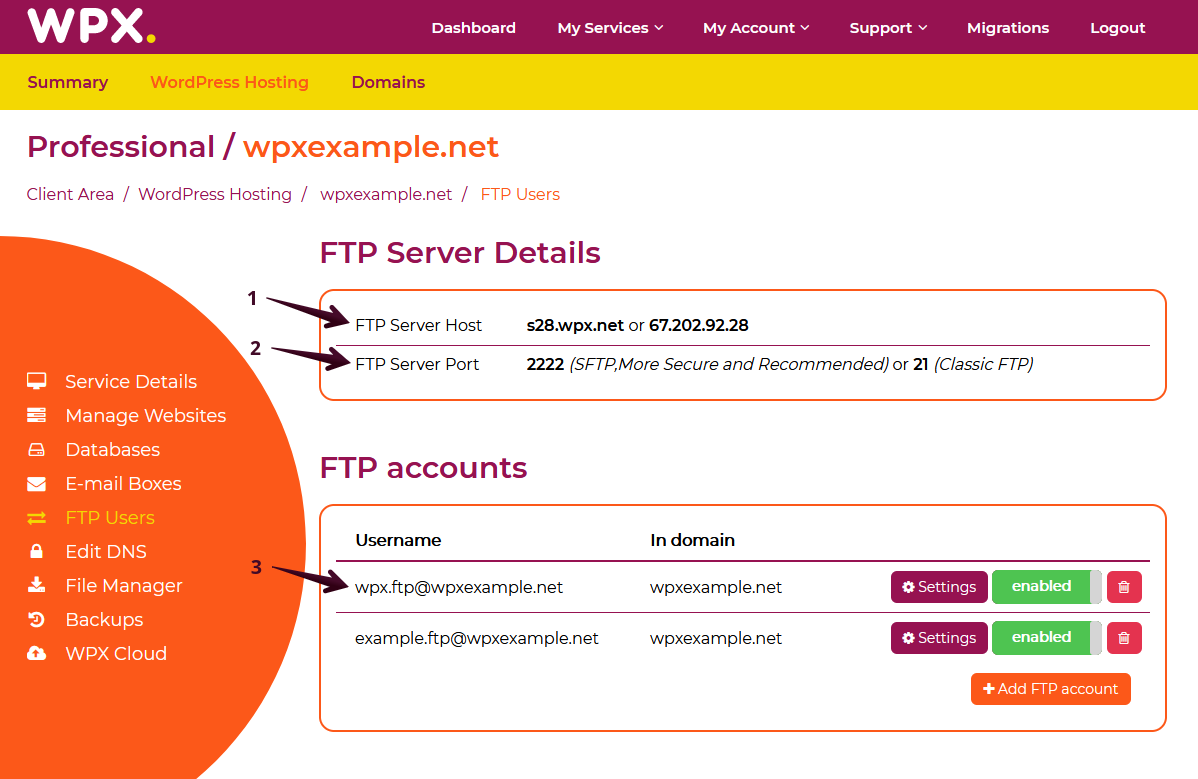
Once you’ve taken care of the FTP user creation, you can proceed with getting the right information to open an FTP connection using FileZilla.
The first thing you’ll need is the Server Host (1) along with the Server Port (2). Тhe server port determines whether you’d like to establish a non-secure (FTP) or secure (SFTP) connection. Last but not least you’ll need to copy the details from the already created FTP user. Please make sure to copy the Username (3) as displayed in the panel. As for the password, that’s something you’re getting while setting up the FTP account.
Step 4. FileZilla connection.
Now that you have the FTP/SFTP details you’re ready to access your site files through FileZilla. There are things you should keep in mind shown in the screenshot below.
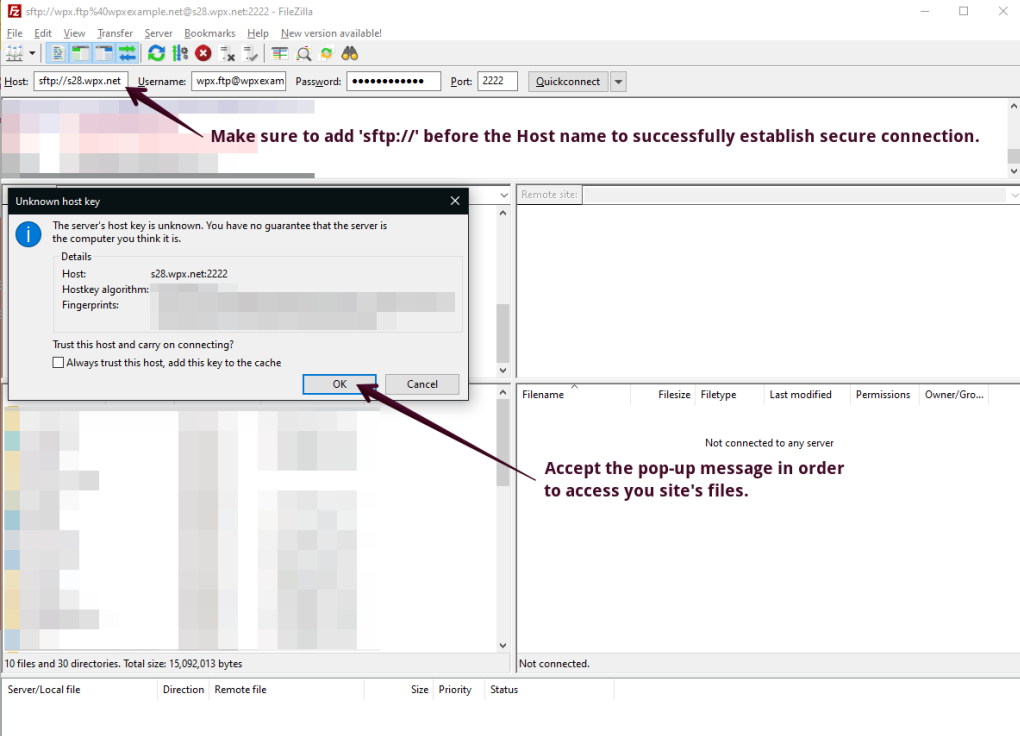
As shown in the image, using ‘sftp://‘ before the Hostname and port: 2222 will establish a secure connection. If you’d like to go for a regular non-secure FTP connection, just make sure to add the hostname along with FTP’s classic port: 21.

If you get stuck with anything discussed on this page, please get in touch with the WPX Support Team via live chat (use the bottom right-hand widget) and they will respond and help within 30 seconds or less.