This is a step-by-step article that will help you change and configure your web address via Google Search Console without losing your SEO rankings in the process.
This will be especially helpful if you have moved the content of your website to a new domain name.
Step 1. Add new website address to Google Search Console
To begin, you will need to navigate to the top left corner of your screen and select Search Property (1) and Add Property (2):

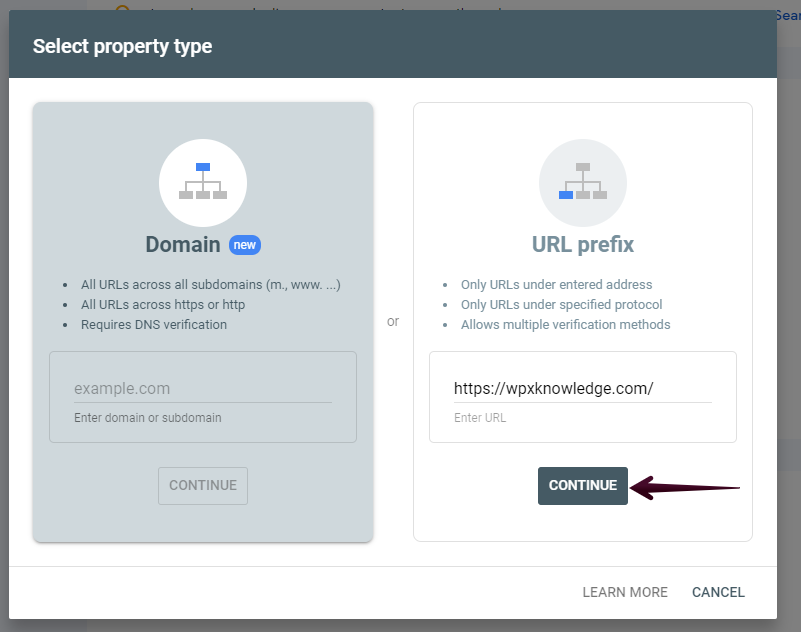
From there you will need to add the website version you want in section URL Prefix and select Continue:

You will need to verify all added properties from Google Search Console. If you need help with the verification process, please use this article for reference.
Step 2. Set up 301 redirects for the new website address
To automatically redirect visitors as well as Google-Bot to the new domain, when they request the old domain name, you have set up a 301-redirect for the old domain name.
To use a redirect to the new domain, with an HTTP Status Code 301, you simply enter the following Rewrite Rule into the .htaccess file for the old domain:
RewriteEngine on
RewriteCond %{HTTP_HOST} ^example.com [NC]
RewriteRule ^(.*)$ http://www.example.com/$1 [L,R=301,NC]
It needs to be added on the top of the .htaccess file which can be accessed via the File Manager.
If you get stuck during this process or have any questions about changing your web address, please don’t hesitate to contact us via LiveChat or Ticket.
Step 3. Change web address via Google Search Console
To change the web address, you can navigate to Settings (1) and choose Change of address (2):

From there you can select the new site (1) from the drop-down list of available properties and Validate & Update (2) from Google:

If you get stuck with anything discussed on this page, please contact WPX Support Team via live chat (use the bottom right-hand widget) and they will respond and help within 30 seconds or less.