If you have not created your free email account yet, please check this article before you get started. This step-by-step guide will help you connect your WPX Email account with the Thunderbird Mail Client.
Step 1. Log in to your WPX account.
You can log in to your WPX account here.
Step 2. Email settings.
If you already know where your email settings are located, you can skip this step.
You can find the email settings in your emails from WPX here. You need to look for the email that includes the email box you need to set up in the subject.
For example, The settings for support@wpxexample.net are in the following email:

Select the E-mail Boxes (1) menu → You can change the email password (2) and send the settings (3) to an email address of your choosing. When you are done with the changes, click on the Submit (4) button.

Step 3. Set up Mozilla Thunderbird.
Now that you have the settings for your email box, open Mozilla Thunderbird. From the Local Folders (or another email if you have one set, select Email to create a new account;
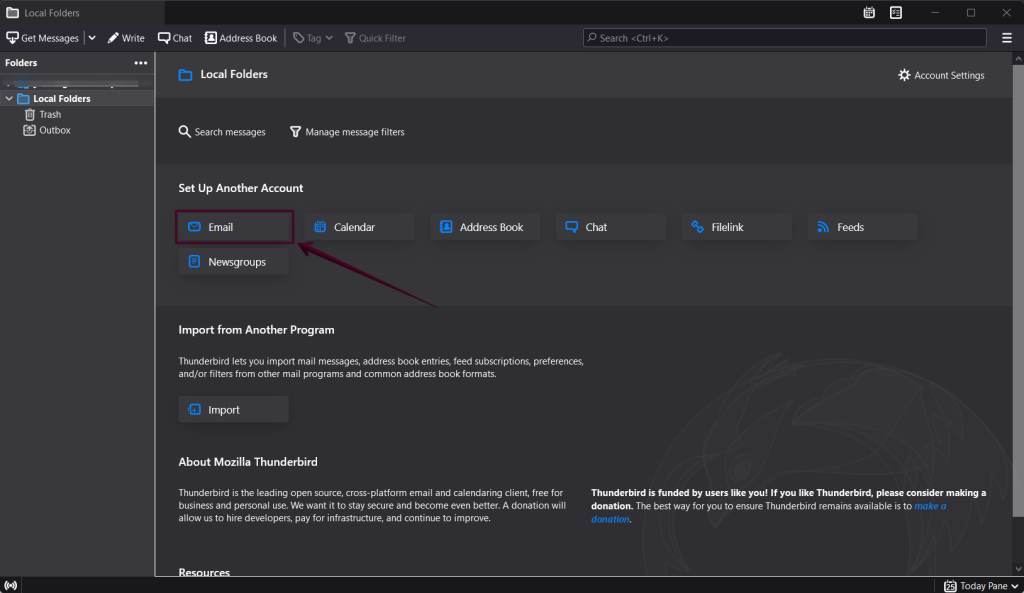
Alternatively, you can use the right-hand side menu → New → Existing Mail Account.

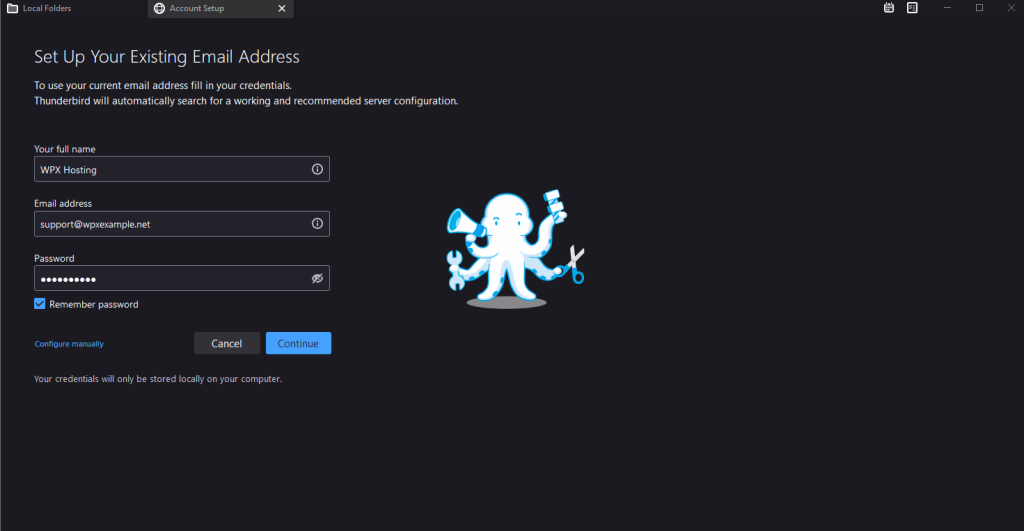
Step 4. Fill the Email account details.
Enter your name as you would like it to appear in the Your name field for all outgoing messages. Input your full email address in the Email address field. Provide the password for the email account. Click Continue.
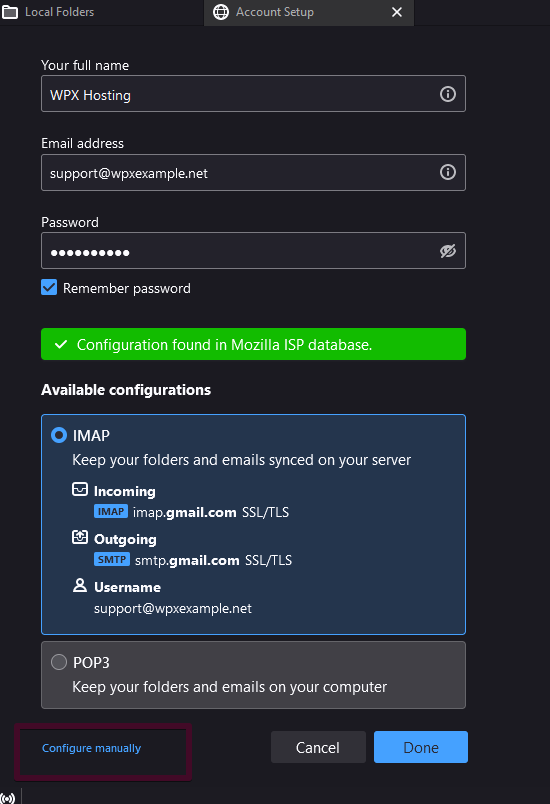
Step 5. Configure manually.
The automatic suggestion by Thunderbird for IMAP won’t be correct, so you need to click on the Configure Manually button.
Fill in the IMAP and SMTP information. Both correspond to the server hostname of your hosting plan. In our case s28.wpx.net
- IMAP secure port 993;
- SMTP secure port 465;
- The Connections security should be set on SSL/TLS;
- Authentication method should be set ont Autodetect.
Adjust the remaining settings as shown below on the right-hand side screenshot and click the Re-Test button, then Done.

If you get stuck with anything discussed on this page, please get in touch with the WPX Support Team via live chat (use the bottom right-hand widget) and they will respond and help within 30 seconds or less.