This article is a step-by-step guide to help you enable/disable Redis Cache on your websites.
Step 1. Log in to your WPX account
You can log in to your WPX account here.
Step 2. Navigate to your WooCommerce Plan
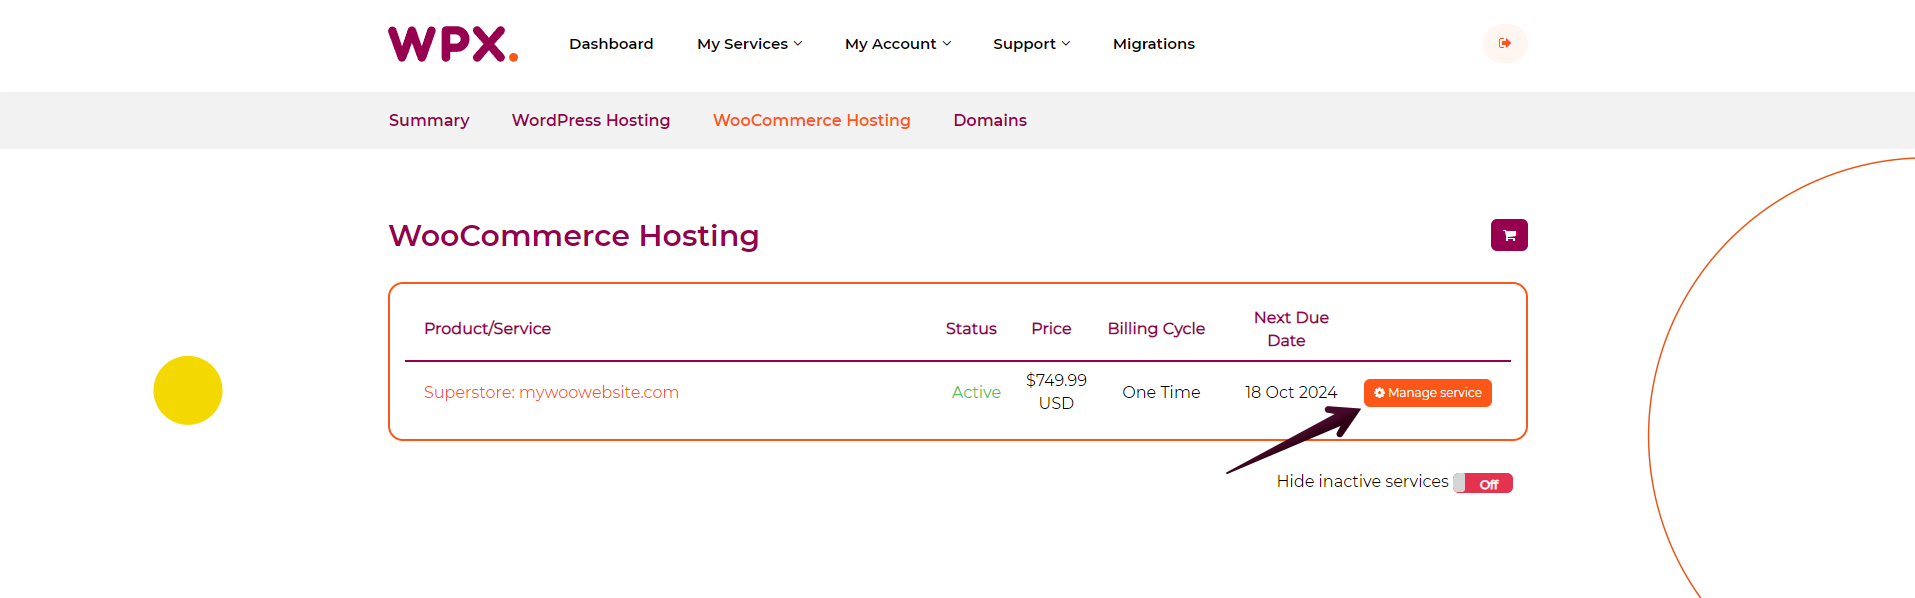
You can either find your hosting service through the navigation menu or within your dashboard. Once you log in to your WPX account select My Services (1) → WooCommerce Hosting (2).

Then you will see all of your WooCommerce hosting plans with us. When you find the one you want to manage, click on the orange button Manage service.
Step 3. Go to the WPX Redis menu
Once you are in Service Details, select the WPX Redis (1) menu from where you can see all the websites that can use the WPX Redis.
The Service Status (2) bar indicates if WPX Redis is currently Enabled or Disabled next to your website.

Step 4. Enable WPX Redis for your WooCommerce site
To enable Redis you need to click the Toggle button next to it shown as step 2 in the previous screenshot.
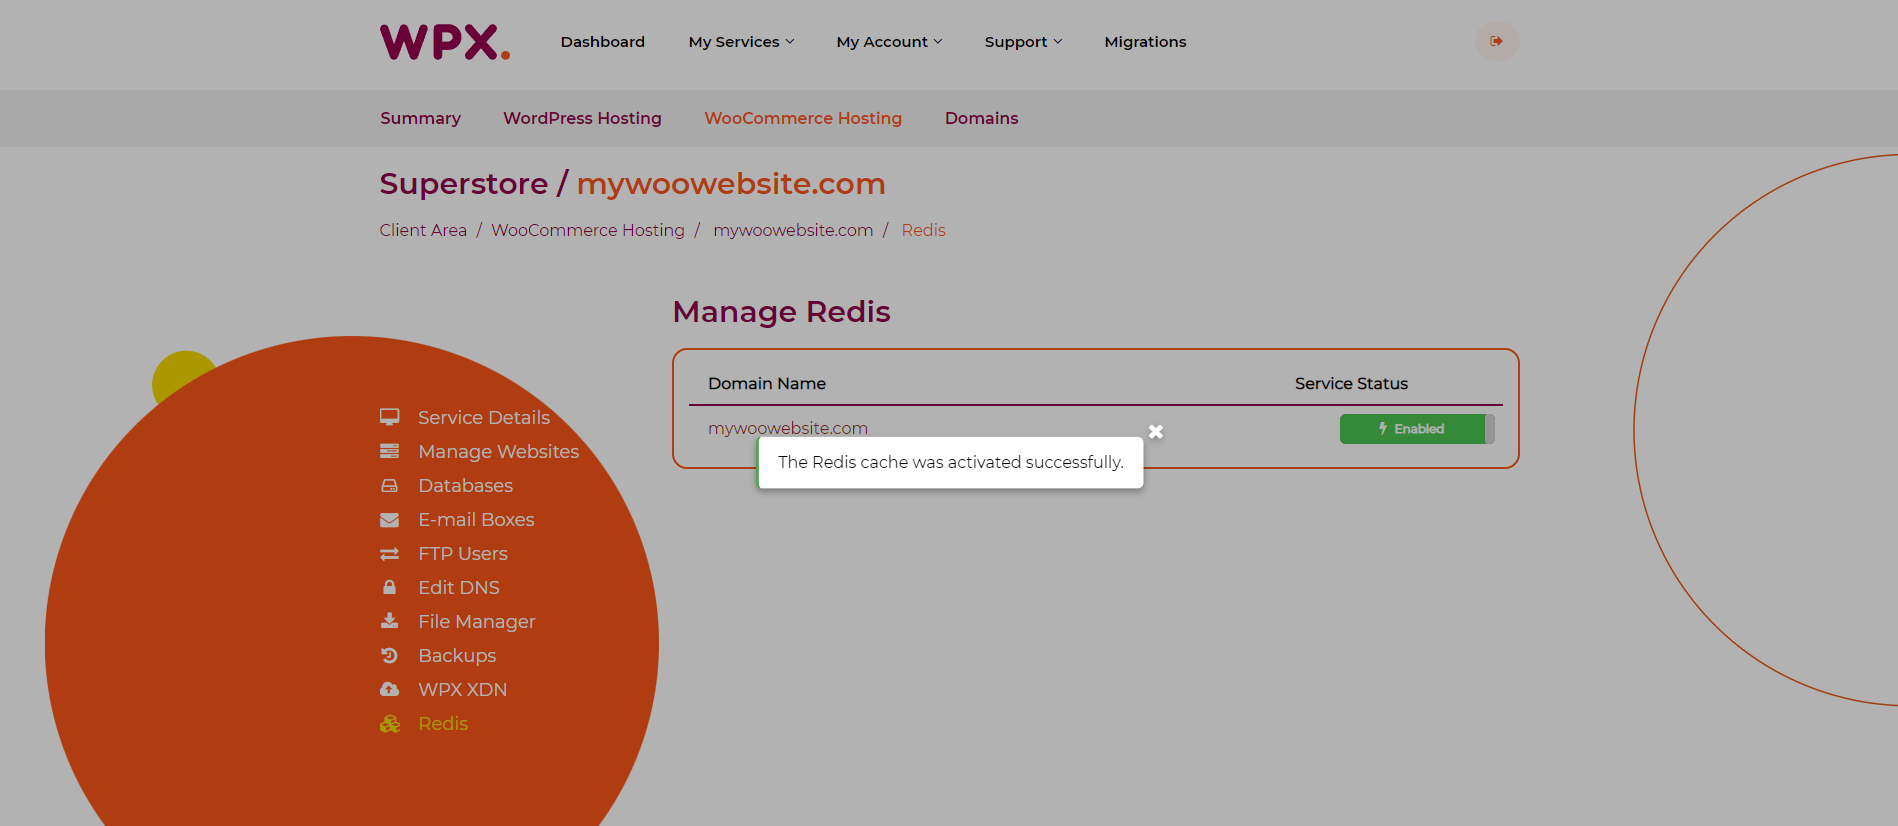
Once you do that, an automatic process for enabling the WPX Redis will begin. You will receive two notifications for starting (1),(2), and completing the task:
If you have any other questions on the topic, don’t hesitate to contact the WPX Support Team via live chat (use the bottom right-hand widget) and they will respond and help within 30 seconds or less.