If our mail service does not suit the needs of your business and you want to set up a 3d party mail service, we made that easy from the WPX control panel.
Those 3 mail services that we’re going to set, use DNS records that we made on a preset, so you can add those with a few clicks. Let’s begin!
Where is my active DNS zone?
To be able to use that feature, the active DNS zone for your domain name should be with WPX. If you don’t know what an active DNS zone is, you can read more about it here.
Essentially, you need to point your domain with NS records to WPX so the DNS changes could be globally set. You can check the NS records that you are currently using with an online tool. Here is how you can point your domain to WPX.
Step 1. Log in to your WPX account.
You can log in to your WPX account here.
Step 2. Navigate to your hosting plan.
You can either find your hosting service through the navigation menu or within your dashboard. Once you log in to your WPX account select My Services (1) → WordPress Hosting (2).

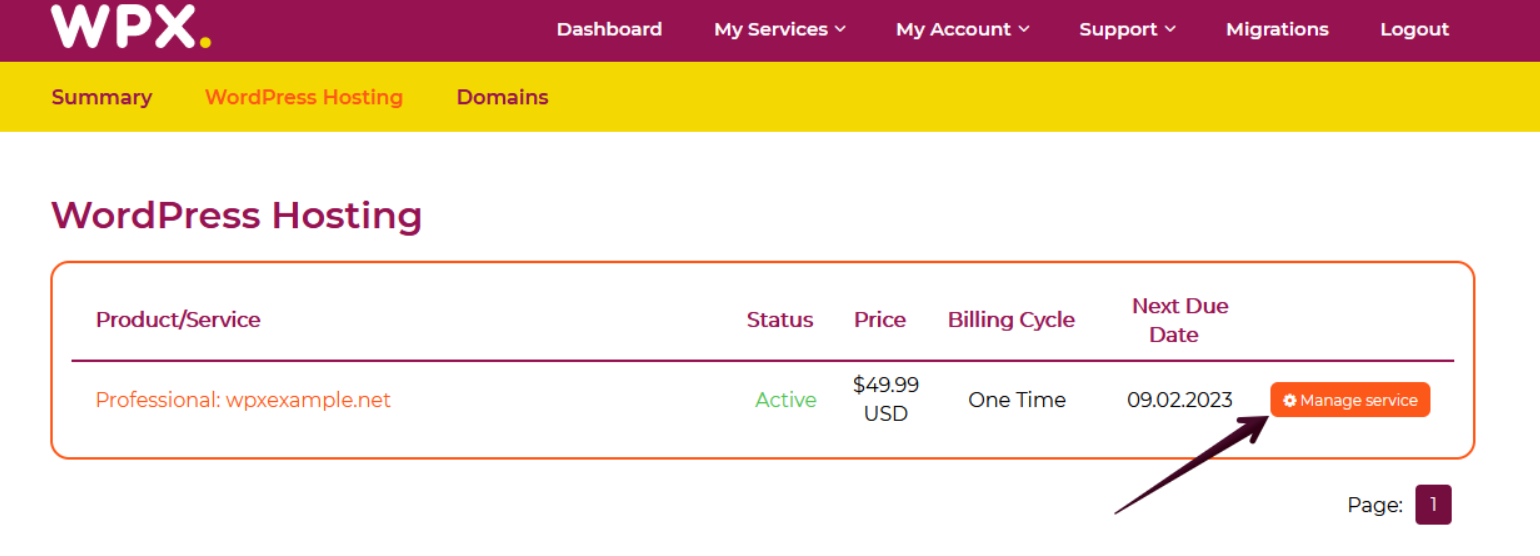
Then you will see all of your hosting services with us. When you find the plan that you want to manage, you need to select the orange button Manage service.
Step 3. Go to the Edit DNS menu.
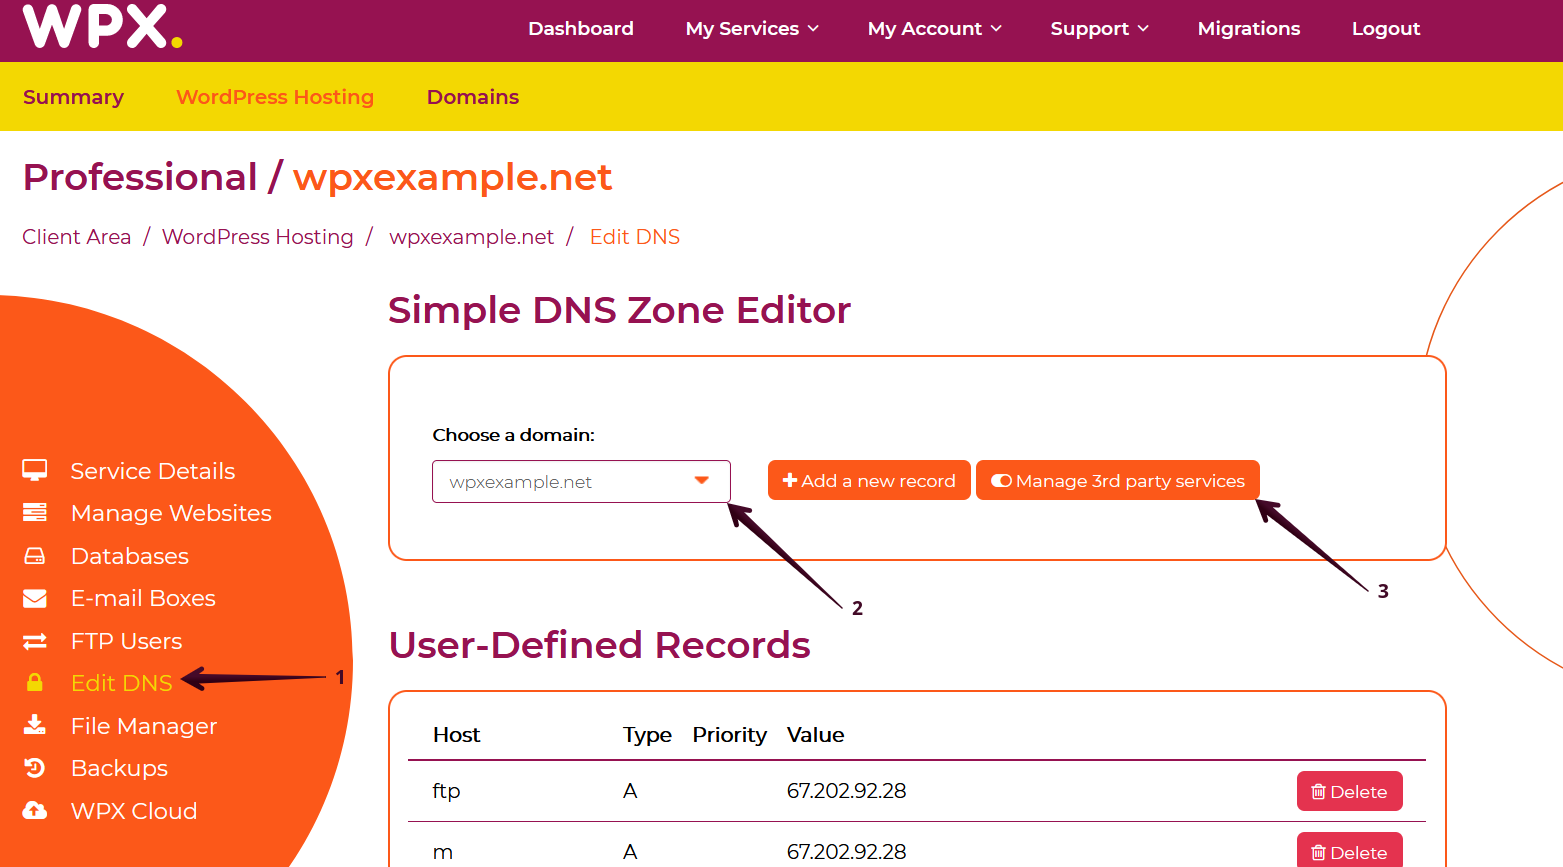
Now that you are in the hosting panel, select Edit DNS (1), and then choose the website (2) that you want to set up. After you’ve selected the website click on the Manage 3d party services (3) button.
Step 4. Select the mail service that you’re going to use.
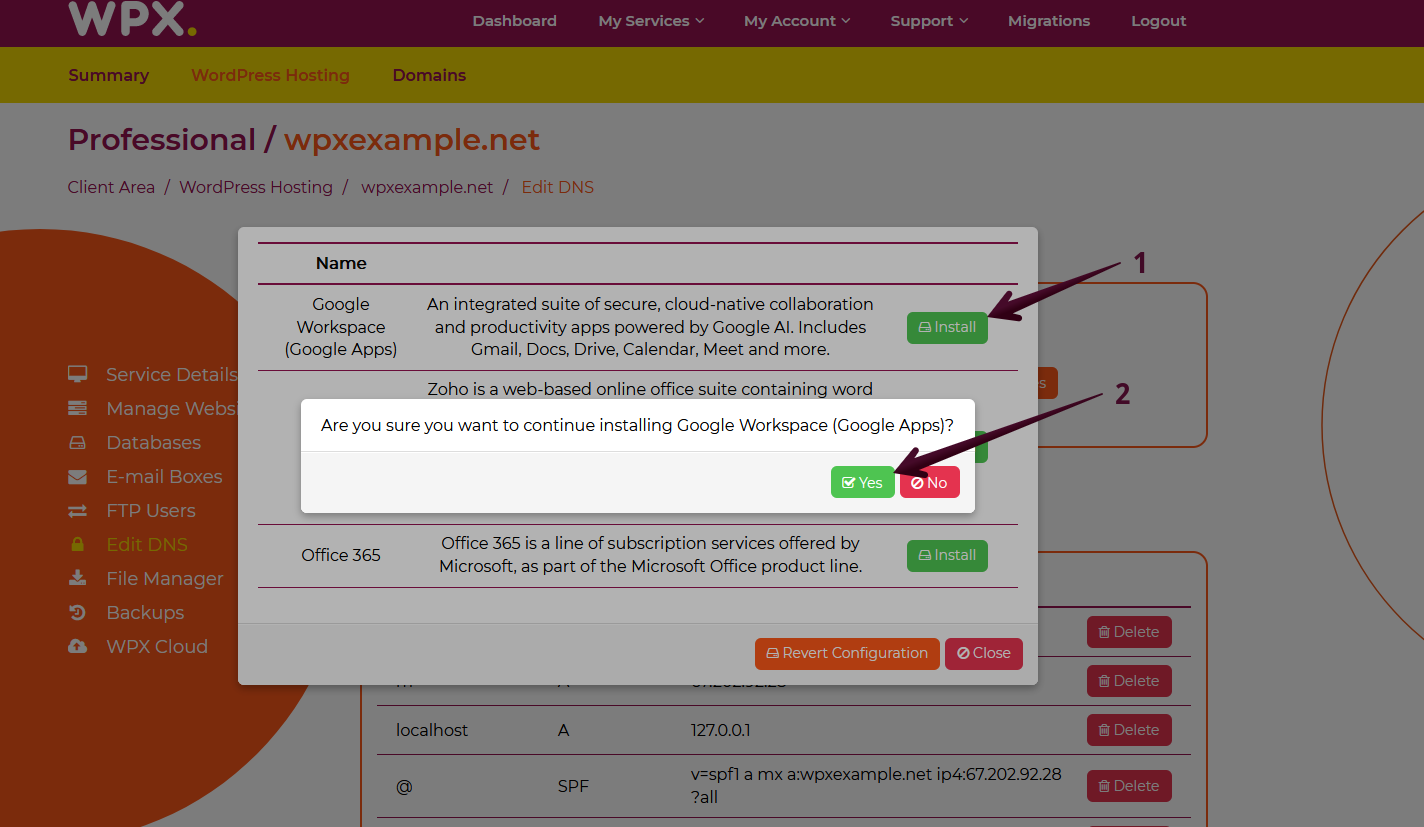
A pop-up window will appear with the available preset 3d party mail services that you can install.

Google Workspace
Click on the Install (1) button next to the description of the mail service. Then select Yes (2) to continue with automatically adding all the DNS records for Google Workspace mail service.
This will also disable our mail service to ensure that there won’t be any conflicts.
Once the installation is completed, you will receive a notification:

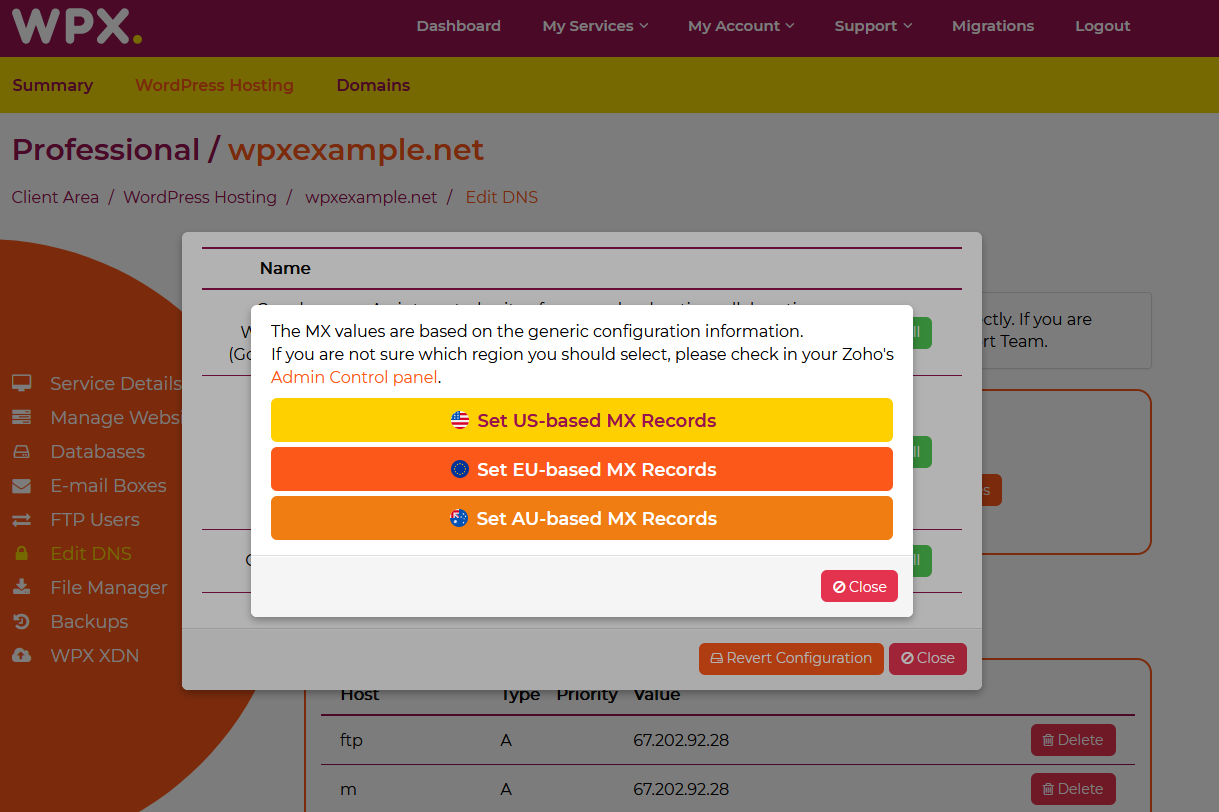
Zoho
Zoho mail service has two types of MX records (USA-based, EU-based, and AU-based). Depending on the account that you’ve created with them, select the correct MX records for the service.
Once the installation is completed, you will receive a notification:

Office 365
When installing Office 365 mail service records, you will be prompted to provide the unique MX record (domain-key). You can obtain that from your Office 365 mail account as explained here.

When you add the record, click on the Continue button to install Office 365. The other two mail services, do not have any unique records that are mandatory, therefore you can just click on the Install button next to the email service description and it will be done automatically for you.

If you get stuck with anything discussed on this page, please get in touch with the WPX Support Team via live chat (use the bottom right-hand widget) and they will respond and help within 30 seconds or less.