Yes, you can entirely replace the live site with the content built on the staging site.
You can use this article when you are developing an entirely different staging site from scratch with new theme/plugins and layout and if you want to replace the content on the live site.
Information regarding our WPX Admin Panel and what it has to offer can be read here.
Step 1. Log in to your WPX account
You can log in to your WPX account here.
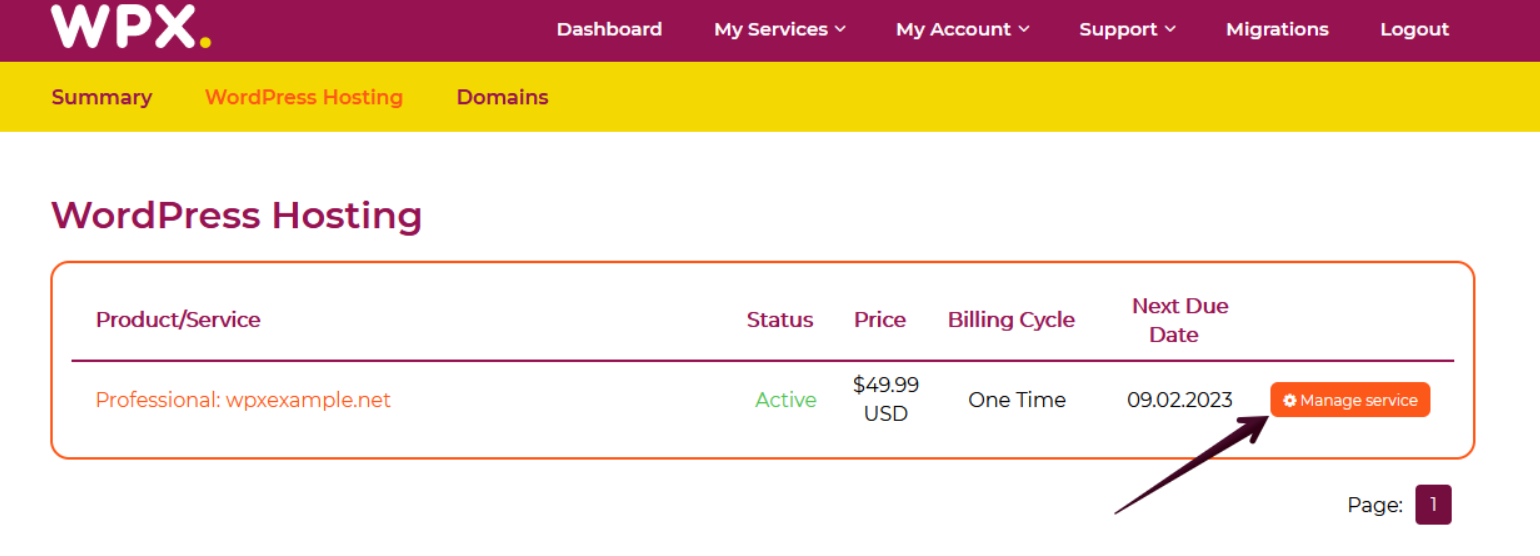
Step 2. Navigate to your hosting plan
You can either find your hosting service through the navigation menu or within your dashboard. Once you log in to your WPX account select My Services (1) → WordPress Hosting (2).

Then you will see all of your hosting services with us. When you find the plan that you want to manage, you need to select the orange button Manage service.
Step 3. Delete Live Site Database
To completely replace the content on the Live Site, then you need to prepare by deleting its database.
You will need to first navigate through Databases (1) and use the phpMyAdmin button (2) to enter the specific database of the live site you want to replace:

Once you log in to the phpMyAdmin interface, you will see a list of all the databases of your sites. You will need to choose the specific database of the live site and select all the tables.
Every time you deploy a staging instance, a database with a similar name will appear. The only difference, as shown below, is that the name ends with “_staging“
For example, we have chosen “wpxexamp” (1) which is the database of our live website, and selected Check all (2):

After you selected all the tables, you will need to use the drop-down menu to select (1) and choose Drop (2) from the options:

That will lead you to a confirmation page where you need to select to finish the process:

Step 4. Delete Live Site files
The next step after deleting all the tables from the live site database would be to delete all the files except one that would allow the Merge option to work properly.
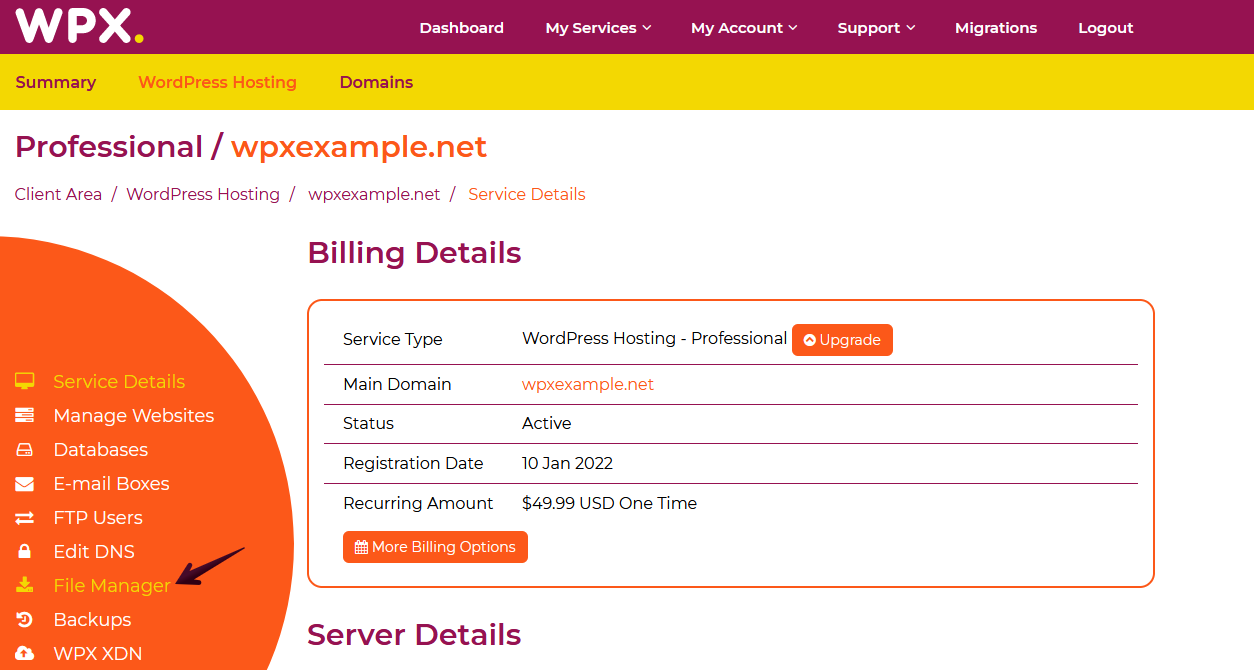
You will need to navigate to the File Manager menu as shown below.
Once you’ve opened the File Manager, you need to navigate to the specific live site’s public_html folder which would contain the files:
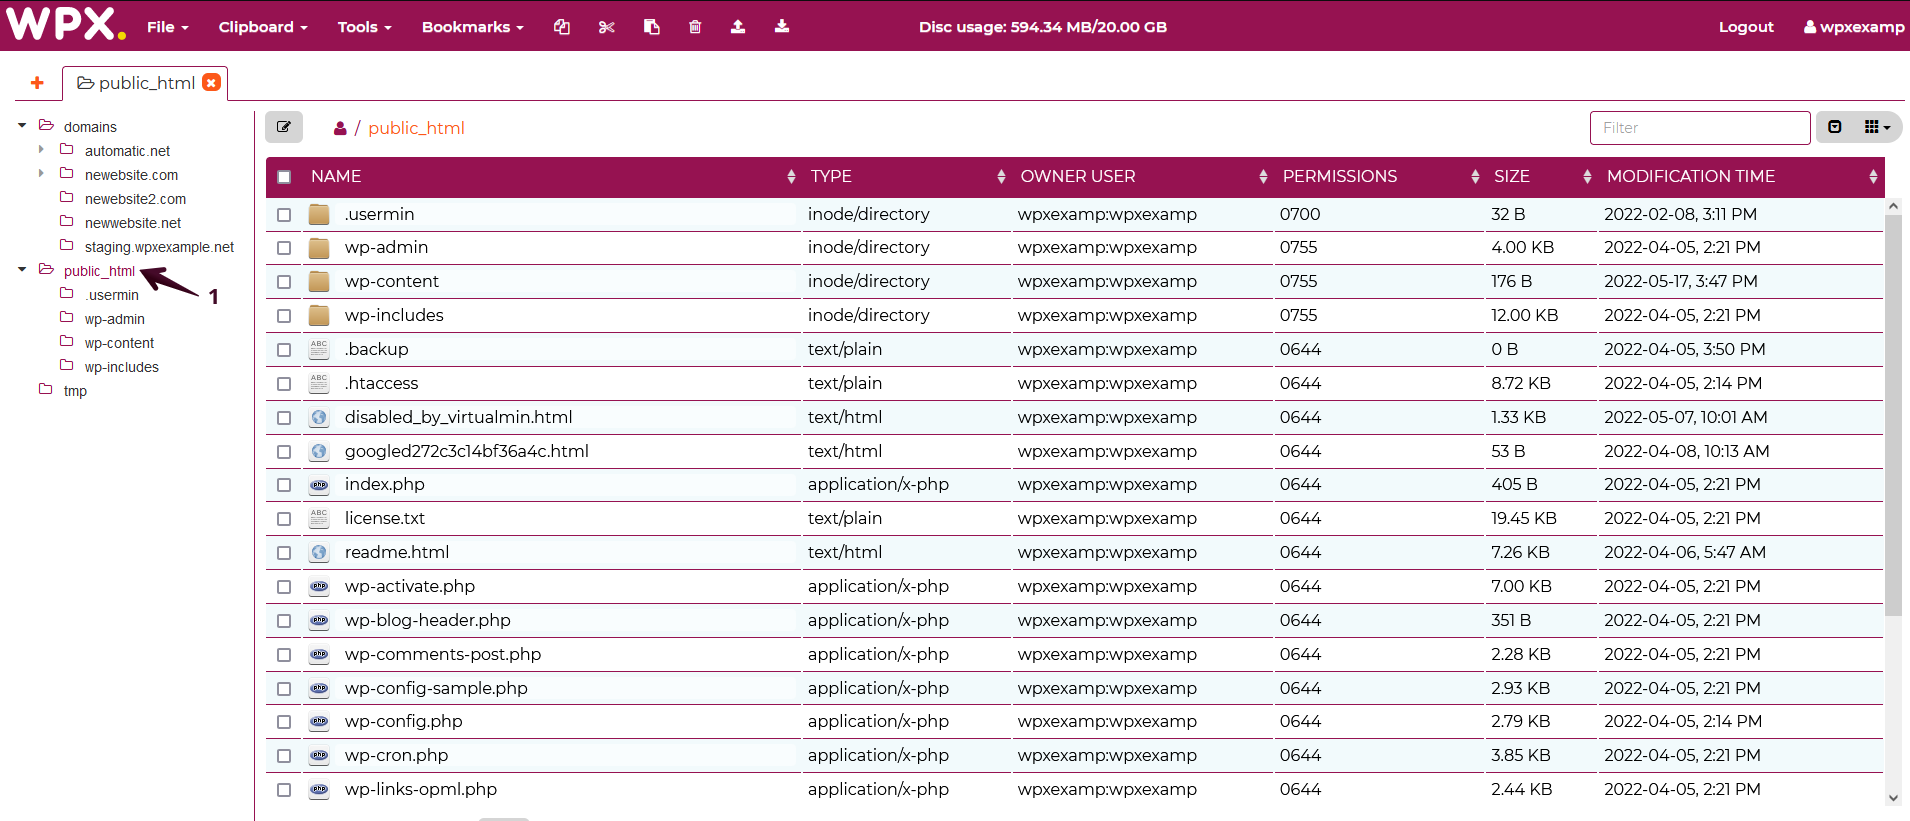
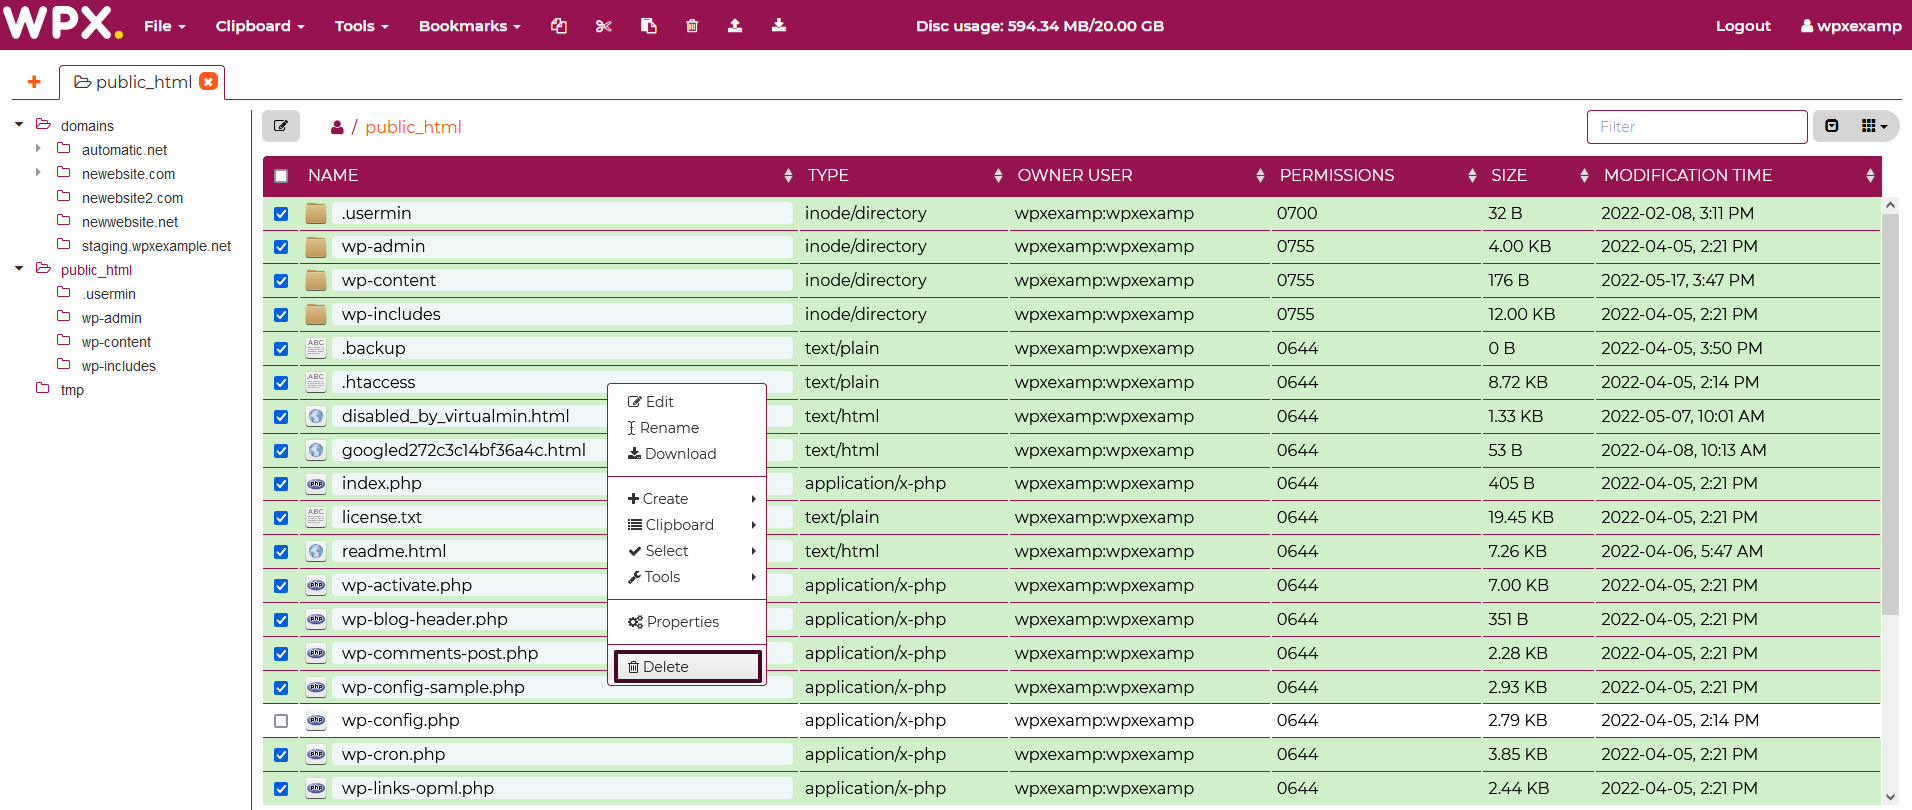
Once you have listed all the files, you can select them with one checkmark NAME (1) and then de-select only one file that is needed wp-config.php (2) for the Merge function to work in the end.

You can then right-click on any of the selected files and determine the action you want to take, which would be Delete:
It will then ask you for final confirmation before proceeding to complete the task of deleting the selected files:

Step 5. Merge the Live Site and Staging Site
Now that you have deleted the database of the live site, you can go ahead and use the merge option from your hosting panel by navigating to Manage Websites (1) and selecting Merge To Live (2) to complete the process:

If you have any other questions on the topic, don’t hesitate to contact the WPX Support Team via live chat (use the bottom right-hand widget) and they will respond and help within 30 seconds or less.