The best practice is to use the latest PHP version that is available. It is not only the fastest one but the most secure one. Old PHP versions have different bugs and setbacks that are fixed with the newer ones which offer faster caching and performance for your sites.
In this article, we will explain how you can change the PHP version of your websites using the WPX Control Panel.
Step 1. Log in to your WPX account
You can log in to your WPX account here.
Step 2. Navigate to your hosting’s dashboard

Make sure to select the plan you’d like to apply these changes to.

Step 3. Go to the Manage Websites menu
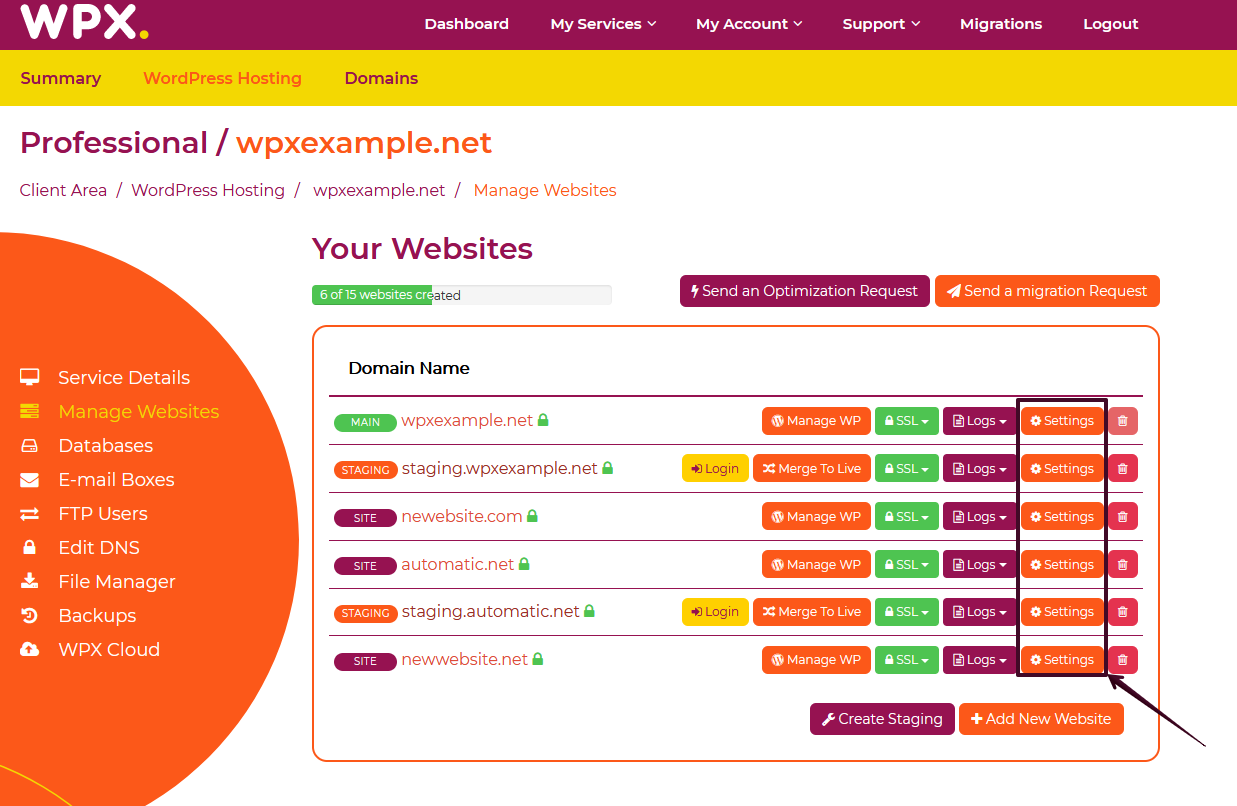
Now that you’re in the Hosting Panel, select the Manage Websites menu. In this section, you can oversee, manage, and add new websites to your WPX account.

You’ll need to select the specific site you’d like to change the PHP version for. Click on the Settings button next to the website that you want to update.
Step 4. Change the PHP version
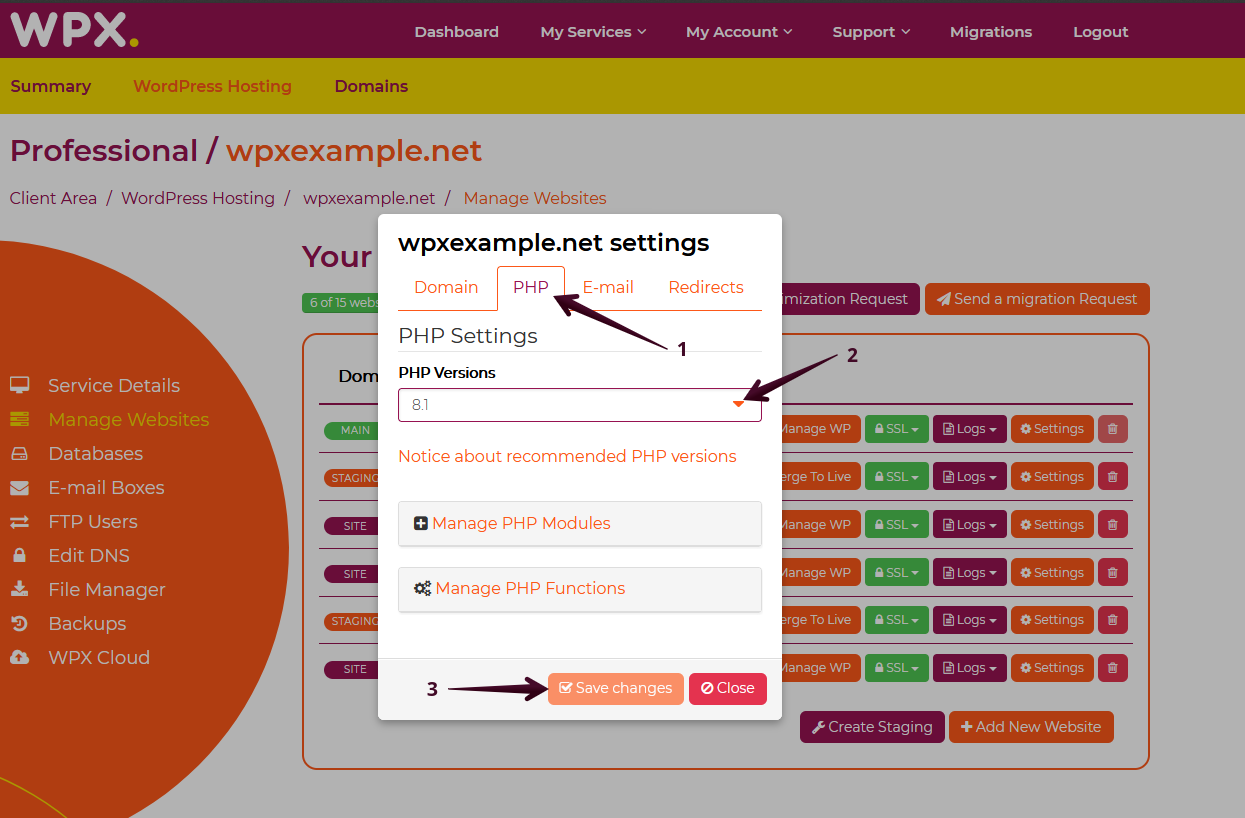
First, you’ll need to navigate to the PHP tab (1). Then you can select the desired PHP version (2). Once you’re done, proceed with the Save Changes button (3). You are now good to go.
If you get stuck with anything discussed on this page, please contact WPX Support via live chat (use the bottom right-hand widget) and they will respond and help within 30 seconds or less.