If you haven’t created а Personal Backup from the Backups menu, you can check our guide here. In case, you don’t have a Personal Backup created but you need your website to be restored, you can use the WPX Automatic backups.
In this article, we will show you how you can restore your websites from a Personal Backup.
Step 1. Log in to your WPX account
You can log in to your WPX account here.
Step 2. Navigate to your hosting plan
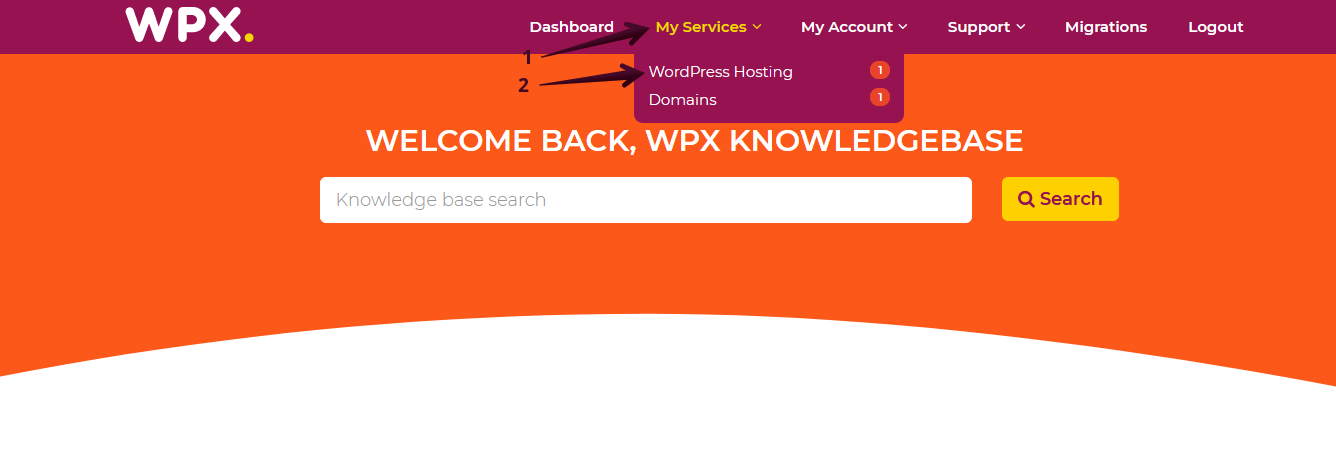
You can either find your hosting service through the navigation menu or within your dashboard. Once you log in to your WPX account select My Services (1) → WordPress Hosting (2).

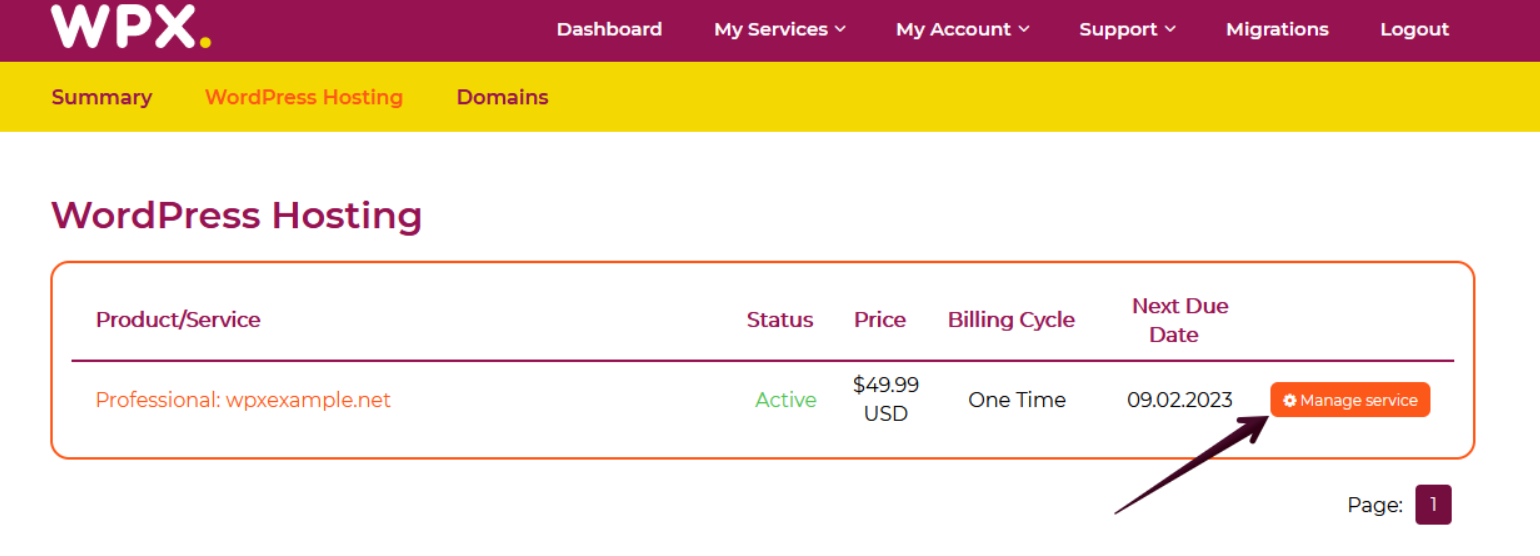
Then you will see all of your hosting services with us. When you find the plan that you want to manage, you need to select the orange button Manage service.

Step 3. Go to the Backups menu
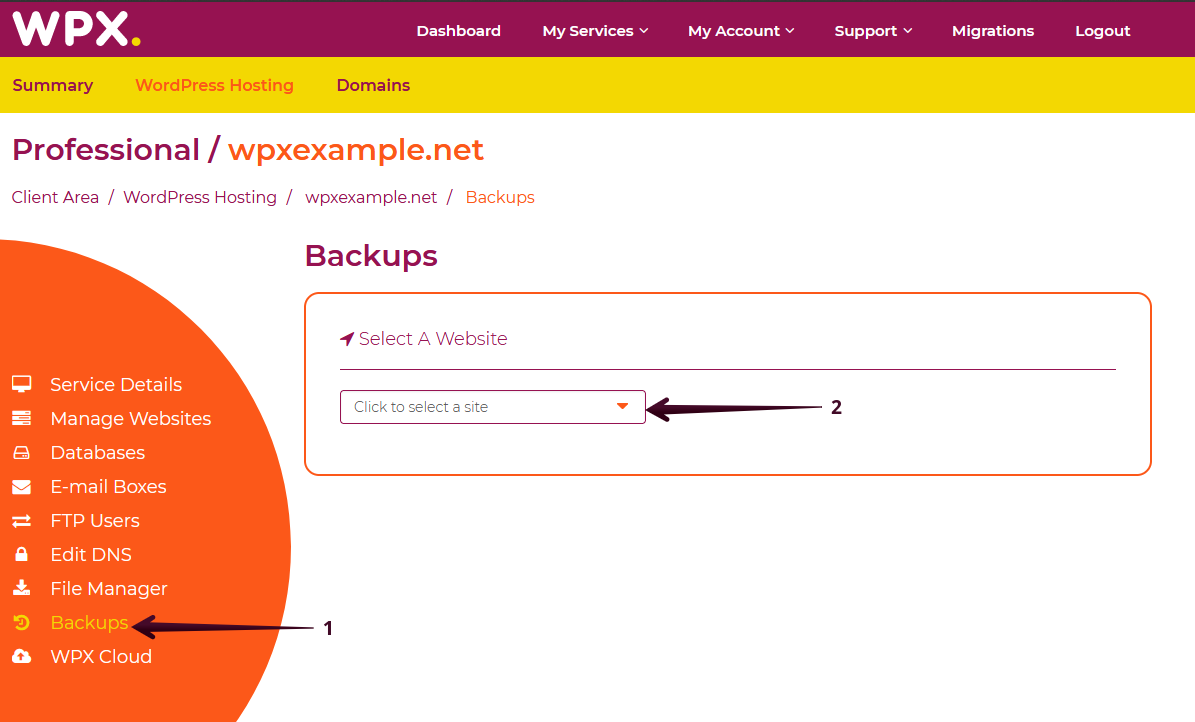
Now that you’re in the Hosting Panel, select the Backups (1) menu. After that, you need to select the website that you wish to restore from the dropdown (2) menu.

Once you select the website the Backups page will expand to provide you with options to manage Personal backups.
There are four options:
- Backup Website (1) – This button will start the process of creating a new personal backup for the selected website;
- Restore Backup (2) – This button will be active when you have already created a personal backup. You can use it to restore your website from a personal backup that you create.
- Download Personal Backup (3) – The button will be active have already created a personal backup. This button will take you to the download link of your personal backup.
- Delete Backup (4) – The button will be active have already created a personal backup. You can use it to delete the backup and free up some disk space.

Step 4. Restore your site from a Personal Backup
Select the Restore Website (1). A pop-up window will provide you with the information for your personal backup – its size, and backup date for both files and the database.

Select if you want to restore the files or the databases (1). They are both selected by default. And then click on the Continue restoring (2) button to start the restoration task.

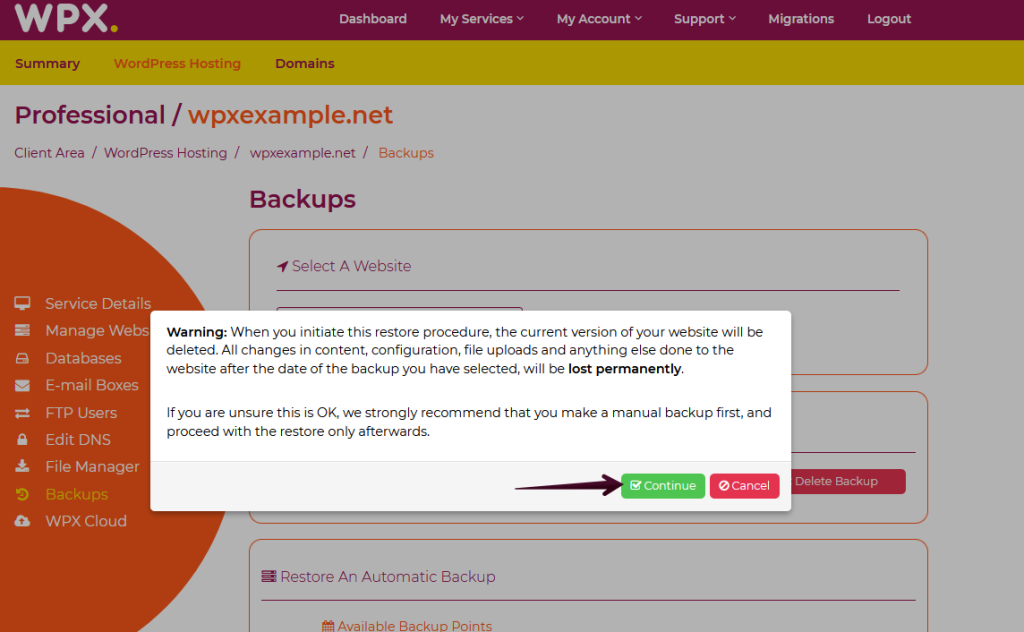
If you are sure that you wish to restore the website from that personal backup, click on the Continue button to start the automatic process.

When your website has been restored you will receive the green notification in the top right corner.

If you get stuck with anything discussed on this page, please get in touch with the WPX Support Team via live chat (use the bottom right-hand widget) and they will respond and help within 30 seconds or less.