What we can do to fix it? Let’s find out!
When you configure your Wordfence firewall, the plugin creates a file named wordfence-waf.php. In that file, the plugin places paths that lead to your website. It also writes lines in your .htaccess file.
That breaks the Staging website because it is an exact copy of the Live website (including those files, however, the paths are not changed to point to the Staging instance).
This causes your Staging website to display an HTTP Error 500 (or a blank page).

To fix the issue, you need to comment (using the # symbol) on the lines that include paths pointing to your Live website.
The files that we need to update to make the Staging website load are the following:
- .htaccess
- wordfence-waf.php
Step 1. Log in to your WPX account
You can log in to your WPX account here.
Step 2. Navigate to your hosting plan
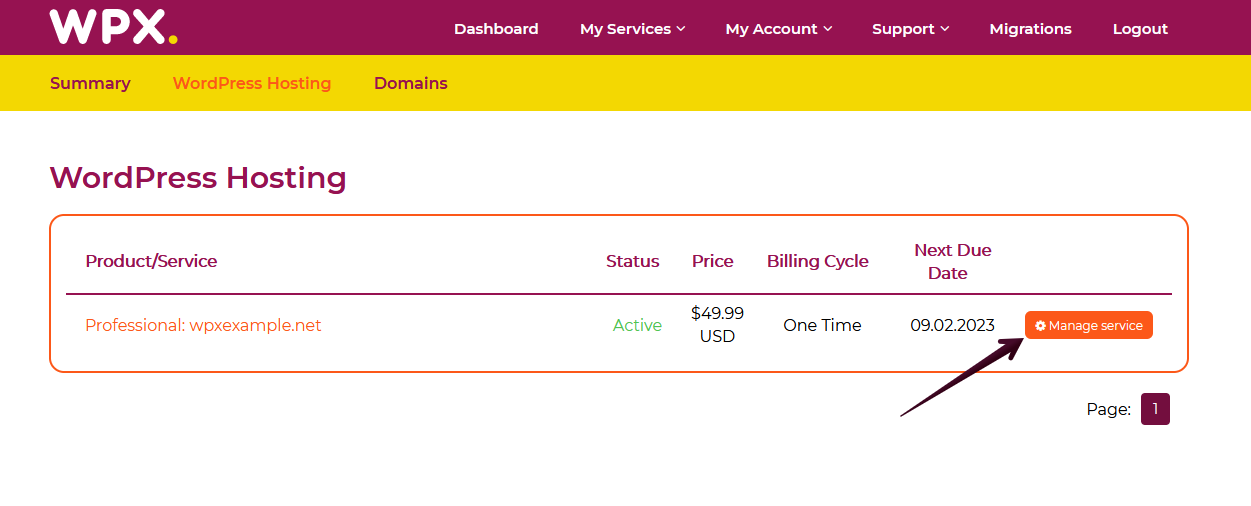
You can either find your hosting service through the navigation menu or within your dashboard. Once you log in to your WPX account select My Services (1) → WordPress Hosting (2).

Then you will see all of your hosting services with us. When you find the plan that you want to manage, you need to select the orange button Manage service.
Step 3. Open File Manager
Now that you’re in the Hosting Panel, select the File Manager option in the left-hand menu. It will open the file manager in a new tab.

Step 4. Locate the files that caused the error
First, we need to navigate to the public_html folder of the Staging site.
There are 2 (two) files you need to edit that are stored in the public_html directory of your staging website:
- .htaccess
- wordfence-waf.php
Let’s see how the public_html folder looks with these files:

Step. 5. Edit the .htaccess file
Now that you’ve located the files, you need to edit them one by one.
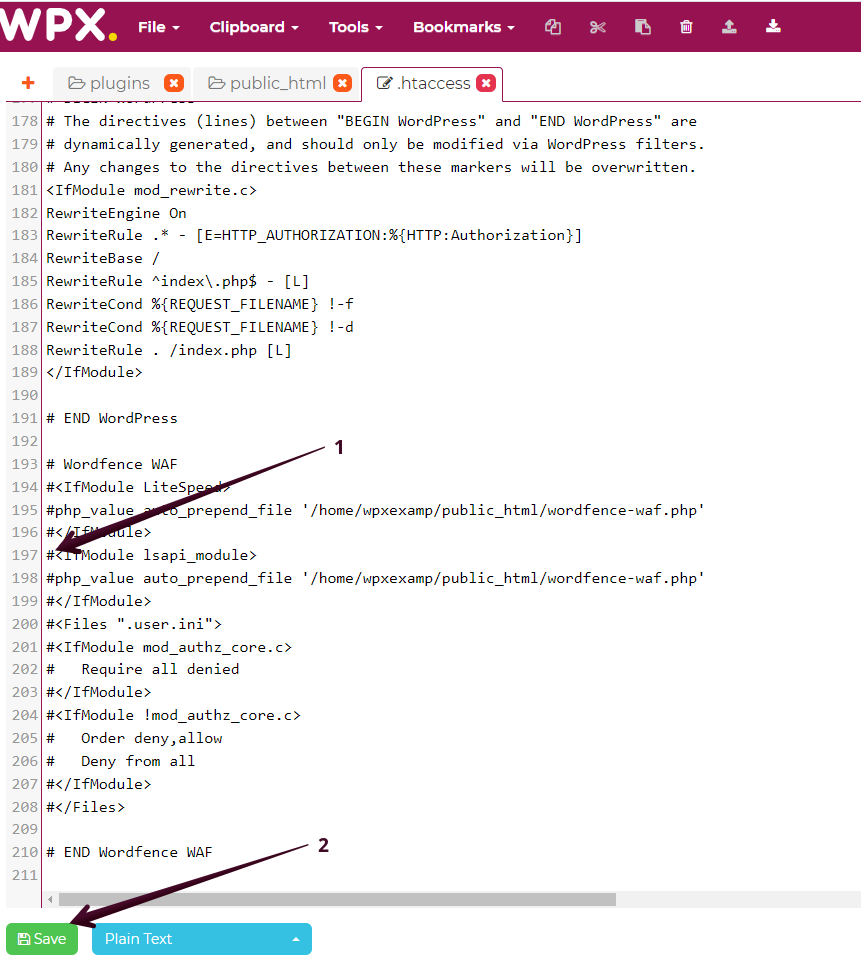
Double-click on the .htaccess file to enter the edit mode and search for the #Wordfence WAF line

After that, place a “#” in front of every line (1) which will comment on those lines, and then click on the Save button (2):
Step 6. Rename the wordfence-waf.php file
After that, locate the other file called wordfence-waf.php, click the right mouse button on it, and select Rename:

A new window will appear, where you can rename the file to “wordfence-waf.php-stop” for example, then just click on the OK button:

Step 7. Enjoy the Staging instance
Once you comment the text in the .htaccess by using a # and rename the wordfence-waf.php file the Staging instance should start working.
You can check it again and make sure to clear your browser’s cache:

If you get stuck with anything discussed on this page, please get in touch with the WPX Support Team via live chat (use the bottom right-hand widget) and they will respond and help within 30 seconds or less.