This is a step-by-step article that will help you clone your WordPress website with the Migrate Guru plugin. This will be especially helpful if you want to move the content of your website to a new domain name.
Before proceeding further with the guide, you should make a few preparations. The following must be prepared before using the Migrate Guru plugin:
- You must have added the website to your plan;
- WordPress must be installed on the new domain name;
- FTP user should be created on the new domain name.
Step 1. Download and Install the Migrate Guru plugin on your website
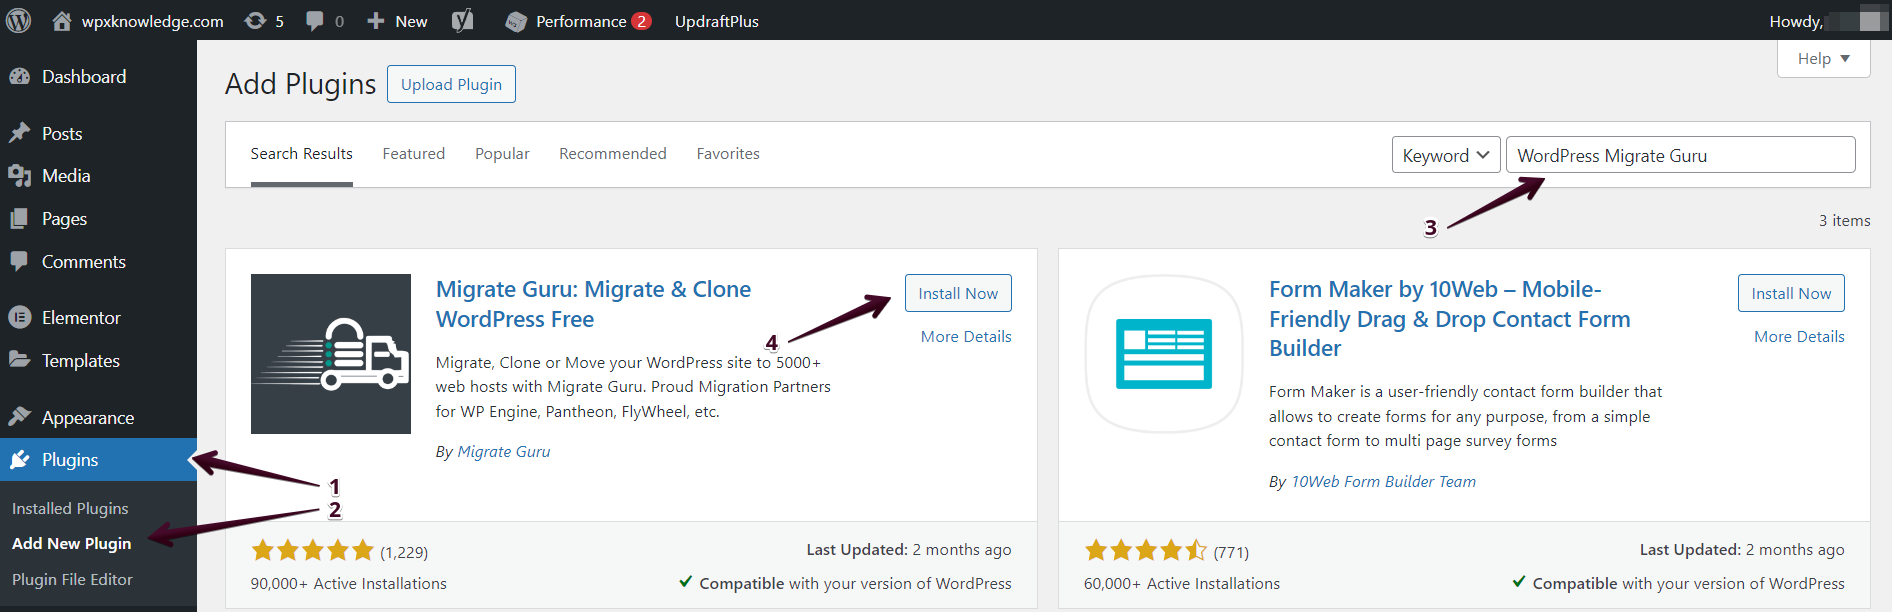
To add Migrate Guru to your existing WordPress site, navigate from your WordPress Dashboard to Plugins(1) > Add New(2). Search for the “WordPress Migrate Guru plugin“(3) in the top-right search bar.
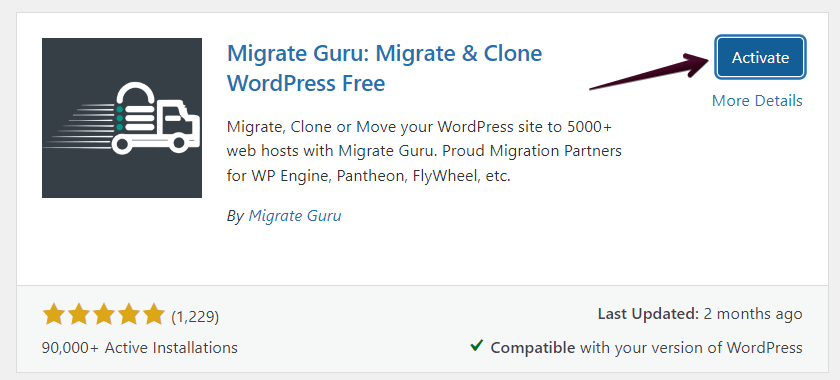
Next, click the Install Now button(4). After a successful installation, click the Activate button.
After a successful installation, click the Activate button.
Step 2. Setup Migrate Guru
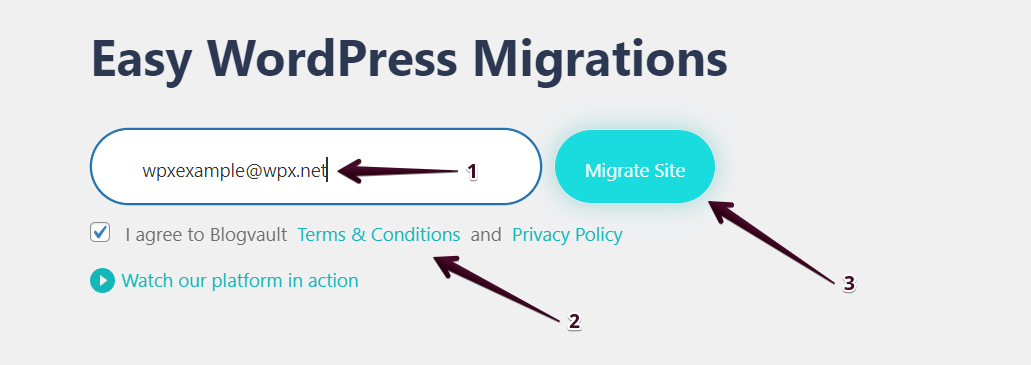
After activating the plugin, you will be prompted to enter your Email Address (1). You can use a relevant email address or a random one – this is to receive updates during the process. Afterwards, you will need to agree with the Terms and Conditions (2) and select Migrate Site (3).
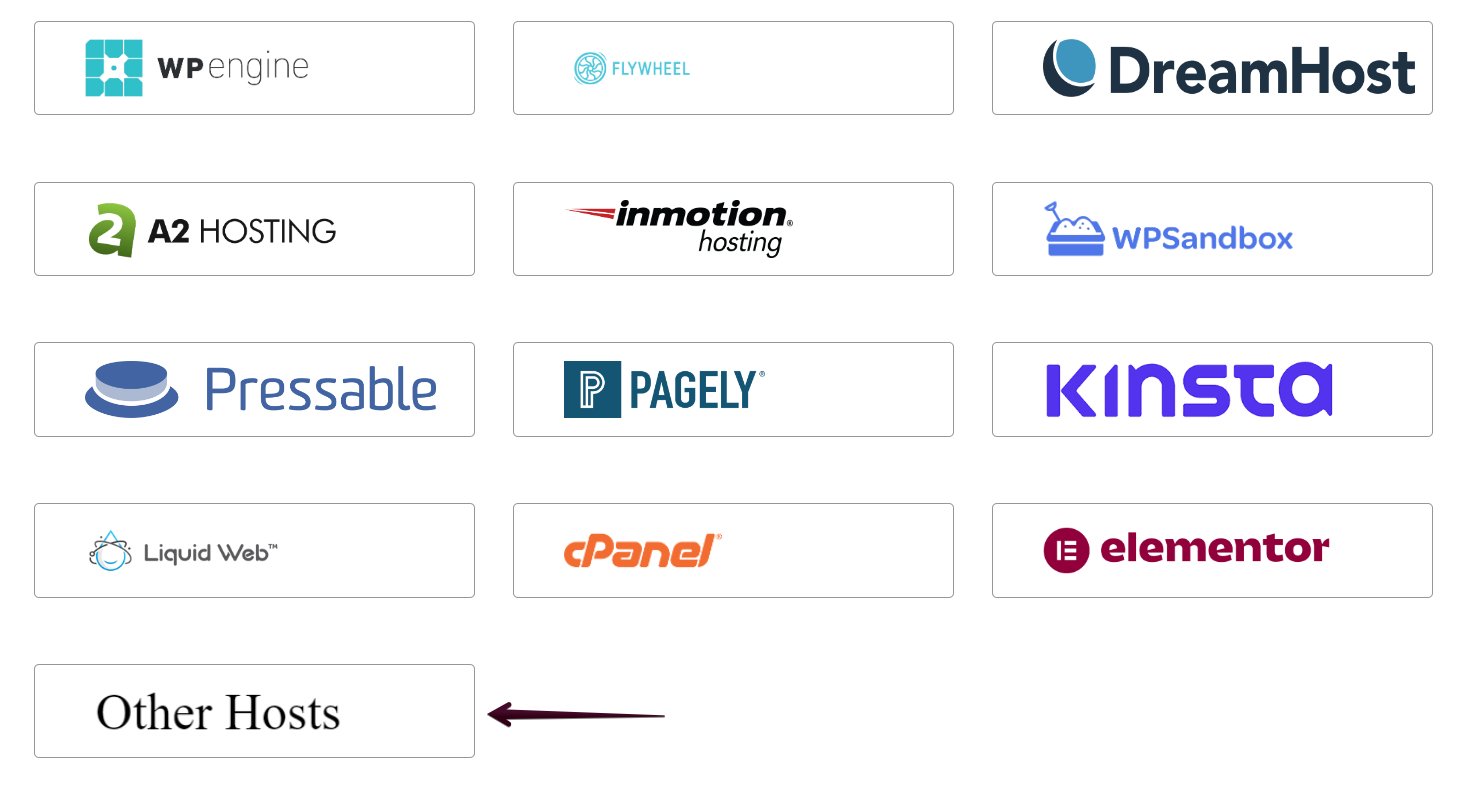
You will be prompted to choose a hosting. From there you will need to select Other Hosts or FTP in other words to input the details from your hosting provider.
Afterwards, you need to select Manually Input Host Details.
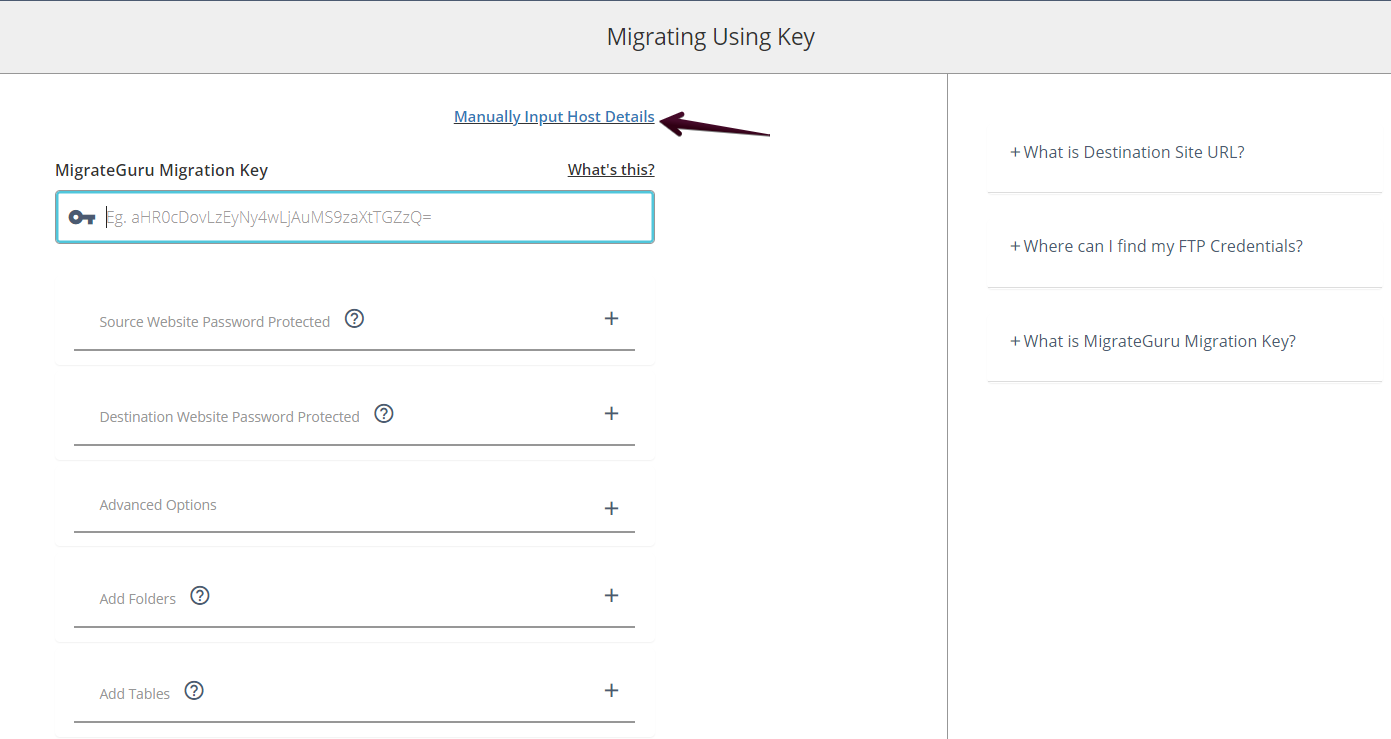
You will be redirected to the main page, where you will need to input the specific FTP details from the user you created under the website you want to clone or migrate.
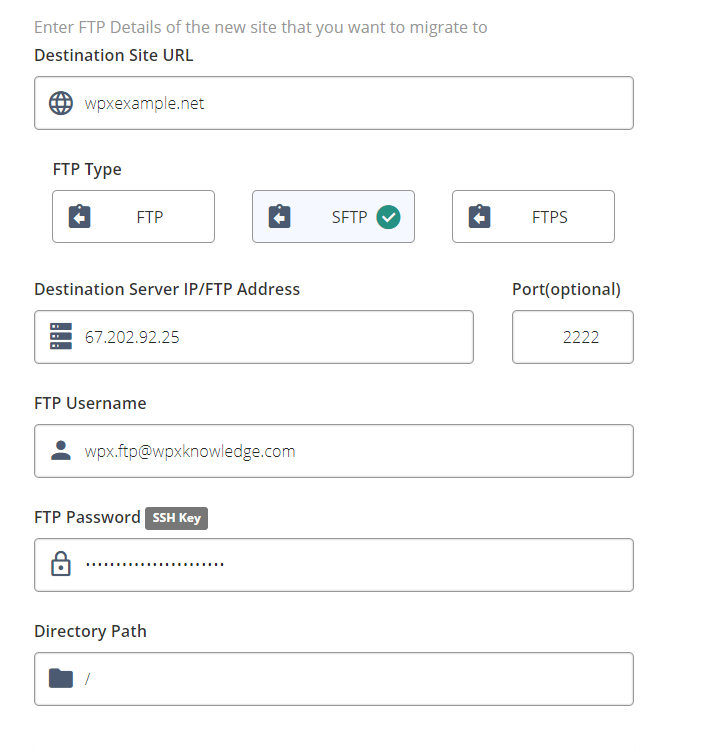
- Destination site URL – Paste the URL of the website. This is for the receiving end, and you can use a new URL if you want the website to migrate to a new URL;
- Choose SFTP TYPE;
- Destination server – That’s the IP of the destination server. It can be located in the ‘Service Details’ of your WPX panel;
- Port – 2222;
- Username – The FTP username we created;
- Password – The FTP password for the user we created;
- Directory path – / (Just a slash – the FTP will forward the files to the relevant destination path).
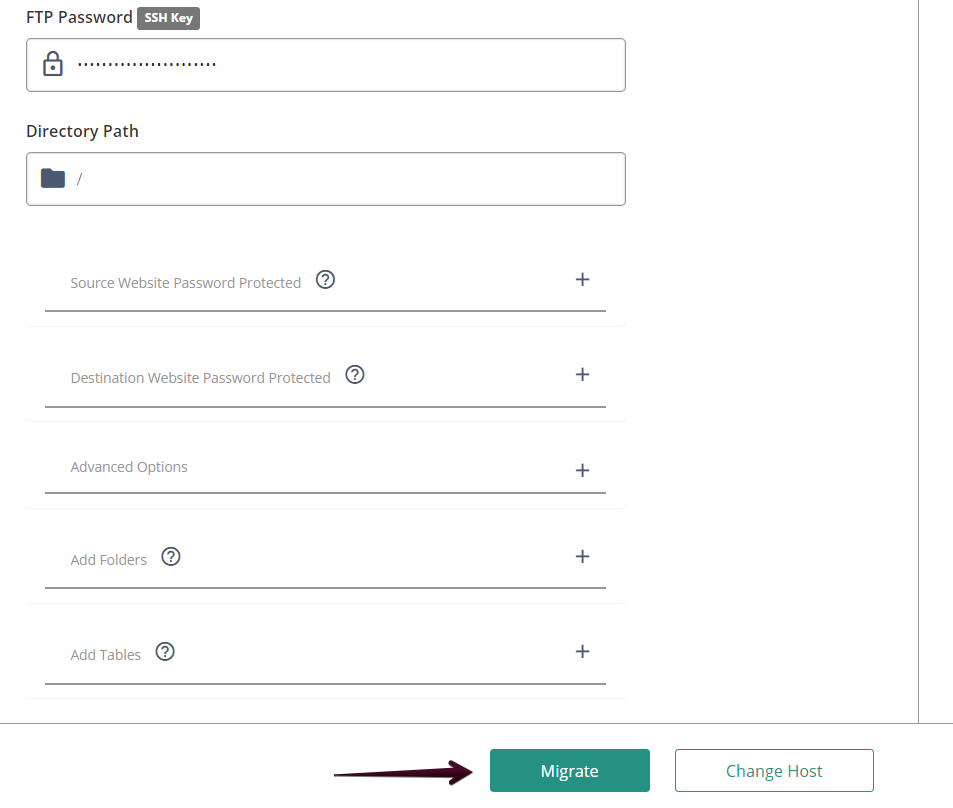
After you have checked all the needed information in the fields, you can finish the process by selecting the Migrate button.
You will see a page that will display the process of migrating – make sure to wait for the full migration process.
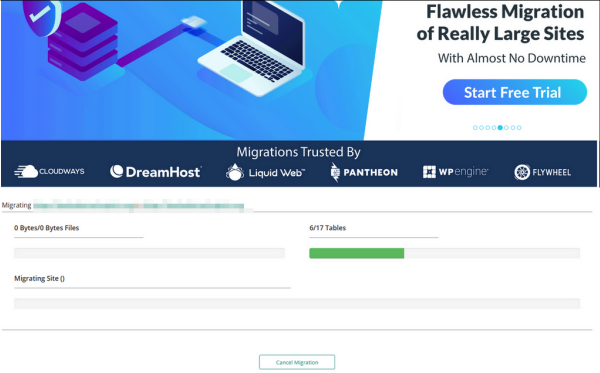
If you enter the relevant email address in the beginning, you will receive an email confirmation after the complete migration.
Step 3. Last Checks Before Completing The Migration Process
After completing the migration, there are some additional steps to take into consideration if everything is as expected.
- Make sure the new domain name loads from WPX.
- Use our File Manager to ensure all the files are moved. This is a plugin and not a 100% solution for migrations – sometimes folders, files might not be transferred accordingly.
- Make sure the database is successfully migrated – you can use the phpMyAdmin service we offer to compare the migrated database and the original one.
- Open the new website URL and compare the original site and the migrated one.
If you get stuck with anything discussed on this page, please get in touch with the WPX Support Team via live chat (use the bottom right-hand widget) and they will respond and help within 30 seconds or less.